background image

30

0:30

1:00

4:00

4:30

0:30

1:00

4:00

9:00

5:00

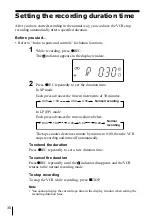
Setting the recording duration time

After you have started recording in the normal way, you can have the VCR stop
recording automatically after a specified duration.

Before you start…

• Refer to “Index to parts and controls” for button locations.

1

While recording, press 

z

 REC.

The   indicator appears in the display window.

2

Press 

z

 REC repeatedly to set the duration time.

In SP mode

Each press advances the time in increments of 30 minutes.

Normal recording

In LP (EP) mode

Each press advances the time as shown below.

Normal
recording

The tape counter decreases minute by minute to 0:00, then the VCR
stops recording and turns off automatically.

To extend the duration

Press 

z

 REC repeatedly to set a new duration time.

To cancel the duration

Press 

z

 REC repeatedly until the   indicator disappears and the VCR

returns to the normal recording mode.

To stop recording

To stop the VCR while recording, press 

x

 STOP.

Note

• You cannot display the current tape time in the display window when setting the

recording duration time.

Summary of Contents for SLV-ED343SG

Page 1: ...Operating Instructions Video Cassette Recorder 3 090 243 P1 1 GB 2004 Sony Corporation SLV ED949SG SLV ED343SG PAL NTSC ...

Page 2: ...nsor 3 Tape compartment 4 A EJECT button 28 5 H PLAY button 28 M FF fast forward m REW rewind 28 Playback Dial 28 6 x STOP button 9 28 33 7 X PAUSE button 24 28 33 8 z REC record button 17 30 33 9 EASY TIMER 19 q PROGRAM TRACKING buttons 20 qa LINE 2 IN VIDEO AUDIO L R left right jacks 31 The H PLAY and PROGRAM TRACKING buttons have a tactile dot ...

Page 3: ...ensor 4 Tape compartment 5 H PLAY button 28 M FF fast forward m REW rewind 28 Playback Dial 28 6 x STOP button 9 28 33 7 X PAUSE button 24 28 33 8 z REC record button 17 30 33 9 PROGRAM TRACKING buttons 20 The H PLAY and PROGRAM TRACKING button has a tactile dot continued ...

Page 4: ...s 6 ten s digit button 7 VOL volume buttons 8 z REC record button 17 30 9 REC SPEED recording speed button q MENU button 12 qa X PAUSE M button 12 28 x STOP m button 12 28 m REW rewind button 12 28 M FF fast forward button 12 28 H PLAY OK button 12 28 The H PLAY AUDIO MONITOR number 5 and PROG buttons have a tactile dot Index to parts and controls continued ...

Page 5: ...l switch qf AUDIO MONITOR button 1 2 qg DISPLAY button 18 qh PROG programme buttons 1 qj y SLOW button 28 qk 2 button 28 ql INDEX SEARCH buttons 1 The H PLAY AUDIO MONITOR number 5 and PROG buttons have a tactile dot 2 SLV ED949SG only 1 2 3 4 5 6 7 8 9 0 ...

Page 6: ...ial cable from your TV and connect it to on the rear panel of the VCR 2 Connect of the VCR and the aerial input of your TV using the supplied aerial cable 3 Connect the mains lead to the mains Note When you connect the VCR and your TV only with an aerial cable you have to tune your TV to the VCR see page 8 ...

Page 7: ...io video input jacks This additional connection improves picture and sound quality Connect the TV as shown on the left For SLV ED949SG LINE OUT LINE IN Audio video cable not supplied For SLV ED343SG LINE OUT LINE IN Audio video cable not supplied ...

Page 8: ...to channel 32 the initial RF channel for this VCR Refer to your TV manual for TV tuning instructions 2 Connect the mains lead to the mains The VCR automatically turns on The LANGUAGE SET menu appears on the TV screen Press to select the desired language ENGLISH or ARABIC then press OK The message for the Auto Set Up function appears 3 Press OK The SYSTEM SELECT menu appears EXIT MENU OK SET SELECT...

Page 9: ...n some of the settings timer etc will be reset If this happens you have to set them again Auto preset starts automatically only when you plug in the mains lead for the first time after you purchase the VCR After using the Auto Set Up function the LANGUAGE SET menu does not appear automatically when you connect the mains lead again If you want to use the Auto Set Up function again press MENU then p...

Page 10: ...to parts and controls for button locations 1 Press MENU then press M m to highlight CLOCK SET and press OK 2 Press M m to set the hour 3 Press to select the minutes and set the minutes by pressing M m MENU SET MENU OK END SELECT 1 2 0 1 JAN 0 2 0 THU 0 4 EXIT OK PLAY SET MENU OK END SELECT 1 8 0 1 JAN 0 2 0 THU 0 4 EXIT SET MENU OK END SELECT 1 8 3 1 JAN 0 2 0 THU 0 4 EXIT OK PLAY OK PLAY ...

Page 11: ... sequence by pressing to select the item to be set and press M m to select the digits then press The day of the week is set automatically 5 Press MENU to exit the menu OK PLAY SET MENU OK END SELECT 1 8 3 8 2 SEP 0 2 0 TUE 0 4 EXIT MENU ...

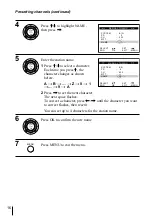
Page 12: ...ant to preset then press To display other pages for programme positions 6 to 80 press M m repeatedly 4 Press repeatedly until the channel you want is displayed Select the appropriate TV system if necessary OK PLAY MENU OK END SELECT PR 5 SYSTEM B G MFT NAME SET EXIT MANUAL TUNING CH 0 3 3 MENU OK PLAY SET MENU OK END SELECT AUTO SET UP MANUAL SET UP TV SYSTEM 3 2 G VCR OUTPUT CH EXIT OK PLAY EXIT ...

Page 13: ...ss until the character you want to correct flashes then reset it You can set up to 4 characters for the station name 7 Press OK to confirm the station name 8 Press MENU to exit the menu Note If the TV sound is distored or noisy select the appropriate TV system G K or I for your area OK PLAY MENU OK END SELECT PR 5 SYSTEM B G MFT NAME SET EXIT MANUAL TUNING CH 0 3 3 OK PLAY OK PLAY MENU MENU OK END...

Page 14: ...edly 4 Press CLEAR The selected row will be cleared as shown on the left OK PLAY EXIT MENU CLEAR DELETE SWAPPING OK TV STATION TABLE 5 4 3 2 1 0 0 0 0 3 3 2 2 2 0 9 7 I C L A J D M A K E N B B G B G B G B G PR CH NAME SYSTEM OK PLAY EXIT MENU CLEAR DELETE SWAPPING OK TV STATION TABLE 5 4 3 2 1 0 0 0 0 3 3 2 2 2 0 9 7 I C L A J D M A K E N B B G B G B G B G PR CH NAME SYSTEM CH MENU CLEAR DELETE SW...

Page 15: ...ON and press OK 2 Press M m to highlight MANUAL SET UP then press 3 Press M m to highlight the row which you want to change or enter the station name then press To display other pages for programme positions 6 to 80 press M m repeatedly MENU continued MENU OK PLAY SET MENU OK END SELECT AUTO SET UP MANUAL SET UP TV SYSTEM 3 2 G VCR OUTPUT CH EXIT OK PLAY EXIT MENU CLEAR DELETE SWAPPING OK TV STATI...

Page 16: ... space flashes To correct a character press until the character you want to correct flashes then reset it You can set up to 4 characters for the station name 6 Press OK to confirm the new name 7 Press MENU to exit the menu MENU OK END SELECT PR 5 SYSTEM B G MFT NAME O SET EXIT MANUAL TUNING CH 0 3 3 OK PLAY OK PLAY MENU OK PLAY MENU OK END SELECT PR 5 SYSTEM B G MFT NAME SET EXIT MANUAL TUNING CH ...

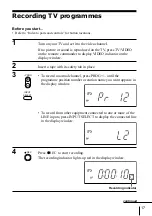
Page 17: ...play window 2 Insert a tape with its safety tab in place 3 To record a normal channel press PROG until the programme position number or station name you want appears in the display window To record from other equipment connected to one or more of the LINE inputs press INPUT SELECT to display the connected line in the display window 4 Press z REC to start recording The recording indicator lights up...

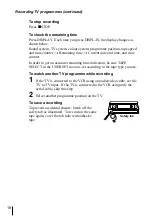
Page 18: ...ure TAPE SELECT in the USER SET menu is set according to the tape type you use To watch another TV programme while recording 1 If the TV is connected to the VCR using an audio video cable set the TV to TV input If the TV is connected to the VCR using only the aerial cable skip this step 2 Select another programme position on the TV To save a recording To prevent accidental erasure break off the sa...

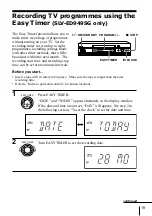
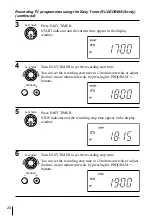
Page 19: ...ding stop time can be set at one minute intervals 1 ON STANDBY EASY TIMER PROGRAM X PAUSE Before you start Insert a tape with its safety tab in place Make sure the tape is longer than the total recording time Refer to Index to parts and controls for button locations 1 Press EASY TIMER DATE and TODAY appear alternately in the display window If the date and time are not set DAY will appear See step ...

Page 20: ...art time in 15 minute intervals or adjust the time in one minute intervals by pressing the PROGRAM buttons 5 Press EASY TIMER STOP indicator and the recording stop time appear in the display window 6 Turn EASY TIMER to set the recording stop time You can set the recording stop time in 15 minute intervals or adjust the time in one minute intervals by pressing the PROGRAM buttons EASY TIMER EASY TIM...

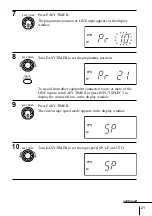
Page 21: ...om other equipment connected to one or more of the LINE inputs turn EASY TIMER or press INPUT SELECT to display the connected line in the display window 9 Press EASY TIMER The current tape speed mode appears in the display window 10 Turn EASY TIMER to set the tape speed SP LP or AUTO EASY TIMER EASY TIMER INPUT SELECT EASY TIMER EASY TIMER continued ...

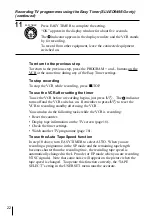
Page 22: ...ust press 1 The indicator turns off and the VCR switches on Remember to press 1 to reset the VCR to recording standby after using the VCR You can also do the following tasks while the VCR is recording Reset the counter Display tape information on the TV screen page 18 Check the timer settings Watch another TV programme page 18 To use the Auto Tape Speed function In step 10 above turn EASY TIMER to...

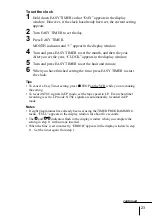
Page 23: ...ing the time press EASY TIMER to start the clock Tips To cancel a Easy Timer setting press x STOP on the VCR while you are making the setting To record NTSC signals in EP mode set the tape speed to LP Even when timer recording is set to LP mode NTSC signals are automatically recorded in EP mode Notes If eight programmes have already been set using the TIMER PROGRAMMING menu FULL appears in the dis...

Page 24: ...ause the settings to be inaccurate To activate the Demonstration Mode Press X PAUSE on the VCR while turning the EASY TIMER DEMO appears in the display window for a few seconds To cancel the Demonstration Mode Turn the power off and unplug the mains lead Although the Demonstration Mode is cancelled the timer settings entered while using the Demonstration Mode will remain Be sure to manually cancel...

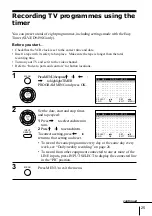
Page 25: ... thenpressM m tohighlightTIMER PROGRAMMING and press OK 2 Set the date start and stop times and tape speed 1 Press toselecteachitemin turn 2 PressM m toseteachitem Tocorrectasetting press to return to that setting and reset To record the same programme every day or the same day every week see Daily weekly recording on page 26 To record from other equipment connected to one or more of the LINE inpu...

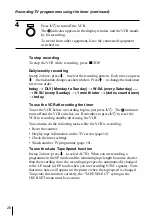
Page 26: ...he indicator turns off and the VCR switches on Remember to press 1 to reset the VCR to recording standby after using the VCR You can also do the following tasks while the VCR is recording Reset the counter Display tape information on the TV screen page 18 Check the timer settings Watch another TV programme page 18 To use the Auto Tape Speed function In step 2 above press m to selectAUTO When you a...

Page 27: ... INPUT SELECT button To record NTSC signals in EP mode set the tape speed to LP Even when timer recording is set to LP mode NTSC signals are automatically recorded in EP mode Note The and indicators flash in the display window when you press 1 with no tape inserted ...

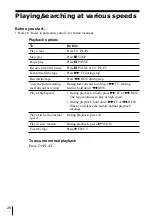
Page 28: ...nd the tape Press m REW during stop View the picture during fast forward or rewind During fast forward hold down M FF During rewind hold down m REW Play at high speed During playback briefly press M FF or m REW The tape continues to play at high speed During playback hold down M FF or m REW When you release the button normal playback resumes Play at twice the normal speed During playback press 2 P...

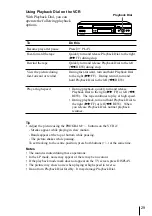
Page 29: ... Dial to the right M FF or left m REW The tape continues to play at high speed During playback turn and hold Playback Dial to the right M FF or left m REW When you release Playback Dial normal playback resumes Tip Adjust the picture using the PROGRAM buttons on the VCR if Streaks appear while playing in slow motion Bands appear at the top or bottom while pausing The picture shakes while pausing To...

Page 30: ...h press advances the time in increments of 30 minutes Normal recording In LP EP mode Each press advances the time as shown below Normal recording The tape counter decreases minute by minute to 0 00 then the VCR stops recording and turns off automatically To extend the duration Press z REC repeatedly to set a new duration time To cancel the duration Press z REC repeatedly until the indicator disapp...

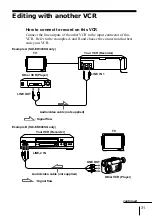
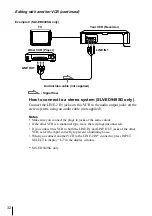
Page 31: ...Refer to the examples A and B and choose the connection that best suits your VCR Example A SLV ED343SG only TV Your VCR Recorder LINE IN 1 Other VCR Player LINE OUT Audio video cable not supplied Signal flow Example B SLV ED949SG only Your VCR Recorder TV LINE 2 IN LINE OUT Audio video cable not supplied Other VCR Player Signal flow continued ...

Page 32: ...dio output jacks on the stereo system using an audio cable not supplied Notes Make sure you connect the plugs to jacks of the same colour If the other VCR is a monaural type leave the red plugs unconnected If you connect this VCR to both the LINE IN and LINE OUT jacks of the other VCR select the input correctly to prevent a humming noise When you connect another VCR to the LINE 2 IN connector pres...

Page 33: ... to start playback and set it to playback pause 2 Insert a tape with its safety tab in place into this recording VCR Search for the point to start recording and press X PAUSE to set it to playback pause 3 Press z REC on this VCR to set it to recording pause 4 To start editing press the X PAUSE buttons on both VCRs at the same time To stop editing Press the x STOP buttons on both VCRs Tip To cut ou...

Page 34: ...34 ...

Page 35: ...35 ...

Page 36: ...Sony Corporation Printed in Indonesia AC68 02101V ...

Reviews: