Basic Operations
49
Basic Operations
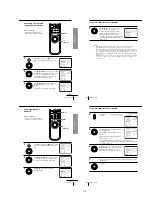
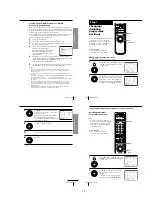
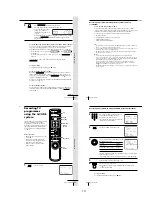
To record satellite broadcasts
If you connect the satellite tuner and the VCR, you can record satellite
programmes using the G-CODE number when available.
1
Turn on the satellite tuner.
2
On the satellite tuner, select the satellite programme for which you wish
to make a timer setting.
3
Repeat the steps described on pages 47 and 48.
4
Keep the satellite tuner turned on until the VCR finishes recording the
satellite programme for which you have made a timer setting.
Tips
• To cancel the procedure, press G-CODE before you press OK.
• To record NTSC signals, set the tape speed to SP or EP. To record in the EP mode, set
the tape speed to “LP”.
Notes
• The G-CODE system used in this VCR is for Singapore, Malaysia, Hong Kong,
Macau, etc. and cannot be used in areas such as U.S.A., Canada, Japan, Korea,
Taiwan, and U.K.
• The
t
indicator flashes in the display window when you press
?/1
with no tape
inserted.
Basic Operations
50
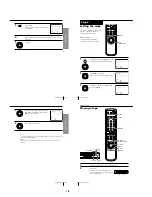
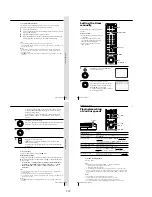
Setting the timer
manually
You can preset up to eight programmes
at a time.
Before you start…
• Check that the VCR clock is set to the
correct time.
• Insert a tape with its safety tab in
place. Make sure the tape is longer
than the total recording time.
• Turn on your TV and set it to the
video channel.
INPUT SELECT
MENU
OK
M
/
m
/
<
/
,
1
Press MENU and select TIMER SET/
CHECK, then press OK.
2
Set the date, start and stop times,
programme position, and tape speed:
1
Press
,
to select each item in turn.
2
Press
M
/
m
to set each item.
To correct a setting, press
<
to return to
that setting and reset it.
PROG +/–
?/1
OK
PLAY
MENU
OK
PLAY
1
2
3
4
5
6
7
8
9
0
TIMER SET / CHECK
TUE
2 5 . 1
DATE
START
STOP PROG
–
.
– –
– : – –
– : – – – – –
–
.
– –
– : – –
– : – – – – –
–
.
– –
– : – –
– : – – – – –
–
.
– –
– : – –
– : – – – – –
–
.
– –
– : – –
– : – – – – –
–
.
– –
– : – –
– : – – – – –
–
.
– –
– : – –
– : – – – – –
–
.
– –
– : – –
– : – – – – –
2
TIMER SET / CHECK
TUE
2 5 . 1
DATE
START
STOP PROG
2
.
5 12 TUE
– : – –
– : – – – – SP
–
.
– –
– : – –
– : – – – – –
–
.
– –
– : – –
– : – – – – –
–
.
– –
– : – –
– : – – – – –
–
.
– –
– : – –
– : – – – – –
–
.
– –
– : – –
– : – – – – –
–
.
– –
– : – –
– : – – – – –
–
.
– –
– : – –
– : – – – – –
2
Basic Operations
51
Basic Operations
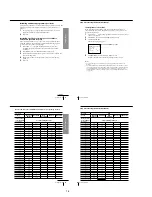
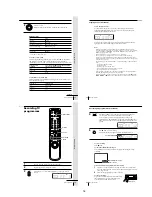
To record the same programme every day or the same day every
week, press
m
while the date is flashing. For details, see “Daily/
weekly recording” below.
To record from a source connected to the LINE-1 IN jacks; press
INPUT SELECT or PROG +/– to display “L1” in the “PROG”
position.
3
Press
,
to confirm the setting.
The cursor (
B
) appears at the beginning of the line. To enter another
setting, move the cursor to the next line and repeat step 2.
4
Press OK.
5
Press
?/1
to turn off the VCR.
The
t
indicator appears in the display window and the VCR
stands by for recording.
To record from other equipment, leave the connected equipment
switched on.
To stop recording
To stop the VCR while recording, press
x
STOP.
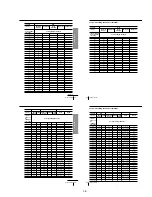
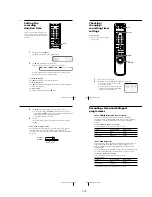
Daily/weekly recording
In step 2 above, press
m
to select the recording pattern. Each time you press
m
, the indication changes as shown below. Press
M
to change the indication
in reverse order.
Tips
• To set the programme position, you can also use the PROG +/– or programme
number buttons.
• To set the tape speed, you can also use the REC SPEED button.
• To record NTSC signals, set the tape speed to SP or EP. To record in the EP mode, set
the tape speed to “LP”.
Note
•
The
t
indicator flashes in the display window when you press
?/1
with no tape
inserted.
the current date
t
SUN-SAT (Sunday to Saturday)
t
MON-SAT (Monday
to Saturday)
t
MON-FRI (Monday to Friday)
t
EVERY SAT .....
t
EVERY
MON
t
EVERY SUN
t
1 month later
t
(dates count down)
t
the
current date
OK
PLAY
OK
PLAY
•
]/1
Additional Operations
52
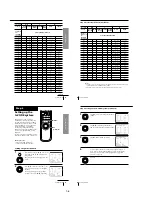
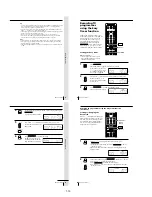
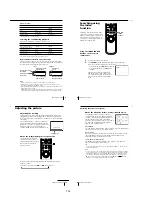
Playing/searching
at various speeds
Additional Operations
Playback options
View the picture during fast-
forward or rewind
Play at high speed
Play at twice the normal speed
Play in slow motion
Play frame by frame
Rewind and start play
To resume normal playback
Press
H
PLAY.
Tips
• Adjust the picture using the P/– buttons on the VCR if:
– streaks appear while playing in slow motion.
– the picture shakes during pause.
To set tracking to the centre position, press both buttons (+/–) at the same time.
• If noise appears during pause or frame-by-frame playback, first switch to the slow
motion playback, then adjust the picture using the P/– buttons on the
VCR.
Notes
• The playback sound is muted during these operations.
• In LP or EP mode, noise may appear or there may be no colour.
• The picture may show noise when playing at high speed in reverse.
• On-screen symbols may shake while playing or searching at various speeds.
Operation
During fast-forward, hold down
M
FF. During rewind, hold
down
m
REW.
• During playback, press
M
FF or
m
REW on the remote
commander.
• During playback, hold down
M
FF or
m
REW. When you
release the button, normal playback resumes.
During playback or pause, press
×
2.
During playback or pause, press
y
SLOW.
During pause, press
M
FF or
m
REW on the remote
commander. Hold down the button to play one frame each
second.
While the tape is stopped, hold down
j
(rewind) on the VCR
and press
H
(play) on the VCR.
m
REW
M
FF
×
2
H
PLAY
y
SLOW
j
(rewind)
H
(play)
1-12
Summary of Contents for SLV-LF1
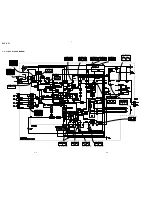
Page 26: ...SLV LF1 3 1 3 2 SECTION 3 BLOCK DIAGRAMS 3 1 OVERALL BLOCK DIAGRAM ...
Page 29: ...SLV LF1 3 4 AUDIO BLOCK DIAGRAM 3 7 3 8 ...
Page 30: ...SLV LF1 3 5 TUNER BLOCK DIAGRAM 3 9 3 10 ...
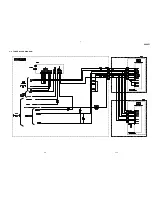
Page 31: ...SLV LF1 3 6 MODE CONTROL BLOCK DIAGRAM 3 11 3 12 ...

