Settings
12
Click the
(Admin) button to display the
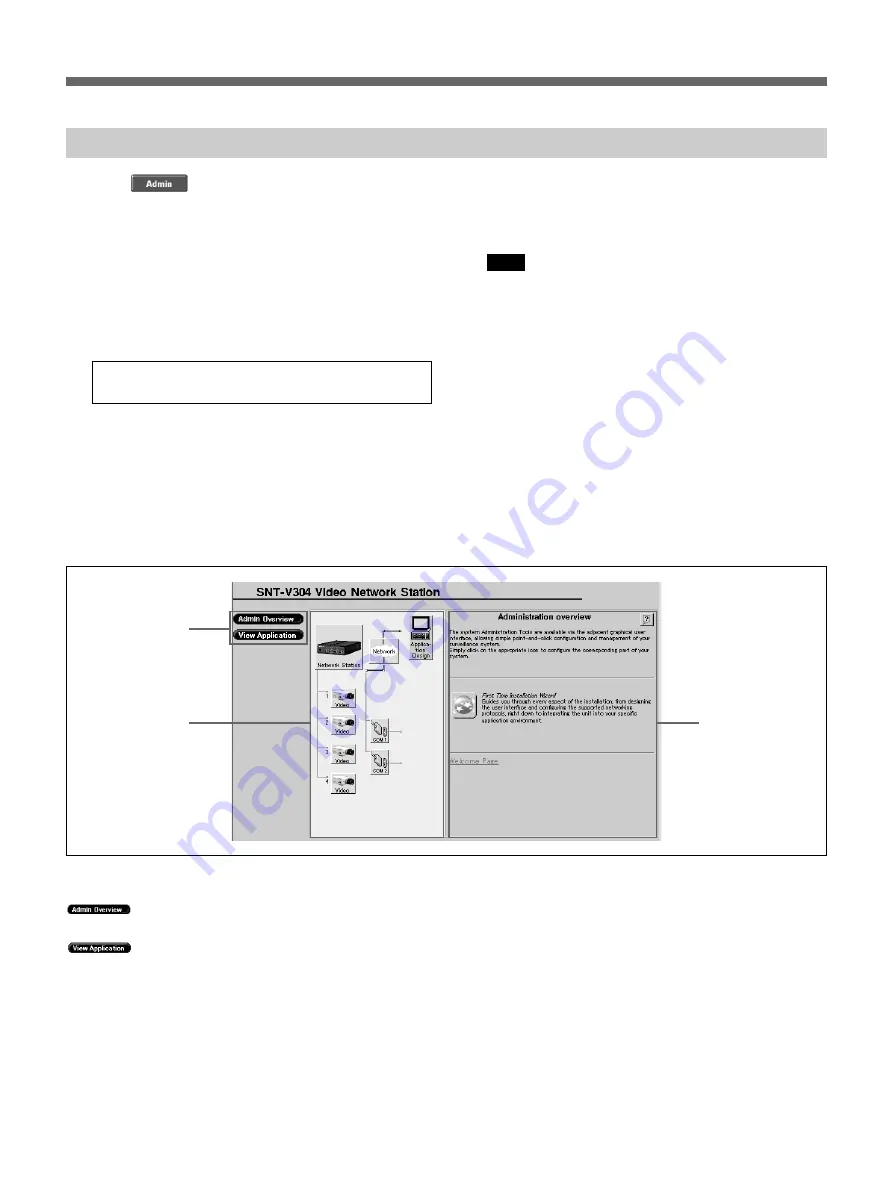
“Administration overview” page. After basic settings
have been made with the “First Time Installation
Wizard”, all video network station settings and
management are performed from the “Administration
overview” page.
1
Launch the Web browser and enter the following
in the [Address] box, and press Enter.
http://<host name or IP address of the
video network station>/
The monitor screen appears.
2
Click the [Admin] button.
The “Enter User Name and Password” dialog box
appears.
3
Enter “root” as the system user name, and the
password that was set previously, and click [OK].
The “Administration overview” page appears.
Note
• The factory-default administrator (root) password
is “pass”. Unless the administrator’s password
has been changed, enter “pass” for the password.
However, as all units are programmed with the
same settings at shipping time, you should change
the password as soon as possible. Refer to
“Changing Passwords and User Registration” on
page 18 for the procedure.
• A message such as “There is no Data” may
appear when changing the window size from the
“Administration overview” page. In this case,
click the right mouse button, and select [Refresh].
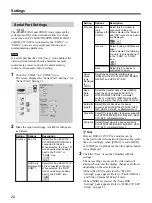
Accessing the Administration Overview Page
1
Menu
(Admin Overview): Click to return to the
initial “Administration overview” page.
(View Application): Click to open a monitor
screen window. Changes to settings related to the
monitor mode can be confirmed in this window.
2
Items
The system’s structural elements are indicated by the
icons. Clicking on an item displays related settings that
can be changed in the Settings area at the right.
3
Settings Area
Text boxes and icons are displayed for setting the
selected item.
The “First Time Installation Wizard” icon is displayed
on the initial screen. Refer to “Basic Settings with the
First Time Installation Wizard” on page 11 for details.
3
1
2


