— 3 —
SECTION 1
GENERAL
This section is extracted from
instruction manual.
Getting Started
6
US
Getting Started
Base unit
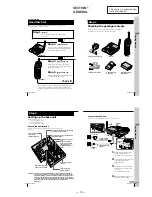
Read this first
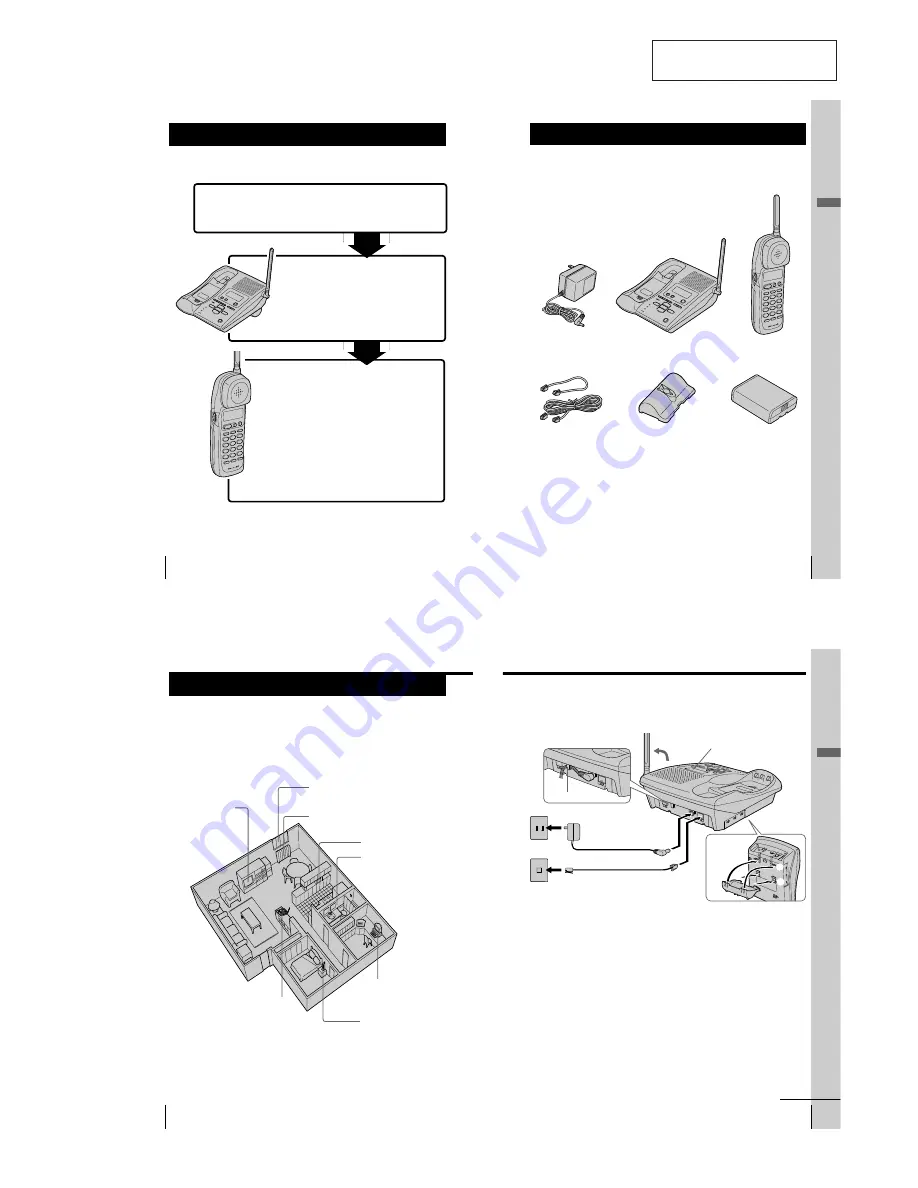
Before you use your phone, you must set it up. Here’s a quick way to
set up your phone: Steps 1, 2, 3 and 4.
Step 2
(pages 8 to 10)
Next, you need to do three things to set
up the base unit, including finding the
best location for the base unit.
Step 3
(pages 11 to 12)
Then, you need to insert the battery
pack into the handset and charge it for
more than 12 hours.
Step 4
(pages 14 to 16)
Finally, you need to enter the area code
to use the Caller ID service.
First, unpack the phone and the supplied
accessories.
Step 1
(page 7)
That’s it!
Handset
If you want to change the language of the display and the
voice guidance, follow the procedure in “Changing the
language of the display and the voice guidance” on page
17.
Getting Started
7
US
Getting Started
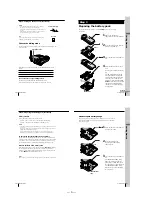
Telephone line cords (2)
Handset
AC power adaptor (AC-T46)
Wall bracket/stand
for base unit
Base unit
Rechargeable battery
pack (BP-T31)
Step 1
Checking the package contents
Make sure you have received the following items in the package.
If anything is missing, contact your local Sony dealer.
Getting Started
8
US
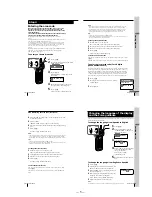
Step 2
Away from television
sets and other
electronic equipment
Away from a microwave
oven
Away from excessive
moisture, extremely low
temperatures, dust,
mechanical vibration, or
shock
Away from a personal
computer
Away from another
cordless telephone
Near a central location
and on a level surface
Away from heat sources, such as radiators,
airducts, and sunlight
Away from noise sources such as a window
by a street with heavy traffic
Setting up the base unit
Do the following steps:
• Choose the best location
• Connect the base unit
• Choose the dialing mode
Choose the best location
Where you place the base unit affects the reception quality of the
handset.
CAUTION: • Should you experience intermittent loss of audio during a conversation, try
moving closer to the base or move base unit away from other noise sources.
• The cordless telephone operates at a frequency that may cause interference to
nearby TVs and VCRs; the base unit should not be placed near or on the top of
a TV or VCR; and, if interference is experienced, moving the cordless telephone
farther away from the TV or VCR will often reduce or eliminate the
interference.
Getting Started
9
US
Getting Started
2
1
continued
1
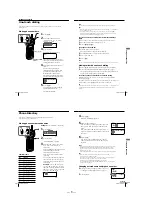
Attach the wall bracket to the
bottom of the base unit as
illustrated to use it as a stand.
2
Connect the telephone line cord
to the LINE jack and to a
telephone outlet.
3
Connect the AC power adaptor
to the DC IN 9V jack and to an
AC outlet.
“P” flashes on the display.
4
Raise the antenna. Make sure it
points toward the ceiling.
Hook the cord.
To DC IN 9V
To LINE
AC power adaptor
(supplied AC-T46)
Telephone line cord
(supplied)
4
To AC outlet
3
To
telephone
outlet
2
Connect the base unit
If you want to hang the base unit on the wall, see page 60.
1
Align the
f
marks.
Display


