1-3
SRW-5000/5500
B4
x
6
B4
x
6
B4
x
6
B4
x
6
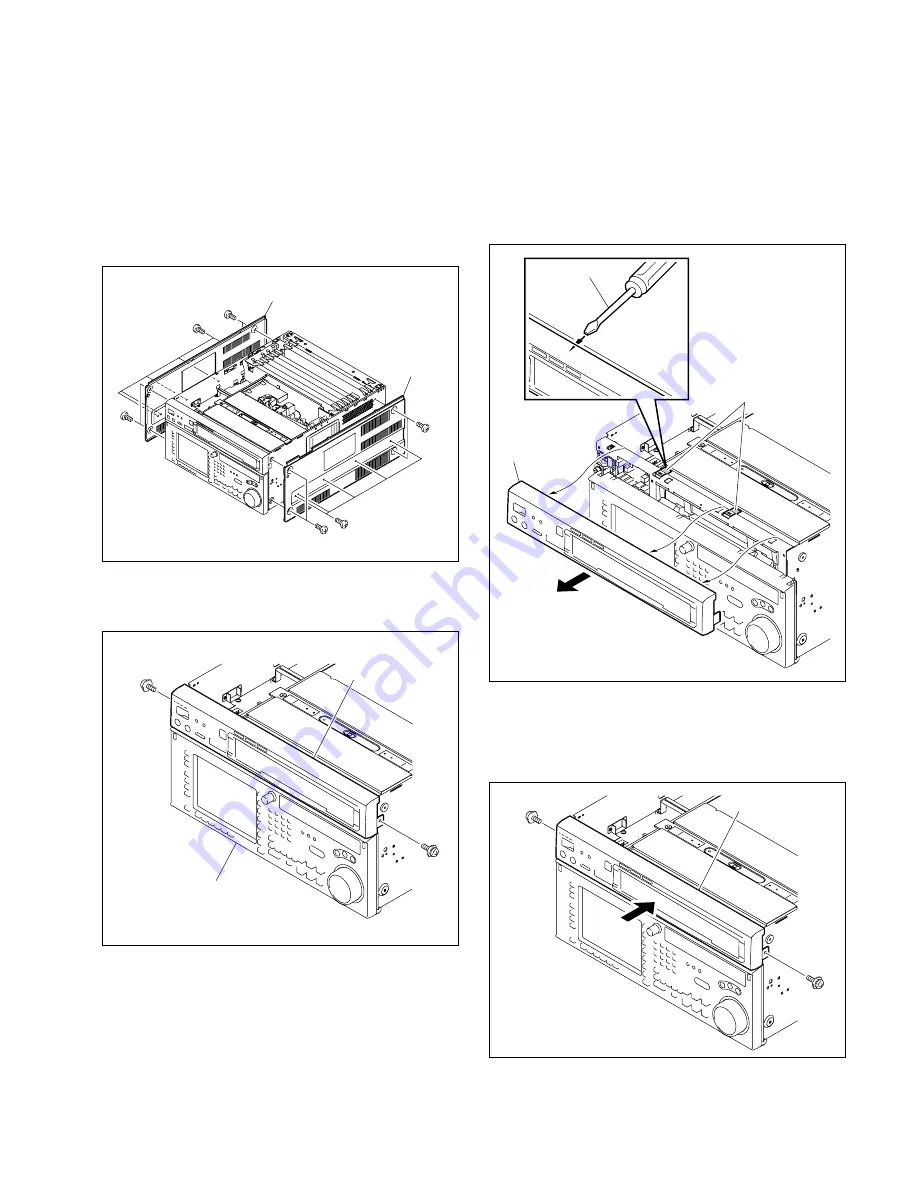
Side panel
(right)
Side panel (left)
PSW3
x
6
PSW
3
x
6
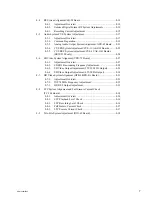
Front panel
Front panel
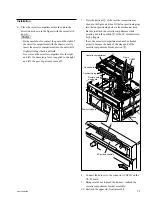
Markings
(non-painted portion)
Flat blade
driver
PSW3
x
6
PSW
3
x
6
Front panel
Lower control panel
4.
Pull the front panel forward while pushing it up.
n
When the front panel is not removed easily, release the
front panel upward, inserting the tip of the flat blade
driver into the warkings shown in the fugure, and then
remove the front panel in the arrow direction.
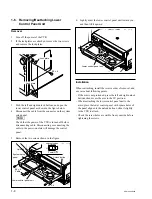
When reattaching, install in the reverse order of removal.
n
When reattaching the front panel, press it tightly against
the chassis in parallel.
n
Use of screws other than specified will cause damage of
the internal mechanism. Be sure to use the specified
screws.
1-3-3. Removing/Reattaching Side Panels
and Front Panel
1.
Remove the upper lid (front) assembly and upper lid
(rear) assembly. (Refer to Section 1-3-1.)
2.
Remove the nine screws, and side panels (right and
left).
3.
Remove the left and right screws (one each) securing
the front panel.


