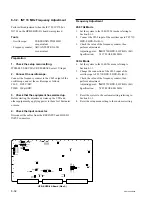
8-22
SRW-5000/5500
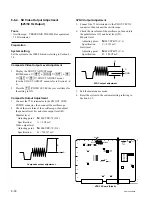
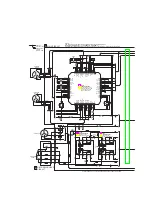
APR-62 Board (Side A)
MONITOR L channel adjustment
12. Connect the audio analyzer’s input to MONITOR
OUTPUT L connector.
13. Adjust the audio level on the audio analyzer.
Adj. point:
1
RV1300/APR-62 (G-3)
Specification:
+
3.95
±
0.1 dBm (at 600
Z
load)
MONITOR R channel adjustment
14. Connect the audio analyzer’s input to MONITOR
OUTPUT R connector.
15. Adjust the audio level on the audio analyzer.
Adj. point:
1
RV2300/APR-62 (G-3)
Specification:
+
3.95
±
0.1 dBm (at 600
Z
load)
16. Exit the maintenance mode.
RV1300
RV2300
RV1200
RV2200
RV3200
RV4200
C
D
E
F
G
A
1
2
3
4
8-5-4. CUE PB System Adjustment/CUE-13/
AE-31H Boards
Tools
.
Audio analyzer:
Audio Precision System One/Two or equivalent
.
Audio level meter:
Hewlett-Packard HP3400A or equivalent
.
Digital voltmeter:
Advantest TR6845 or equivalent
.
Extension board:
EX-949
.
Shorting clip
.
Alignment tapes:
HR5-1A
Preparation
1. Check the switch settings on the APR-62/CUE-
13 boards.
Reset all the settings of these boards to the factory settings.
(Refer to “1. Switches Settings” in “8-5-2. Common
Preparation”.)
2. Extend the CUE-13 board with an extension
board EX-949.
n
After turning off the power, then remove the CUE-13
board.
3. Open the AE-31H board.
(Refer to the figure in Section 5-30-1.)
4. Clean the AT head.
Clean the tape running surface of the AT head.
(Refer to “4-2-6. Stationary Heads Cleaning”.)
n
Perform the cleaning under the power off.
5. Check the other settings.
Check that any setting on the panel or the menu on the
VTR is well prepared for processing adjustments.
(Refer to “8-5-2. Common Preparation”.)
6. Check the warming up.
Warming up of equipment to be used (20 minutes or
more).


