background image

10

E

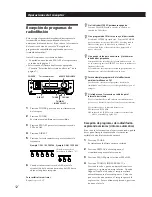
Operaciones del receptor

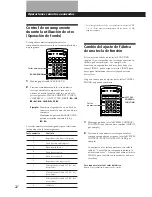
Selección de un componente

Para escuchar o contemplar un componente conectado,
seleccione en primer lugar la función en el receptor o
con el telemando.
Antes de comenzar, cerciórese de haber:
• Conectado todos los componentes con seguridad y

correctamente como se indica en las páginas 5 a 8.

• Girado MASTER VOLUME hacia la posición extrema

izquierda (0) para evitar dañar sus altavoces.

1

Presione el botón POWER para conectar la
alimentación del receptor.

2

Presione una tecla de función para seleccionar el
componente que desee utilizar:

3

Conecte la alimentación del componente, por
ejemplo un reproductor de discos compactos, e
inicie la reproducción.
Para sintonizar emisoras de radiodifusión en este
receptor, consulte “Recepción de programas de
radiodifusión” de la página 12.

MASTER VOLUME

POWER

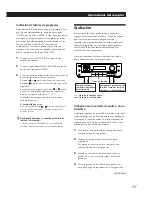
4

Gire MASTER VOLUME para ajustar el volumen.
Para ajustar el volumen de los altavoces del
televisor, utilice el control de volumen del mismo.

haga lo siguiente

presione MUTING del telemando.
Para restablecer el sonido, vuelva a
presionarla.

presione BASS BOOST de forma que
se encienda el indicador BASS
BOOST.

gire el control BALANCE hacia la
izquierda o la derecha.

Para

silenciar el sonido

reforzar los graves

ajustar el equilibrio

Para escuchar a través de auriculares

Conecte los auriculares a la toma PHONES y ponga las
teclas SPEAKERS en OFF.

Contemplación de programas de vídeo

Para contemplar programas de teledifusión o de vídeo,
recomendamos que reproduzca la parte de audio a
través del receptor en vez de utilizar el altavoz de su
televisor.  Esto le permitirá aprovechar las ventajas de
los efectos de sonido perimétrico del receptor, como
Dolby Surround, y utilizar el telemando del receptor
para controlar el sonido.
Desconecte los altavoces de su televisor antes de
comenzar a disfrutar del sonido perimétrico del
receptor.

Para contemplar programas de televisión,

 conecte la

alimentación del televisor y del receptor, y presione la tecla
TV del receptor.

Para contemplar videocintas o discos láser,

 realice lo

siguiente:

1

Presione una tecla de función para seleccionar el
componente (por ejemplo, VIDEO 1).

2

Conecte la alimentación del televisor y ajuste la
entrada de vídeo del mismo de acuerdo con su
componente de vídeo.

3

Conecte la alimentación del componente
(videograbadora o reproductor de discos láser), e
inicie la reproducción.

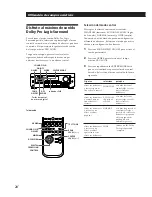
presione

PHONO

TUNER

CD

DAT/MD

TAPE MONITOR

TV/DBS

VIDEO 1 o
VIDEO 2

VIDEO 2

Para escuchar o contemplar

discos analógicos

programas de radiodifusión

discos compactos

cintas audiodigitales (DAT) o
minidiscos (MD)

cintas de audio

programas de televisión

cintas de vídeo

discos láser

Teclas de función

Summary of Contents for STR-DE705

Page 1: ... 1996 by Sony Corporation 3 856 169 31 1 EN P S STR DE705 EN E C Operating Instructions Manual de Instrucciones CH FM Stereo FM AM Receiver ...

Page 2: ...m the wall outlet To disconnect the AC power cord grasp the plug itself never pull the cord One blade of the plug is wider than the other for the purpose of safety and will fit into the wall outlet only one way If you are unable to insert the plug fully into the outlet contact your dealer AC power cord must be changed only at a qualified service shop On placement Place the receiver in a location w...

Page 3: ...ditional Information Troubleshooting 22 Specifications 23 Glossary 24 Rear Panel Descriptions 26 Remote Button Descriptions 27 Index 28 Quick Reference Guide 29 About This Manual Conventions The instructions in this manual describe the controls on the receiver You can also use the controls on the remote if they have the same or similar names as those on the receiver A Quick Reference Guide is supp...

Page 4: ...malfunction If you don t use the remote for an extended period of time remove the batteries to avoid possible damage from battery leakage and corrosion Before you get started Turn off the power to all components before making any connections Do not connect the AC power cords until all of the connections are completed Be sure to make connections firmly to avoid hum and noise When connecting an audi...

Page 5: ...m connect a ground wire not supplied to the y ground terminal If you ve connected an outdoor antenna be sure to connect the ground for lightning protection Where do I go next If you want to connect other components go on to the next section If you re only planning to use the receiver to listen to the radio go to Speaker System Hookups on pages 6 and 7 Audio Component Hookups Overview This section ...

Page 6: ... speakers Speaker System Hookups Overview This section describes how to connect your speakers to the receiver Although front left and right speakers are required center and rear speakers are optional Adding center and rear speakers will enhance the surround effects Connecting an active woofer will increase bass response For specific locations of the terminals see the illustration below Getting Sta...

Page 7: ...8 If you want to connect video components to enjoy surround sound when watching TV programs or video tapes go on to the next section TV VCR Hookups Overview This section describes how to connect video components to the receiver For specific locations of the jacks see the illustration below What cables will I need Audio video cable not supplied 1 for each TV or LD player 2 for each VCR Video cable ...

Page 8: ...SWITCHED AC OUTLETs to a wall outlet Getting Started AC Hookups Connecting the AC power cord Connect the AC power cord from this receiver and from your audio video components to a wall outlet If you connect other audio components to the SWITCHED AC OUTLETs on the receiver the receiver can supply power to the connected components so you can turn on off whole system when you turn on off the receiver...

Page 9: ...sound Reinforce the bass Press BASS BOOST to turn on the BASS BOOST indicator Adjust the balance Turn the BALANCE control left or right Receiver Operations When you listen with headphones Connect the headphones to the PHONES jack and set the SPEAKERS selector to OFF Watching video programs When you watch TV or video programs we recommend you play audio portion through the receiver instead of your ...

Page 10: ...a button See page 20 If the component does not turn on Press the power switch on the component 2 Start playing Refer to Remote Button Descriptions on page 27 for details To turn off the components Press SYSTEM OFF This will also turn off the video and audio components connected to the SWITCHED AC OUTLETs on the back of this unit at the same time If you use a Sony TV When you press TV to watch a TV...

Page 11: ...stortion will be reduced To return to the auto stereo mode press this button again If you cannot tune in a station and the entered numbers are flashing Make sure you ve entered the right frequency If not press DIRECT and reenter the frequency you want If the entered numbers still flash the frequency is not used in your area To watch FM simulcast TV programs Make sure that you tune in the simulcast...

Page 12: ...tions You can display either the index name or frequency Each time you press DISPLAY the display switches between the frequency and the index name Scanning indexed stations index tuning Once you select a station index you can scan all the stations with that station index 1 Press TUNER The last station you received is tuned in 2 Press DISPLAY so that the index mode appears in the display The statio...

Page 13: ...o record to and from the components connected to the receiver You don t have to connect playback and recording components directly once you select a program source on the receiver you can record and edit as you normally would using the controls on each component Before you begin make sure you ve connected all components properly ç Audio signal flow c Video signal flow Recording on an audio tape or...

Page 14: ...he point you want to start adding different sound press another function button for example CD and start playback The sound from the selected component will be recorded over the original audio To resume recording the sound of the original playback source press the function button for that component Using the Sleep Timer You can set the receiver to turn off automatically at a time you specify Press...

Page 15: ...with the SPEAKERS selector when you use two sets of speakers otherwise you will not obtain the full surround effect Using Surround Sound Sound Fields GENRE MODE To PRO LOGIC PRO LOGIC Decode programs processed with Dolby Surround ENHANCED Provide additional output to the rear speakers after decoding the Dolby Surround program MOVIE SMALL THEATER Add the acoustic reflections of a small theater to d...

Page 16: ...to adjust the levels of your speaker system and customize the DOLBY SUR sound field Customizing Sound Fields You can customize the sound fields by adjusting the tone bass or treble and surround sound parameters while listening to a program source The adjusted parameters are stored in memory automatically and you can use your custom sound fields just as you would use the pre programmed ones Before ...

Page 17: ...the SUR indicator lights up 2 Use the digital processing control buttons to select the parameter you want 3 Use the digital processing control buttons to adjust the level of the parameter The adjusted parameters are stored automatically Note If you make new adjustments to a sound field the previous settings are replaced by the new ones Resetting customized sound fields to the factory settings 1 If...

Page 18: ...igned for a different speaker configuration Select the mode that best suits your speaker system configuration 1 Press SOUND FIELD ON OFF to turn on the sound fields 2 Press GENRE to select the PRO LOGIC sound field 3 Press CENTER MODE repeatedly until the center mode you want appears in the display Select the center mode by referring to the following chart If you have Front and rear speakers no ce...

Page 19: ...adjust the level of rear speakers press REAR LEVEL or on the remote 3 Press TEST TONE on the remote to turn off the test tone You can adjust all speakers at one time Adjust MASTER VOLUME Adjusting the delay time You can make the surround sound more effective by delaying the output from the rear speakers delay time You can adjust the delay time in 5 ms steps within the range of 15 to 30 ms For exam...

Page 20: ...tting to the factory setting Repeat the above procedure Operating One Component While Using Another background operation You can temporality operate other components while listening to or watching a program 1 Hold down BACKGROUND 2 Press both the corresponding numeric button of the component you re going to use see the table below and one of the following buttons at the same time VISUAL POWER TV V...

Page 21: ...urns off you can control the other component with the programmed buttons When you program the recording signal While holding down the r button on the receiver s remote and press the record button on the other remote If you cannot successfully program signals check the following If the LEARN indicator does not light up at all the batteries are weak Replace both batteries If the LEARN indicator does...

Page 22: ...d correctly Select the source component with the function buttons No sound or only a very low level sound is heard from the rear speakers Turn on the sound field function Select the appropriate center mode see page 18 Adjust the speaker volume appropriately see page 19 Make sure you turned on the sound field function Radio stations cannot be tuned in Check that the antennas are connected securely ...

Page 23: ...r only in the DOLBY SUR and THEATER modes Rear Dynamic power output Harmonic distortion at rated output Frequency response 8 ohms 20 Hz 20 kHz 120 W 120 W 8 ohms at 1 kHz THD 0 8 120 W ch 120 W 50 W ch 160 W 160 W 8 ohms 225 W 225 W 4 ohms Less than 0 3 PHONO RIAA equalization curve 0 5 dB CD TAPE DAT MD VIDEO 1 2 10 Hz 50 kHz dB 0 1 Impedance 50 kilohms 50 kilohms S N weighting network input leve...

Page 24: ...om the front speakers 3 CH LOGIC mode Select 3 CH LOGIC mode if you have front and center speakers but no rear speaker The sound of the rear channel is output from the front speakers to let you experience some of the surround sound without using rear speakers Delay time Time lag between the surround sound output from front speakers and rear speakers By adjusting the delay time of the rear speakers...

Page 25: ... with a center speaker NORMAL WIDE 3 CH LOGIC modes The test tone is output from the front L left center front R right and rear speakers in succession In a system without a center speaker PHANTOM mode The test tone is output from the front and the rear speakers alternately 3 CH LOGIC Center Front R Front L NORMAL WIDE Rear L R Rear L R PHANTOM Front L R ...

Page 26: ...6 VIDEO 2 7 VIDEO 1 8 MIX OUT 9 FRONT SPEAKERS A B 0 IMPEDANCE SELECTOR AC power cord SWITCHED AC OUTLETs Outlet shape and position varies according to destination SURROUND SPEAKERS CENTER SURROUND SPEAKERS REAR TAPE MONITOR DAT MD CD PHONO 1 2 3 45 6 7 8 9 0 Rear Panel Descriptions ...

Page 27: ...ck Tape deck TV VCR TV VCR TV VCR LD player TV TV TV TV TV TV TV VCR TV TV Function Selects tape direction for tape decks with the RMS function Clears RMS program for tape decks with the RMS function Programs tracks tape deck with the RMS function only Changes channels when used with 0 9 Selects input signal TV input or video input Turns on or off the power Turns on the TV switches the input to TV...

Page 28: ...11 12 SHIFT 10 27 SLEEP 14 SOUND FIELD ON OFF 15 18 SYSTEM CONTROL FUNCTION 10 20 SYSTEM OFF 10 TAPE MONITOR 9 13 TEST TONE 19 25 TUNER 10 11 12 TUNING INDEX SELECT 12 TV DBS 9 10 TV CONTROL ON 10 TV VIDEO 10 27 VIDEO 1 9 10 VIDEO 2 9 10 VISUAL POWER 27 12 16 19 0 27 27 P 27 r 27 Number 10 11 20 Switch and selector POWER 9 SPEAKERS 7 Controls BALANCE 9 MASTER VOLUME 9 19 Jacks PHONES 9 Indicators ...

Page 29: ...er A7 v SHIFT Select A v TUNER TUNER TUNER FM AM v Select FM v Display DIRECT v 1 0 2 5 0 7 v Selecting a Component Example1 Playing a CD CD v Turn on the CD player v Start playing VIDEO 1 v v Start playing Turn on the VCR Example2 Watching a video tape PRESET TUNING v TUNING INDEX SELECT v v Select FM v TUNING INDEX SELECT To continue scanning FM AM Select the frequency display Select the frequen...

Page 30: ...ra y solamente encajará en la toma de la red de una forma Si no puede insertar completamente el enchufe en la toma de la red póngase en contacto con su proveedor El cable de alimentación de CA solamente deberá ser cambiado en un taller de reparaciones cualificado Ubicación Coloque el receptor en un lugar adecuadamente ventilado para evitar el recalentamiento interior y prolongar su duración útil N...

Page 31: ...una tecla de función 22 Programación del telemando 23 Información adicional Solución de problemas 24 Especificaciones 25 Glosario 26 Descripción del panel posterior 28 Descripción de las teclas del telemando 29 Índice alfabético 30 Guía de referencia rápida 31 Descripción de este manual Convencionalismos En este manual de instrucciones se describen los controles del receptor Usted también podrá ut...

Page 32: ...á conectar y controlar los componentes de audio vídeo siguientes Para conectar al receptor los componentes deseados siga los procedimientos de las páginas especificadas Para aprender la ubicación y el nombre de cada toma consulte Descripción del panel posterior de la página 28 Preparativos Antena de AM FM Conexión de componentes de audio 5 6 Altavoz de graves activo Conexión de antenas 5 Reproduct...

Page 33: ...tar zumbidos conecte un conductor de puesta a tierra no suministrado al terminal de puesta a tierra y Si ha conectado una antena exterior cerciórese de conectar la puesta a tierra como protección contra rayos Qué hacer a continuación Si desea conectar otros componentes vaya a la sección siguiente Si solamente tiene planeado utilizar el receptor para escuchar la radio vaya a Conexión de sistemas de...

Page 34: ...ptor Reproductor de discos compactos L R CD IN OUTPUT LINE L R L R TAPE MONITOR IN REC OUT OUTPUT LINE LINE L R INPUT Deck de cassettes Receptor Deck de cinta audiodigital deck de minidiscos L R DAT MD IN REC OUT OUTPUT LINE LINE L R INPUT Receptor Qué hacer a continuación Vaya a la sección siguiente para conectar los altavoces Conexión de sistemas de altavoces Descripción general En esta sección ...

Page 35: ... Usted podrá conectar uno de ellos a los terminales SURROUND SPEAKER CENTER para conseguir sonido perimétrico Dolby Pro Logic Surround consulte la página 20 Selección de la impedancia Ajuste IMPEDANCE SELECTOR para los altavoces delanteros como se indica en la tabla siguiente Si no está seguro de la impedancia consulte el manual de instrucciones de sus altavoces Esta información normalmente está i...

Page 36: ...audio vídeo no suministrado 1 para el televisor o el reproductor de discos láser 2 para la videograbadora Cable de vídeo no suministrado 1 para un televisor Conexiones La flecha ç indica el flujo de la señal Televisor o sintonizador del sistema de radiodifusión digital DBS Monitor de televisión Si utiliza un monitor de televisión no conecte nada a la toma TV DBS VIDEO IN Videograbadora a través de...

Page 37: ...r No conecte electrodomésticos de gran vataje como planchas eléctricas ventiladores ni televisores a este tomacorriente Qué hacer a continuación Antes de utilizar el receptor vaya a la sección siguiente para cerciorarse de que todos los controles estén ajustados en las posiciones apropiadas a una toma de la red SWITCHED AC OUTLETS Antes de utilizar su receptor Antes de comenzar a utilizar su recep...

Page 38: ...s ajustar el equilibrio Para escuchar a través de auriculares Conecte los auriculares a la toma PHONES y ponga las teclas SPEAKERS en OFF Contemplación de programas de vídeo Para contemplar programas de teledifusión o de vídeo recomendamos que reproduzca la parte de audio a través del receptor en vez de utilizar el altavoz de su televisor Esto le permitirá aprovechar las ventajas de los efectos de...

Page 39: ...sconectar la alimentación de los componentes Presione SYSTEM OFF Usted podrá desconectar al mismo tiempo la alimentación de los componentes de vídeo y de audio conectados a SWITCHED AC OUTLETS del panel posterior de esta unidad Si está utilizando un televisor Sony Cuando presione TV para contemplar un programa de televisión se conectará la alimentación del televisor y cambiará a la entrada de tele...

Page 40: ...o automático presione de nuevo esta tecla Si no puede sintonizar una emisora y los números introducidos parpadean Compruebe si ha introducido la frecuencia correcta Si no es correcta presione DIRECT y vuelva a introducir la frecuencia deseada Si los números introducidos continúan parpadeando la frecuencia no estará utilizándose en su zona Para contemplar programas de teledifusión con emisión simul...

Page 41: ...ecuencia banda de FM solamente Salte las emisoras con señal débil Presione LEVEL En el visualizador aparecerá HIGH y el receptor explorará solamente las emisoras con señal intensa Memorización de emisoras de radiodifusión Seguramente deseará memorizar en el receptor las emisoras que escuche más a menudo a fin de no tener que sintonizarlas cada vez El receptor podrá almacenar un total de 30 emisora...

Page 42: ...isora Indización Usted podrá indizar las emisoras memorizadas y después utilizar los nombres de indización para explorar emisoras específicas de la memoria Usted también podrá utilizar la función de indización para asignar etiquetas a fuentes de programas para que el receptor visualice los nombres de los componentes que haya conectado por ejemplo VHS Indización de emisoras memorizadas Usted puede ...

Page 43: ...las de función Componente para reproducción fuente de programas Componente para grabación Deck de cassettes deck de minidiscos videograbadora Indización de fuentes de programas Esta función será muy útil cuando por ejemplo posea más de una videograbadora usted podrá asignar VHS a una de ellas y 8MM a otra Después podrá hacer que el receptor visualice los nombres de índice para saber qué videograba...

Page 44: ...os conectado a las tomas DAT MD REC OUT los ajustes del sonido no afectarán la grabación Grabación en un cassette de vídeo Usted podrá grabar de una videograbadora un televisor o un reproductor de discos láser utilizando el receptor También podrá añadir audio desde gran variedad de fuentes de audio cuando edite una cinta de vídeo Si necesita ayuda consulte el manual de instrucciones de su videogra...

Page 45: ...zando dos juegos de altavoces ya que de lo contrario no podría obtener el efecto perimétrico completo GENRE MODE SOUND FIELD ON OFF Campos acústicos GÉNERO MODO para PRO LOGIC PRO LOGIC decodificar programas procesados con Dolby Surround ENHANCED proporcionar salida adicional a los altavoces traseros después de haber decodificado programas procesados con Dolby Surround MOVIE SMALL THEATER añadir l...

Page 46: ... ajustar la presencia global del campo acústico Antes de comenzar Para aprovechar las ventajas del sonido Dolby Pro Logic Surround vaya a Disfrute al máximo de sonido Dolby Pro Logic Surround de la página 20 En esta sección se describe cómo ajustar los niveles de su sistema de altavoces y personalizar el campo acústico DOLBY SUR PRO LOGIC ENHANCED SMALL THEATER LARGE THEATER MONO MOVIE SMALL HALL ...

Page 47: ...ODE hasta que se encienda el indicador SUR 2 Utilice las teclas de proceso digital para seleccionar el parámetro deseado 3 Utilice las teclas de proceso digital para ajustar el nivel del parámetro Los parámetros ajustados se almacenarán automáticamente Nota Si realiza nuevos ajustes de un campo acústico los anteriores serán reemplazados por los nuevos Devolución de los campos acústicos personaliza...

Page 48: ...figuración diferente de altavoces Seleccione el modo que más se adecúe a su configuración de altavoces 1 Presione SOUND FIELD ON OFF para activar el sonido perimétrico 2 Presione GENRE para seleccionar el campo acústico PRO LOGIC 3 Presione repetidamente CENTER MODE hasta que en el visualizador aparezca el modo central deseado Seleccione el modo central de la forma siguiente Si posee altavoces del...

Page 49: ...avoces traseros presione REAR LEVEL o del telemando 3 Presione TEST TONE del telemando para desactivar el tono de prueba Usted podrá ajustar todos los altavoces a la vez Ajuste MASTER VOLUME Ajuste del tiempo de retardo Usted podrá hacer que el sonido perimétrico resulte más efectivo retardando la salida de los altavoces traseros tiempo de retardo Usted podrá ajustar el tiempo de retardo en pasos ...

Page 50: ...a podrá cambiarlos Por ejemplo si ha conectado un reproductor de discos láser Sony a las tomas VIDEO 2 podrá asignar la tecla VIDEO 2 para hacer que el telemando controle el reproductor de discos láser Tenga en cuenta que los ajustes de las teclas TUNER y PHONO no pueden cambiarse 1 Mantenga pulsada la tecla SYSTEM CONTROL FUNCTION cuya función dese cambiar VIDEO 2 por ejemplo 2 Presione la tecla ...

Page 51: ...el interruptor de alimentación del componente No programe las señales de control remoto de acondicionadores de aire ni de otros electrodomésticos Borrado de señales programadas Para borrar las señales programadas realice lo siguiente La funciones de las teclas se repondrán a los ajustes realizados en fábrica 1 Presione LEARN para que se encienda el indicador LEARN 2 Manteniendo pulsada BACKGROUND ...

Page 52: ...uente con las teclas de función Información adicional No hay sonido o solamente se oye sonido de nivel muy bajo a través de los altavoces traseros Active la función de campo acústico Seleccione el modo central apropiado consulte la página 20 Ajuste apropiadamente el volumen de los altavoces consulte la página 21 Cerciórese de haber activado la función de campo acústico No es posible sintonizar emi...
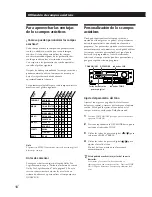
Page 53: ...AA 0 5 dB CD TAPE DAT MD VIDEO 1 2 10 Hz 50 kHz dB 0 1 Sección del sintonizador de FM Sensibilidad Sensibilidad útil Señal ruido Distorsión armónica a 1 kHz Separación Respuesta en frecuencia Selectividad Gama de sintonía Antena Sensibilidad útil Señal ruido Distorsión armónica Selectividad Entradas Salidas Monoaural 18 3 dBf 4 5 µV Estéreo 38 3 dBf 45 µV 11 2 dBf 2 µV IHF Monoaural 76 dB Estéreo ...

Page 54: ...o cuando los haya colocado en una sala grande o separados de su posición de escucha Sintonía directa Método de sintonía que le permite introducir directamente la frecuencia de una emisora utilizando las teclas numéricas Utilice este método si conoce la frecuencia de la emisora deseada Dolby Pro Logic Surround Sistema decodificador de sonido Dolby Surround normalizado en programas y películas de te...

Page 55: ...és del altavoz delantero izquierdo del central del delantero derecho y de los traseros En un sistema sin altavoz central modo PHANTOM El tono de prueba saldrá alternativamente a través de los altavoces delanteros y traseros Tiempo de reflexión cercana Tiempo Nivel Delantero izquierdo Central Delantero derecho 3 CH LOGIC Traseros izquierdo y derecho NORMAL WIDE PHANTOM Delanteros izquierdo y derech...

Page 56: ...ara altavoces perimétricos traseros SURROUND SPEAKERS REAR Tomas para deck de cassettes TAPE MONITOR Tomas para deck de cinta audiodigital deck de minidiscos DAT MD Tomas para reproductor de discos compactos CD Tomas para giradiscos PHONO 9 Terminales para altavoces delanteros FRONT SPEAKERS A B 0 Selector de impedancia IMPEDANCE SELECTOR Cable de alimentación de CA Tomacorriente de CA conmutable ...

Page 57: ...pequeña y la grande Activa la función de imagen en imagen Salta entre los canales anterior y actual Selecciona la señal de salida de los terminales de antena Señal de televisión o programa de la videograbadora Normalmente ajusta el volumen principal del receptor Si había presionado TV CONTROL ON ajustará el volumen del televisor Normalmente silencia el sonido del receptor Si había presionado TV CO...

Page 58: ...automática 12 Sintonía de emisoras memorizadas 13 Sintonía directa 11 26 Solución de problemas 24 Sonido Dolby Surround disfrute al máximo 20 modo central 26 Sonido perimétrico 18 26 T U V W X Y Z Telemando 9 11 20 cambio de ajustes 22 control de componentes que no sean Sony 23 control de componentes Sony 22 operación de fondo 22 programación 23 Tiempo de retardo 20 26 Tono de prueba 21 26 Denomin...

Page 59: ... PRESET TUNING v Exploración de emisoras memorizadas Selección de un componente Ejemplo 1 Reproducción de un disco compacto Conecte la alimentación de la videograbadora Conecte la alimentación del reproductor de discos compactos CD v VIDEO 1 v v Inicie la reproducción v Inicie la reproducción Ejemplo 2 Contemplación de una videocinta TUNER v TUNING INDEX SELECT v v v TUNING INDEX SELECT FM AM DISP...

Page 60: ... A WÆy fi Uq u C fiq uÆ A ßÏ Ì Y i µ qæ u fi C w ÿ Aæ æ æP Ò t æPºe uØ H w Ë V J W Æy C p G Y i Æy A fl z Jæ æ C ßÛ AC q uÆ A ß ÍÆÊ z A C w m æ µ æ wm bq n Ïm œ Œ A ßK ønºˆ A H K µ µ æ œ Œ ÿ R C µ æ i Ò bæa Òºˆ a Ë A Œ µ Æg Ïß Aàh Œ æ Ò R ª a Ë œ Œ C n bæ fl W Ôm F Ë A HßKÙ Ìq Æ y æ æ GªŸ C æ fi ß æ bs µ L Ê Æ A wnˆ º µ æ q ˆ q Æy W fi Uq u C M º æ æ fl A Ó O M Óæ A i Œn Ÿ M æتG ø Mº C œ Œ Ù Û ...

Page 61: ... 16 Úß Ò M fiøË Ù n à ŒÆƒ G 18 i ªª æfiß ø œ Œ Ê PÆ æfiß t Ê I æfiß 20 ßÔ FUNCTION uºt w 20 µ ªª æ sµ ß 21 ÍÆ GªŸ M22 WÆÊ23 Nªy 24 O ª 26 ªª ª 27 Ø fi 28 t n 29 ˆ Û ª U q Œº O ª U Æeª µ æ W Óæ C i œ ŒªP µ æ W WŸ P ªª æ Óæ C ƒ29 ß t n O C ƒ27 ߪª ª à ªª ßz Ì C ª U ƒ Œ p U œ G Ì uØ Œªª æ Ó æfiß C Ì Ò Æe ˆæfiß nª C ª µ æ ßt ß Ò Ù n t Œ C gß Ò Í Á q v Ó y C ß Ò ADOLBY Dº a ŒPRO LOGIC ß Ò Í Á q ß º C C...

Page 62: ...Pæ µº ÆÕß Œ Àm Cß_ h A N iØ µo Õ GªŸ C Œªª æÆ A U q A HßK q G ªGªk A lß ªª æ C sµ ß ª µ æ i s µ Ó U C n µ W Ê C z i ˆ A à w º W Ans µ Ï µ æ Û sµ Ë kª i Ês µ C U Ïm M WŸ A ƒ26 ß O ª C l AM FM u sµ u 5 ßCµ næ ø æ pÆgºv Ò tæ qµ æ sµ n æ tŒ 6 A7 CD æ dÆy DAT MDÆy L næ sµ µT Ê 5 A6 sµ qµ æ ø æ 7 A8 e næ L e næ R n æ L n æ R l œ Œ H e µL ß Ûs µ A wnˆ º XÊ æ æ q C Dq u A Ød Ï s µ uß ß ß H Aà s µ C s µ TÍ...

Page 63: ...nß ªÚ H p Gns µ L Ê AßY ß U æfiß C p G u Œ µ æ µæ Æ AßY µ Uß ƒ6 Mƒ7 ßsµ næ tŒ C sµ µT Ê ßz ª ª p Ûß µ T Ê s µ Ï µ æ C p G nß µ æ Ì Ò jæ ŒÆ AßY ß s µ C w Ï m A Uœ C Œ ªÚæ u H n Wæ u µL a CD æ M L U1 F dÆy ADAT Æy A Œ gßA pÆg MD Æy U2 ANTENNA FMæ u u a 1 AM Ùߌ u a 1 AM Ùߌ u sµ FM æ u u s µ næ u u A iØ œ O Ù C ANTENNA AM FM 75Ω COAXIAL µ æ FM u ANTENNA AM FM 75Ω COAXIAL µ æ µ æ µ a PHONO DAT MD CD ...

Page 64: ...ß U s µ næ C sµ næ tŒ ßz ª ª p Ûß næ s µ Ï µ æ C e M k næ O A M næ hƒ øÔ Û C p À W M næ A N i j Ù nƃ G C s µ ßCµ næßY iºW ßCµT C w l Ïm A Uœ C l L R CD IN OUTPUT LINE L R L R TAPE MONITOR IN REC OUT OUTPUT LINE LINE L R INPUT CD æ µ æ dÆy µ æ L R PHONO IN OUTPUT LINE L R L L R DAT MD IN REC OUT OUTPUT LINE LINE L R INPUT DAT gßA pÆg MD µ æ µ æ SURROUND SPEAKERS CENTER SURROUND SPEAKERS REAR MIX O...

Page 65: ... sµ qµ æ ø æ ßz ª ª p Û Nµ W Ê s µ Ï µ æ C w Ïm A Uœ C Œ ªÚql H n µ W q l µL a qµ æ Œ pÆgºv LD Ò tæ U1 Fø æ U Œ2 µ W q l µL a C x qµ µ æ 1 sµ b Y ç Ì H y C qµ Œº rºsº t Œ DBS ø æ MIX AUDIO OUT INPUT µ æ ßCµ næ l SURROUND SPEAKERS IMPEDANCE USE 8 16 Ω REAR L R CENTER L R µ æ næ L næ næ R p G z næ ø ß O 4 Ï8º ß 8º H W N IMPEDANCE SELECTOR w Û 4Ω 8Ω n X næ t ŒA s µ Ï FRONT SPEAKERS A l næ tB s µ ÏFRO...

Page 66: ... IN VIDEO OUT AUDIO IN AUDIO OUT S LINK L R L R l s µ AC q s µAC q u N ª µ æ A M n µ W Ê ACq u µ Ï Wq Æy C p G NßO n W Ê s µ b µ æ SWITCHEDACOUTLETS A K i µ æ q µ s µµ Ê A A K i b ˆ µ æ q Æ A K i PÆ ˆ tŒ q C N Tª s µ b µ æ ACq Æy W Ê q OÆ Ø WLºg b O W ØS W º C ßO b Æy Ws µ ØSº ÆaÆxqæ A pqº Ê Aq Æ A Œqµ æ µ C U Bnß ªÚ H œ Œ µ æ e A U HTª Oß_ Óæ wß Ì C œ Œ µ æ e œ Œ µ æ e A Tª Oß_ß n U Cæfiß G NMAST...

Page 67: ...ƒ G A pß Ò Ù n A i z Œ µ æ ªª æ h Ó µ T C l œ Œ e A ˆ º qµ æ W næ A z K i q µ æ h Y Ù n µ T C n qµ ÿÆ A qµ æ M µ æ q ˆ U µ æ W TV C n ø ºv a ŒpÆgºv Æ A ß p Uæfiß G 1 ˆ U Ø HøÔæ Ê pVIDEO1 C 2 qµ Nqµ æ µ WøÈ J w œ X z µ W Ê C 3 æ ø æ Œ pÆgºv Ò tæ q A l Ò t C œ Œªª æ ªª æ iæfiß µ æ M s µ Sony Ê C POWER MASTER VOLUME Ø n Œ ø µL u qºsº ÿ pÆg CD º r n W œ a DAT Œ g ßA pÆg MD n Wœ a qµ ÿ µ Wœ a pÆgºv LD ...

Page 68: ... O œSonyqµ æ Ì ˆ UTV qµ ÿÆ A qµ æ ßY q ÏTV øÈ J C Ì ˆ UVIDEO1 ŒVIDEO2Æ A qµ æ N q ÏæA Ì µ WøÈ J C p G qµ æ ÏæAÌ øÈ JÆ A ˆ Uªª æ W TV VIDEO C qµ Œ µ æ Sony qµ æ ˆ UTVCONTROLON Aß ªª æ w Û uæfiß qµ æ Ø ƒ27 ߪª ª C Ì ˆ U F A qµ æ ßY q ßeTV qµ øÈ J C p G qµ æ ßeTVøÈ J AßY ˆ UTV VIDEO C ˆ U PHONO TUNER CD DAT MD TAPE TV DBS VIDEO 1 VTR 1 A VIDEO2 VTR2 Œ VIDEO 3 VTR 3 LD n Œ µ ø µL u qºsº ÿ pÆg CD º r n...

Page 69: ...MMODE HßÔ ße Ê n MONO C n µßYµL fl È nƃ G A O i H Óª n µ Øu H C n Ï _ fl È nº Æ A A ˆ C p G Ø Jq x øÈ J º r_ Æ Tª øÈ J Wvº Oß_ øT C p G Ô AßY ˆ U DIRECT A søÈ J n Wv C p Gº r µM AßY Ì Ì aœ Œ Wv C n FM PÆ ºsº qµ ÿÆ Tª Oß_ bqµ æ Œø æ M µ æ W J F PÆ ºsº ÿ C p GøÈ J Wv q Œ Û ø j øÈ J º N Q æ à µ ÒæA Œ ø j º C µ ø ø j p U G FM G50 kHz j AM G10kHz j nßÔ 9kHz jÆ ƒ23 y q x H µ ºsº ø p G æDn q x Wv A i µ ...

Page 70: ... UTUNER C ßY J W à µ q x C 2 J nµ ß Ø fi w q x C p G Ÿ ºÙ x Jw q x Ë k A Wz ß J w q x w ø ª C 3 œ _ ˆ U DPC MODE I G INDEX øO C 4 p U z A Œº r B z Ó ªsß q xØ fi W Ÿ J ˆ U Œ HøÔæ r AµM ˆ U H º Ï U Ïm CQ J Æ A i ˆ U Œ X Ï Û ß M ß I ß C q xØ fißY i s J C p Gß ø Fæfiß œ _ ˆ U Œ nßÔ r _ CµM AøÔæ øT r C 5 œ _ BJ2 Ï4 Aµ Lq x tØ fi WŸ C i H Ø fi W Ÿ Œ W v C ˆ U DISPLAY AßY N b W v MØ fi W Ÿ ß C yØ fi q x...

Page 71: ...W Ÿ MØ fi W Ÿ ß C ø µ Aºv ª µ æ ˆ Û q s µ Ê ø µ Aºv Œø Ï o Ê W C z µs µ Òt Œ Mø µ Aºv Œ Ê un b µ æ WøÔæ n H A K i H µ b U Ê Wæfiß ø A Ò ºÀ i Êø µ Aºv MsøË C lßQ Œ Ø e A Tª S ß Ê s µ ß Ì C ç J n W H y c Jµ W H y ø b n Wœ a ŒgßApÆg i Œ µ æ ø b d a Aº r n W œ a DAT Œ gßA p Æg MD W C z dÆy ADAT Æy AMD Æy a ª Æ C 1 ˆ U Ø HøÔæ nø Ê C 2 N Ê w Ò t Œ A C p b CD æ À iCD pÆg C 3 bø µÆy À œ a C nÆ A æ ø µq C ...

Page 72: ... a C 4 lø æ ø ºvæfiß AµM Ò nø ø ºv a ŒpÆgºv C ø ºv a ŒpÆgºv Æ ißÛ µT b Q J P µ T _ I A ˆ U L Ø p CD l Ò µ C øÔ Ê n µßYø b Ï µT W C n Ï _ø Ï Òµ H nµÆ A ˆ U Ê Œ Ø C œ Œ Œ Ø v w Æ æ iß µ æ w b w Æ a ˆ º q C q µ Æ A ˆ Uªª æ W SLEEP C C ˆ U SLEEP AÆ ßYß p U C b z w FÆ ß A ßY t H C i a wÆ ˆ USLEEP AµM Œº r B z Ó Œ w nÆ C ŒØv wÆ w j 1 ƒ C i w à Ï5 pÆ C i À d µ æ ˆ º q e ælÆ ˆ U SLEEP C ælÆ ßY X Û æ C SLE...

Page 73: ...Œ SPEAKERS øÔæ æøÔæ n æ A B Aß_ h N Ø Ú o R Ù nƃ G C œ Œ Ù n n ı GENRE MODE SOUND FIELD ON OFF PROLOGIC MOVIE MUSIC1 MUSIC2 SPORTS GAME º PROLOGIC ENHANCED SMALLTHEATER LARGETHEATER MONOTHEATER SMALL HALL LARGE HALL KARAOKE ACOUSTIC ARENA STADIUM X n Œß Ò Ù nBz ƒ X µ ß C ß Ò Ù nµ ß ƒ X A Ï næ øÈ X C p ºv n œÆg µ ß Ò Ù n H i ʃ X C J j ºv œÆg Æ ƒ G C ªs y ÿ Ê n n Ò q ºv ºv Æ C i A p p µº U µTƃ G ...

Page 74: ...æfiß C ª ª p Û æ næ t Œ q M wªs DOLBY SUR ß Ò Ù n n ı Ë k C PRO LOGIC ENHANCED SMALL THEATER LARGE THEATER MONO MOVIE SMALL HALL LARGE HALL KARAOKE ACOUSTIC ARENA STADIUM GAME D E L A Y C E N T E R R E A R E F F E C T T O N E M O D E G E N R E PRO LOGIC MOVIE MUSIC 1 MUSIC 2 SPORTS GAME TONE µ øO DPC MODE TONE ON OFF º rBz Ó æ µ º ß e A M næ µ ßC µ Œ µ æ à Œ n µ C i æ Aß Ò Ù n n ı µ C 1 ˆ UTONEON ...

Page 75: ...ºÆ A ƒ18 ß Úß Ò M fiøË Ù n à ŒÆƒ G ª C 1 œ _ ˆ U DPC MODE SUR øO I G C 2 Œº r B z Ó HøÔæ z n º C 3 Œº r B z Ó æ º q C æ º K a s x U C µ p Gµ Y nıß F s æ A h e wßYQsß æ N C ß wªs n ı Ï _ uºt w 1 p G q µ AßY ˆ U POWER H ˆ º q C 2 ˆ ÌSOUNDFIELDON OFF ˆ UPOWER C ßSURRCLEAR T X ßY n ı C ...

Page 76: ... H n ı C 2 ˆ UGENRE HøÔæ PROLOGIC n ı C 3 œ _ ˆ UCENTERMODE n º X Û æ C U Ì HøÔæ º C TONE ON OFF DPC MODE GENRE MODE SOUND FIELD ON OFF CENTER MODE SUR Ù n øO º rBz Ó CENTER LEVEL œ X TEST TONE DIGITAL PROCESSING CONTROL DPC MODE MODE GENRE 0 9 p P r REAR LEVEL œ X z p G e M næ µL næ e M næ µL næ e M næ A M p næ e M næ A M µ Û e n æ næ œ e næ øÈ X WD n C e næ øÈ X W D n e næ øÈ X WD ßCµ p næ Ø Õ ß...

Page 77: ... e BALANCE ø Ó i Ê æ C n æ næ q Æ A ˆ Uªª æ W CENTERLEVEL œ Œ X C n æ næ q Æ A ˆ Uªª æ W REARLEVEL œ Œ X C 3 ˆ Uªª æ W TESTTONE H ˆ º µ C i H ß n næ æ æ MASTERVOLUME C æ µøÆ µø næ øÈ X i H œ Ù nƃ GßÛ j µø Æ C µø Æ i b15 Ï30 Ì ms d Ú H5 Ì B i i Ê æ C p b j à À Œ næ A Œ næ zÆy Ï ªÆ A µu µø Æ C 1 l Ò Œß Ò Ù nsX ÿ C 2 ˆ U DPC MODE SUR øO I G C 3 Œº rBz Ó øÔæ µøÆ C µøÆ ßY X Û æ C 4 Œº rBz Ó øÔæ µøÆ C ...

Page 78: ...v Ò tæ F C n Ω Ï uºt wÆ Ω œ _ W zµ ß C ø œ Œ Ê PÆ æfiß t Ê I æfiß Ì z ø b Œ ÿ ΩÆ A iº Æ t æfiß t Ê C 1 ˆ Ì BACKGROUND I C 2 PÆ ˆ U z ø n Œ Ê º r U Ì M U C FVISUAL POWER A TV VIDEO ACHPRESET œ X AANTTV VTR A D SKIP A A9 Ap A0 A AP A r C p G n l b dÆy Wø µ PÆ n i CD πp Æg C ˆ ÌBACKGROUNDÆ ˆ U4 Œ5 A P Æ ˆ Ur C º r ßO Œ ÛøÔæ p U Ø G Sony ø π æ O Œ VTR 1 A2 Œ3 wæfiß C o w ßO Ì ÛBeta A8 P MVHS C BACKGRO...

Page 79: ...Ω N A C uØ ßæ fl Lªª æπ H π C 6 ˆ ULEARN C b ˆ º LEARN æ fl øO ß A z K ißQ ŒΩs Fµ ß h Ó L Ê C µπø H πΩsµ ß Æ b ˆ Ì µ æ ªª æπ W r Æ A PÆ ˆ U t ªª æπ W ø µ ºv C p G H πΩsµ ßQ A hΩ À d U U C U µ G LEARN øO p Gßπ I G A o Oπq Sπq F AΩ ßÛ πq C p G b B J3 Œ4 ALEARN øO Œ I G A o K O z Zµo Õ CΩ ˆ U ß M Ωs H πµ ß z M º H πµM q Y l s i ÊΩsµ C ªª æπ Ò m Z ª C w œ u Z5 Q C b i Ê B J2 M3 Ì A Oß_ ºØ b1 ƒ Æ æfiß ...

Page 80: ...A Ì º ƒ18 C æA Ì a æ næ µ q ƒ19 C Ø i Êø µ ºv C À d Ê Oß_s µ øT C Œ Ø øÔæ øT H Ê C næ S n µ Œ n µ Ù ßC C n ı Ø C øÔæ æA Ì º ƒ18 C æA Ì a æ n næ µ q ƒ19 C Tª Oß_ v F n ı Ø C Ø JµL u qºsº q x C À d Oß_ µß u C æ u A nÆ is µ u C q x H j Æz Œ ø JÆ C ßÔ Œ µ ø C Tª ø j Oß_ w ø T Œ ø J AMq xÆ ƒ11 M23 C Sw q x A Œw q xQM Œ yw q x Ø i Ê ø Æ C i Ê q x w ƒ11 C Tª Oß_ß º w Û ßNORMALMODE ÌßQ Œ ø Ø i Ê ø Æ C Ø Ú...

Page 81: ...75º A ø Ê n G18 3dBf A4 5 µV fl È n G38 3dBf A45 µV 11 2dBf A2µV øW fl W Ê n G76dB fl È n G70dB Ê n G0 3 H fl È n G0 5 H 1kHzÆ 45dB 30 Hz 15 kHz dB 400kHzÆ 60dB 10 kHz j G 530 1710kHz 9 kHz j G 531 1710kHz Ù ß Œ u 50dB m 1 000kHz Œ 999kHzÆ 8º 20 Hz 20 kHz A 120W 120W 1kHzÆ 8º A0 8 Hø i Ø u 120W W D 120W 50W W D 160 W 160 W A8º 225 W 225 W A4º p Û0 3 H PHONO GRIAAß ø u 0 5 dB CD ATAPE ADAT MD A VID...

Page 82: ...WIDEº A i R aµo ßß Ò Ù nƃ G C PHANTOM º p G ø M I næ A µL næÆ A øÔ PHANTOM º œ Œ C WD nµ N ø næøÈ X C 3 CH LOGIC 3 W D fiøË º p G ø M næ µL I næ Æ AßYøÔ3CHLOGICº C I W D n µ N ø næ øÈ X C ˆµL I næ A h i Ú o Ù n Æ ƒ G C µ øÆ q ø næ M I næ næ ß øÈ Ù n ø µÆ ßY sµ µøÆ C æ I næ ø µÆ A K i Ú o ÿ ı P C Ì I næ w À b p Œ µ Ò z ÏmÆ A i N µøÆ A Ì w À b j Œª z Ï mÆ A h N µøÆ µu C µ ø Œº r µøÈ Jq x Wv ÿ ø Ë k...

Page 83: ...Œ Û æ næ µq H C µ N p U ß aµo X G œ Œ næ tŒ NORMAL WIDE 3 CH LOGIC º µ Nƒ ƒÚ a ø ß A ø k M I næ ß µo X C µL næ tŒ PHANTOM º µ N Ê a ø M I næ øÈ X C 3 CH LOGIC 3 W D fiøË NORMAL WIDE º ºs Ô I A k PHANTOM ø A k I A k ø k ø ...

Page 84: ... µ W2 7 VIDEO1 µ W1 8 MIXOUT V WøÈ X 9 FRONTSPEAKERS A B e næ A B 0 IMPEDANCESELECTOR ß øÔ æ æ ACq u SWITCHEDACOUTLET ACq Æy Æy ߌ M Ïm A œ Œ ÿ ß C SURROUNDSPEAKERS CENTER Ù n næ SURROUNDSPEAKERS REAR Ù n næ TAPEMONITOR œ a µ æ DAT MD DAT gßA pÆg CD pÆg PHONO æ 1 2 3 45 6 7 8 9 0 O ª ...

Page 85: ... æ qµ æ qµ æ qµ æ qµ æ qµ æ qµ æ ø æ qµ æ qµ æ X X Ø øÔæ œ a Ë V aRMS Ø dÆy C M RMS µ ß a RMS Ø dÆy C µ l sµ ß a RMS Ø dÆy C M0 9 _ œ ŒÆ A ißÔ WD C øÔæ øÈ J H Gqµ øÈ J H Œø ºvøÈ J H C Œ ˆ º q C qµ A NøÈ J Ï ßTV qµ A Nªª æ w æfiß qµ æ º C øÔæ WDøÈ Jº A Œ G º r º w C øÔæ pºv Œw WD C ßÔ pºv Ï m C p M j ºv C øE µe µe PinP Ø C b e M b Ò t W D ı e M ı C u løÔæ øÈ X H Gq µ ÿ Œø æ H C O æ µ æ D µ q C p G ...

Page 86: ... 18 A24 NORMAL ø º 24 PHANTOM º 24 3CHLOGIC 3 W D fiøË º 24 WIDE ºe º 24 µ ø 10 A24 Óæ WŸ s ANTTV VTR D SKIP u qµ ø ºv ı V 20 BACKGROUND I 20 BASS BOOST ßC µ j 9 CD pÆg 9 A10 CENTERLEVEL W D q 19 CENTER MODE º 18 CH PRESET W D w 27 DAT MD DAT gßA pÆg 9 A10 DIGITALPROCESSING CONTROL DPC º r B z Ó 12 A17 A19 DIRECT Ë V 10 DISPLAY 11 A12 DPC MODE DPC º 12 A 17 A19 TONE ON OFF µ ˆ 17 FM MODE Wº 10 GEN...

Page 87: ...RECT v 1 0 2 5 0 v SHIFT øÔæ A v TUNER 7 TUNER v TUNING INDEXSELECT v v øÔæ FM v TUNING INDEXSELECT nƒ ƒÚ yÆ FM AM DISPLAY øÔæ Wv v v SOUNDFIELD SOUNDFIELD v SOUNDFIELD ON OFF VIDEO2 MODE GENRE TUNER v v PRESETTUNING øÔæ Wv DISPLAY øÔæ PROLOGIC M fiøË øÔæ PROLOGIC Œ ENHANCED j øÔæ Ê 1 G Ò iCD 2 G ø ºv a l Ò µ CD v CD æ q v VIDEO1 v v l Òºv ø æ q v LD æ q v l Ò t ...

Page 88: ...Sony Corporation Printed in Malaysia ...

Reviews: