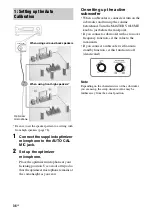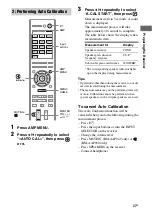
23
GB
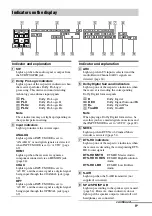
Co
nn
ecti
on
s
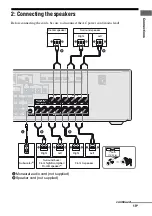
4a: Connecting the audio
components
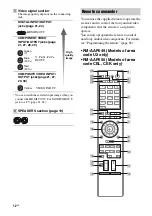
The following illustration shows how to
connect a Super Audio CD player, CD player,
CD recorder and DIGITAL MEDIA PORT
adapter. Before connecting cords, be sure to
disconnect the AC power cord (mains lead).
* You can enjoy the images from the components
connected to the DIGITAL MEDIA PORT adapter
when you connect the TV to the receiver.
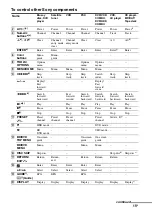
Notes on connecting DIGITAL
MEDIA PORT adapter
• When connecting the DIGITAL MEDIA
PORT adapter, be sure the connector is
inserted with the arrow mark facing towards
the arrow mark on the DMPORT jack.
• Be sure to make DMPORT connections
firmly, insert the connector straight in.
• As the connector of the DIGITAL MEDIA
PORT adapter is fragile, be sure to handle
with care when placing or moving the
receiver.
• Do not connect an adapter other than the
DIGITAL MEDIA PORT adapter.
• Do not connect or disconnect the DIGITAL
MEDIA PORT adapter while the receiver is
turned on.
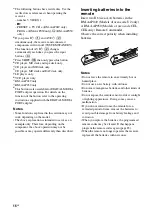
To detach the DIGITAL MEDIA
PORT adapter from DMPORT
jack
Press and hold both sides of the connector and
then pull out the connector.
AM
EZW-T100
ANTENNA
IN 3
IN 2
IN 1
IN
OPTICAL
MONITOR
OUT
AUDIO
OUT
AUDIO
IN
AUDIO
IN
VIDEO
IN
Y
P
B
/C
B
P
R
/C
R
L
R
OPTICAL
SAT/
CATV
IN
SAT/CATV
SUBWOOFER
AUDIO
IN
VIDEO
IN
BD
AUDIO
OUT
VIDEO
OUT
AUDIO
IN
VIDEO
IN
VIDEO 1
COMPONENT VIDEO
ASSIGNABLE (INPUT ONLY)
TV
TV
DIGITAL
SURRO
FRO
BI-AM
SA-CD/CD/CD-R
DMPORT
DC5V
0.7A MAX
MONITOR
AUDIO
OUT
AUDIO
IN
VIDEO
OUT
Super Audio
CD player,
CD player,
CD recorder
A
Audio cord (not supplied)
B
Video cord (not supplied)
A
DIGITAL MEDIA
PORT adapter
B
TV
*
DMPORT
DC5V
0.7A MAX
2
1

