background image

83

GB

D:\NORM'S JOB\SONY HA\SO0129\STR-DH820_PMRF_01\4266497112_GB\GB06REM_STR-
DH820-CEL.fm

masterpage: Right

STR-DH820

4-266-497-

11

(2)


Using the Rem

o

te Contr

o

l

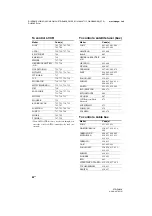
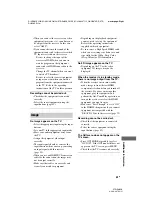
To control a TV

To control an LD player

To control a Video CD player

Maker

Code(s)

SONY

501, 502

AIWA

501, 536, 539

AKAI

503

AOC

503

CENTURION

566

CORONADO

517

CURTIS-MATHES

503, 551, 566, 567

DAYTRON

517, 566

DAEWOO

504, 505, 506, 507, 
515, 544

FISHER

508, 545

FUNAI

548

FUJITSU

528

GOLDSTAR/LG

503, 512, 515, 517, 
534, 544, 556, 568

GRUNDIG

511, 533, 534

HITACHI

503, 513, 514, 515, 
517, 519, 544, 557, 
571

ITT/NOKIA

521, 522

J.C.PENNY

503, 510, 566

JVC

516, 552

KMC

517

MAGNAVOX

503, 515, 517, 518, 
544, 566

MARANTZ

527

MITSUBISHI/MGA

503, 519, 527, 544, 
566, 568

NEC

503, 517, 520, 540, 
544, 554, 566

NORDMENDE

530, 558

NOKIA

521, 522, 573, 575

PANASONIC

509, 524, 553, 559, 
572

PHILIPS

515, 518, 557, 570, 
571

PHILCO

503, 504, 514, 517, 
518

PIONEER

509, 525, 526, 540, 
551, 555

PORTLAND

503

QUASAR

509, 535

RADIO SHACK

503, 510, 527, 565, 
567

RCA/PROSCAN

503, 510, 523, 529, 
544

SAMSUNG

503, 515, 517, 531, 
532, 534, 544, 556, 
557, 562, 563, 566, 
569

SAMPO

566

SABA

530, 537, 547, 549, 
558

SANYO

508, 545, 546, 560, 
567

SCOTT

503, 566

SEARS

503, 508, 510, 517, 
518, 551

SHARP

517, 535, 550, 561, 
565

SYLVANIA

503, 518, 566

THOMSON

530, 537, 547, 549

TOSHIBA

535, 539, 540, 541, 
551

TELEFUNKEN

530, 537, 538, 547, 
549, 558

TEKNIKA

517, 518, 567

WARDS

503, 517, 566

YORK

566

ZENITH

542, 543, 567

GE

503, 509, 510, 544

LOEWE

515, 534, 556

VIZIO

576, 577

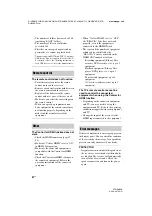
Maker

Code(s)

SONY

601, 602, 603

PIONEER

606

Maker

Code(s)

SONY

605

Maker

Code(s)

continued

Summary of Contents for STR-DH820

Page 1: ... 4 266 497 11 2 filename D NORM S JOB SONY HA SO0129 STR DH820_PMRF_01 4266497112_GB GB01COV_STR DH820 CEL fm masterpage Right 2011 Sony Corporation 4 266 497 11 2 Multi Channel AV Receiver Operating Instructions STR DH820 ...

Page 2: ... of the unit Record these numbers in the space provided below Refer to them whenever you call upon your Sony dealer regarding this product Model No _______________ _____________________________ _________ Serial No ________________ _____________________________ _________ This symbol is intended to alert the user to the presence of uninsulated dangerous voltage within the product s enclosure that ma...

Page 3: ...ference by one or more of the following measures Reorient or relocate the receiving antenna Increase the separation between the equipment and receiver Connect the equipment into an outlet on a circuit different from that to which the receiver is connected Consult the dealer or an experienced radio TV technician for help CAUTION You are cautioned that any changes or modifications not expressly appr...

Page 4: ...nan Minato ku Tokyo 108 0075 Japan The Authorized Representative for EMC and product safety is Sony Deutschland GmbH Hedelfinger Strasse 61 70327 Stuttgart Germany For any service or guarantee matters please refer to the addresses given in separate service or guarantee documents For customers in Australia Disposal of Old Electrical Electronic Equipment Applicable in the European Union and other Eu...

Page 5: ...eet Apple performance standards Apple is not responsible for the operation of this device or its compliance with safety and regulatory standards Please note that the use of this accessory with iPod or iPhone may affect wireless performance x v Color x v Colour and x v Color x v Colour logo are trademarks of Sony Corporation BRAVIA is a trademark of Sony Corporation PlayStation is a registered trad...

Page 6: ...Tuning 52 Receiving RDS broadcasts 53 Europe Australia and Taiwan models only Enjoying Surround Sound Selecting the sound field 54 Using the SOUND OPTIMIZER 58 Resetting sound fields to the default settings 58 BRAVIA Sync Features What is BRAVIA Sync 59 Preparing for the BRAVIA Sync 59 Playing back equipment with one touch operation One Touch Play 60 Enjoying the TV sound from the speakers connect...

Page 7: ...l 80 Resetting the remote control 85 Additional Information Precautions 85 Troubleshooting 86 Specifications 93 Index 96 Supplied accessories Operating Instructions this manual Quick Setup Guide GUI Menu List FM wire antenna aerial 1 AM loop antenna aerial 1 Remote control 1 RM AAP061 USA and Canada models only RM AAP062 Other models R6 size AA batteries 2 Optimizer microphone ECM AC2 1 ...

Page 8: ...ix manganese batteries and other kinds of batteries Do not expose the remote control sensor to direct sunlight or lighting apparatuses Doing so may cause a malfunction If you do not intend to use the remote control for an extended period of time remove the batteries to avoid possible damage from battery leakage and corrosion When you replace or remove the batteries the programmed codes may be clea...

Page 9: ...ear PCM signals are input the sound may suddenly increase when you switch to other formats This function does not work in the following cases Linear PCM signals with a sampling frequency of more than 48 kHz are being received Dolby Digital Plus Dolby TrueHD DTS 96 24 DTS HD Master Audio or DTS HD High Resolution Audio signals are being received E Display panel page 10 F Remote control sensor Recei...

Page 10: ...input through the OPTICAL jack page 62 ARC TV input is selected and the Audio Return Channel ARC signals are detected E Dolby Digital Surround indicator Lights up the respective indicator when the receiver is decoding the corresponding Dolby Digital format signals D D EX D TrueHD Dolby Digital Dolby Digital Surround EX Dolby Digital Plus Dolby TrueHD F NEO 6 Lights up when DTS Neo 6 Cinema Music d...

Page 11: ...er performs Dolby Pro Logic processing This matrix surround decoding technology can enhance input signals PL PL II PL IIx PL IIz Dolby Pro Logic Dolby Pro Logic II Dolby Pro Logic IIx Dolby Pro Logic IIz Note These indicators may not light up depending on the speaker pattern setting S Lights up when the disc being played back contains an LFE Low Frequency Effect channel and the LFE channel signal ...

Page 12: ...AL IN jack page 27 B ANTENNA section FM ANTENNA jack page 33 AM ANTENNA terminals page 33 C Controls jacks for Sony equipment and other external equipment IR REMOTE IN OUT jacks page 66 D SPEAKERS section page 21 E AUDIO INPUT OUTPUT section AUDIO IN OUT jacks page 23 32 AUDIO OUT jacks page 21 F VIDEO AUDIO INPUT OUTPUT section page 23 27 28 30 AUDIO IN OUT jacks VIDEO IN OUT jacks AUDIO OUT jack...

Page 13: ...e this receiver and other equipment The remote control is pre programmed to operate Sony audio video equipment You can also program the remote control to operate non Sony equipment For details see Programming the remote control page 80 RM AAP061 USA and Canada models only RM AAP062 Other models G COMPONENT VIDEO INPUT OUTPUT section page 23 27 28 Y PB PR IN OUT jacks Green Y Blue PB Red PR Remote ...

Page 14: ...ons to select the TV channels 1 Press SHIFT V then press to select the channel entry mode either one or two digit Press TV W then press to select the TV channel entry mode 101 Press SHIFT V then press 10 to select track numbers over 10 ENT MEM1 Press SHIFT V then press ENT MEM to enter the value after selecting a channel disc or track using numeric buttons store a station during tuner operation CL...

Page 15: ...et the receiver to turn off automatically at specified time Each time you press SLEEP the display changes cyclically as follows 0 30 00 t 1 00 00 t 1 30 00 t 2 00 00 t OFF Tip To check the remaining time before the receiver turns off press SLEEP The remaining time appears on the display panel If you press SLEEP again the Sleep Timer will be canceled M BD DVD TOP MENU1 MENU1 Displays the menu or on...

Page 16: ...rogram guide T AUTO CAL Press SHIFT V then press AUTO CAL to perform Auto Calibration Note This button is not available when the receiver is in GUI MODE DISPLAY1 Views information on the display panel RM AAP061 only Press TV W then press DISPLAY to display information of TV Info Text reveal Press TV W then press to display information such as current channel number and screen mode Press TV W then ...

Page 17: ...ce B AV 1 z z z z z z z z z z z z D Numeric buttons z z z z z z z z z z z z z 10 z z z z z z z z z z z ENT MEM z z z z z z zd z z z z z CLEAR z z z zf Text z z z F Color buttons z zc z z z z H TOOLS OPTIONS z z z z z z z z I MENU HOME z z z z z z z z z z J z z z z z z z z ze z z z FOLDER z z z z z zf z z z REPEAT zc z ze z z z SHUFFLE z z m TUNING M TUNING z z z z z z z z z z z zg N X x z z z z z ...

Page 18: ...To output multi channel digital audio check the digital audio output setting on the connected equipment For a Blu ray Disc player check that Audio HDMI Dolby Digital Coaxial Optical and DTS Coaxial Optical are set to Auto Dolby Digital and DTS respectively as of September 2010 For a PlayStation 3 check that BD DVD Audio Output Format HDMI is set to Bitstream with system software version 3 5 For de...

Page 19: ...use the surround back speakers and the front high speakers simultaneously 5 1 channel speaker system To fully enjoy theater like multi channel surround sound requires five speakers two front speakers a center speaker and two surround speakers and a subwoofer 7 1 channel speaker system using surround back speakers You can enjoy high fidelity reproduction of DVD or Blu ray Disc software recorded sou...

Page 20: ...ngles A should be the same When you connect a 7 1 channel speaker system with two front high speakers place the front high speakers at an angle between 22 to 45 at least 1 meter 3 3 feet directly above the front speakers When you connect a 6 1 channel speaker system place the surround back speaker behind the listening position Since the subwoofer does not emit highly directional signals you can pl...

Page 21: ...TR DH820 4 266 497 11 2 Connections 2 Connecting the speakers 10 mm 13 32 1 2 3 4 Right Left Right AMonaural audio cord not supplied BSpeaker cord not supplied Left Right Center speaker B Left B B Surround speaker B A Surround back Front high Bi amplifier Front B speaker Front A speaker A Subwoofer continued ...

Page 22: ...e Speaker Settings menu page 35 Notes Before connecting cords be sure to disconnect the AC power cord mains lead Before connecting the AC power cord mains lead make sure that metallic wires of the speaker cords are not touching each other within the SPEAKERS terminals After you have install and connect your speaker be sure to select the speaker pattern from the Speaker Settings menu page 34 If you...

Page 23: ...o a TV You can operate this receiver using a GUI Graphical User Interface if you connect HDMI TV OUT jack to a TV ARC TV A Audio signals Video signals Audio video signals B C D E or or AOptical digital cord not supplied BAudio cord not supplied CComponent video cord not supplied DVideo cord not supplied EHDMI cable not supplied Sony recommends that you use an HDMI authorized cable or Sony HDMI cab...

Page 24: ...z 44 1 kHz 48 kHz and 96 kHz sampling frequencies The receiver has a video conversion function For details see Function for conversion of video signals page 31 When you connect the audio output jack of the TV to the TV IN jacks of the receiver to output the TV sound from the speakers connected to the receiver set the sound output jack of the TV to Fixed if it can be switched between either Fixed o...

Page 25: ...e image resolution of the playback equipment to more than 720p 1080i to enjoy High Bitrate Audio DTS HD Master Audio Dolby TrueHD The image resolution of the playback equipment may need to be at certain settings before you can enjoy Multi Channel Linear PCM Refer to the operating instructions of the playback equipment To enjoy 3D images connect 3D compatible TV and video equipment Blu ray Disc pla...

Page 26: ...266 497 11 2 If you want to connect several digital equipment but cannot find an unused input See Using the sound images from other inputs Input Assign page 63 Converting video signals This receiver is equipped with a function for converting video signals For details see Function for conversion of video signals page 31 ...

Page 27: ...l cord not supplied FAudio cord not supplied Recommended connection Alternative connection When you connect the equipment equipped with an OPTICAL jack set the Input Assign in the Input Option menu page 63 Note Be sure to change the default setting of the BD DVD input button on the remote control so that you can use the button to control your DVD player For details see Programming the remote contr...

Page 28: ...mends that you use an HDMI authorized cable or Sony HDMI cable BComponent video cord not supplied CVideo cord not supplied DOptical digital cord not supplied EAudio cord not supplied Recommended connection Alternative connection Connecting a satellite tuner cable TV tuner B Audio video signals Audio signals Satellite tuner Cable TV tuner or or Video signals A C D E ...

Page 29: ...erpage Right STR DH820 4 266 497 11 2 Connections AHDMI cable not supplied Sony recommends that you use an HDMI authorized cable or Sony HDMI cable Connecting a PlayStation 3 PlayStation 3 A Audio video signals Connecting an iPhone iPod for video contents AApple composite AV cable not supplied A ...

Page 30: ...rized cable or Sony HDMI cable DAudio video cord not supplied If you want to record you must make this connection page 50 Note Be sure to change the default setting of the VIDEO 1 input button on the remote control so that you can use the button to control your DVD recorder For details see Programming the remote control page 80 Connecting other equipment DVD recorder VCR A Camcorder video game D A...

Page 31: ...storted horizontally or no image can be seen If you are using an image improvement circuitry with your VCR it may impact the video signal conversion It is recommended to turn off this function on your VCR Converted HDMI image output does not support x v Color x v Colour Deep Color Deep Colour and 3D HDMI video signals cannot be converted to component video signals and video signals The converted v...

Page 32: ...rpage Left STR DH820 4 266 497 11 2 4b Connecting the audio equipment Connecting a Super Audio CD player CD player MD deck Tape deck Super Audio CD player CD player AAudio cord not supplied A MD deck Tape deck A Connecting an iPhone iPod USB device AUSB cable not supplied iPhone iPod USB device A ...

Page 33: ... Be sure to fully extend the FM wire antenna aerial After connecting the FM wire antenna aerial keep it as horizontal as possible 6 Connecting the AC power cord mains lead Connect the AC power cord mains lead to a wall outlet Note Be sure to turn the receiver on when the video and audio signals of a playback equipment are being output to a TV via the receiver If the power supply of the receiver is...

Page 34: ...rn off the receiver 2 Hold down 1 for 5 seconds The CLEARING appears on the display panel for a while then changes to CLEARED Changes or adjustments made to the settings are now reset to the defaults Setting the speakers Select the speaker pattern according to the speaker system which you are using 1 Press GUI MODE After GUI ON appears on the display panel for a while the GUI menu appears on the T...

Page 35: ...E After GUI ON appears on the display panel for a while the GUI menu appears on the TV screen Press MENU if the GUI menu does not appear on the TV screen 2 Press V v repeatedly to select Settings then press or b The Settings menu list appears on the TV screen 3 Press V v repeatedly to select Speaker then press or b 4 Press V v repeatedly to select SB Assign then press or b 5 Press V v repeatedly t...

Page 36: ...DIRECT is selected The DCAC is designed to achieve proper sound balance for your room However you can adjust the speaker levels manually according to your preference For details see Test Tone page 70 Before you perform Auto Calibration check the following items Set up and connect the speakers page 19 21 Connect only the supplied optimizer microphone to the AUTO CAL MIC jack Do not connect any othe...

Page 37: ...t front high speakers select the speaker pattern that has front high speakers 5 x x or 4 x x each time you perform Auto Calibration Otherwise the characteristics of the front high speakers cannot be measured 2 Connect the supplied optimizer microphone to the AUTO CAL MIC jack 3 Set up the optimizer microphone Place the optimizer microphone at your seating position Use a stool or tripod so that the...

Page 38: ...ppears on the TV screen 3 Press V v repeatedly to select Auto Cal then press or b 4 Press B b repeatedly to select Standard then press The calibration type is automatically set to Engineer 5 Press to select START 6 The measurement starts in five seconds The measurement process will take approximately 30 seconds with a test tone When the measurement ends a beep sounds and the screen switches Note I...

Page 39: ...nding on the position of the optimizer microphone and speakers and the shape of the room It is recommended that you apply the measurement results However you can change those settings in the Speaker Settings menu Save the measurement results first then try to change the settings To cancel Auto Calibration The Auto Calibration function will be canceled when you perform the following during the meas...

Page 40: ...aker settings and perform the Auto Calibration again Error Code 32 None of the speakers were detected Make sure that the optimizer microphone is connected properly and perform the Auto Calibration again If the optimizer microphone is connected properly but the error code still appears the optimizer microphone cable may be damaged Error Code 33 None of the front speakers are connected or only one f...

Page 41: ... displayed 2 Press GUI MODE After GUI ON appears on the display panel for a while the GUI menu appears on the TV screen Press MENU if the GUI menu does not appear on the TV screen 3 Press V v repeatedly to select a menu you want then press or b to enter the menu The menu item list appears on the TV screen Example When you select Input 4 Press V v repeatedly to select the menu item you want to adju...

Page 42: ... menu item list appears on the TV screen Example When you select Input 3 Press TOOLS OPTIONS while the menu item list is displayed The option menu appears 4 Press V v repeatedly to select the option menu item you want then press or b 5 Press V v repeatedly to select the parameter you want then press To exit the option menu Press MENU Menu icon Description Input Selects the input source equipment c...

Page 43: ...e BD DVD jack GAME PlayStation 3 etc connected to the GAME jack SAT CATV Satellite tuner etc connected to the SAT CATV jack VIDEO 1 VIDEO 2 VCR etc connected to the VIDEO 1 or VIDEO 2 jack TV TV connected to the TV jack MD TAPE MD deck Tape deck etc connected to the MD TAPE jack SA CD CD Super Audio CD or CD player etc connected to the SA CD CD jack 4 Turn on the equipment and start playback 5 Pre...

Page 44: ...ent press the button and release it immediately To activate the muting function Press MUTING or The muting function will be canceled when you do the following Press MUTING or again Increase the volume Turn off the receiver Perform Auto Calibration To avoid damaging your speakers Before you turn off the receiver be sure to turn down the volume level You can enter a name of up to 8 characters for in...

Page 45: ...ftware before using it Notes Sony cannot accept responsibility in the event that data recorded to iPod iPhone is lost or damaged when using an iPod iPhone connected to this receiver This product has been designed specifically to work with iPod iPhone and has been certified to meet Apple performance standards Compatible iPod iPhone models iPhone 3GS iPhone 3G iPhone iPhone 4 iPod touch 1st generati...

Page 46: ...ting the iPhone iPod control mode page 46 2 Press to select iPhone iPod 3 Select the content you want from the contents list then press The selected content starts playback and the information of music video contents appears on the TV screen Note The video signals from iPhone iPod are up converted on this receiver and then viewed on your TV depending on the status of the video signal output For de...

Page 47: ... operation To avoid data corruption or damage to the iPhone iPod turn the receiver off when connecting or removing the iPhone iPod iPhone iPod message list REPEAT SHUFFLE m M x X B b N V v B b RETURN MENU USB SHIFT Press Operation N Starts play X x Pauses play m M Fast reverses or forwards Goes to the previous next file B b Skips to the previous next album b Enters the selected item MENU RETURN B ...

Page 48: ...ways be ensured even when using these USB devices Some of these USB devices may not be available for purchase in certain areas When formatting the above models be sure to format using the model itself or the dedicated formatting software for that model When connecting a USB device to the receiver be sure to connect after the display Creating Library or Creating Database on the USB device has disap...

Page 49: ...upplied with the USB device to be connected Refer to the operating instructions supplied with the USB device to be connected for details on the operation method Do not connect the receiver and the USB device through a USB hub When the USB device is connected Reading appears It may take about 10 seconds before Reading appears depending on the type of USB device connected When the USB device is conn...

Page 50: ...the playback equipment for playing Example 1 audio recording Tune to the radio station you want to record Example 2 video recording Insert the video tape you want to copy into the VCR 3 Prepare the recording equipment Example 1 audio recording Insert a blank MD or tape into the recording deck and adjust the recording level Example 2 video recording Insert a blank video tape etc into the recording ...

Page 51: ...can from high to low The receiver stops scanning whenever a station is received In case of poor FM stereo reception 1 Tune in the station you want to listen to using Auto Tuning Direct Tuning page 51 or select the preset station you want page 52 2 Press TOOLS OPTIONS 3 Select FM Mode then press or b 4 Select MONO then press You can enter the frequency of a station directly by using the numeric but...

Page 52: ...ff the receiver 2 While holding down TUNING MODE press 1 on the receiver 3 Change the current AM tuning scale to 9 kHz or 10 kHz To reset the scale to 10 kHz or 9 kHz repeat the procedure above Note All preset stations will be erased when you change the tuning scale Presetting FM AM radio stations Preset Tuning You can store up to 30 FM and 30 AM stations as your favorite stations 1 Tune to the st...

Page 53: ...ion along with the regular programming signal This receiver offers convenient RDS features such as Program Service name display RDS is available only for FM stations Not all FM stations provide RDS service nor do they provide the same type of services If you are not familiar with the RDS services in your area check with your local radio stations for details Simply select a station on the FM band W...

Page 54: ...itch the audio of the selected input to 2 channel analog input This function enables you to enjoy high quality analog sources When using this function only the volume and front speaker level can be adjusted Note You cannot select A DIRECT when you select GAME and USB as input The Auto Format Direct A F D mode allows you to listen to high fidelity sound and select the decoding mode for listening to...

Page 55: ...of presence and depth x NEO6 CIN Neo 6 Cinema Performs DTS Neo 6 Cinema mode decoding A source recorded in 2 channel format is decoded into 7 channels You can take advantage of surround sound simply by selecting one of the receiver s pre programmed sound fields They bring the exciting and powerful sound of concert halls into your home x HALL Hall Reproduces the acoustics of a classical concert hal...

Page 56: ...on sound fields Depending on the speaker pattern settings some sound fields may not be available You cannot select PLIIx and PLIIz at the same time PLIIx is available only when the speaker pattern is set to a setting with surround back speaker s PLIIz is available only when the speaker pattern is set to a setting with front high speakers The sound fields for music and movie do not work in the foll...

Page 57: ... not correspond to the format For details refer to the operating instructions of the playback equipment b Signals with a sampling frequency of more than 96 kHz are played back at 96 kHz or 88 2 kHz Digital audio formats supported by the receiver Audio format Maximumnumber of channels Connection between the playback equipment and the receiver COAXIAL OPTICAL HDMI Dolby Digital 5 1 a a Dolby Digital...

Page 58: ...the sound level is optimized to suit your environment Press SOUND OPTIMIZER to select SOUND OP ON The Sound Optimizer function is activated The Sound Optimizer is set to on and off as you press SOUND OPTIMIZER Note This function does not work when A DIRECT is being used Resetting sound fields to the default settings Be sure to use the buttons on the receiver to perform this operation 1 Press 1 to ...

Page 59: ...is compatible with the Control for HDMI Easy Setting function If your TV is compatible with the Control for HDMI Easy Setting function you can set the Control for HDMI function of the receiver and playback equipment automatically by setting the Control for HDMI function on your TV page 59 If your TV is not compatible with the Control for HDMI Easy Setting function set the Control for HDMI function...

Page 60: ...n your TV be sure to turn on the TV and other connected equipment including the receiver first If the playback equipment cannot function after you have made the settings for Control for HDMI Easy Setting check the Control for HDMI setting on your TV If the connected equipment does not support the Control for HDMI Easy Setting but still supports the Control for HDMI then you need to set the Control...

Page 61: ...he receiver the sound will output from the TV speakers When you adjust the TV volume the System Audio Control function adjusts the receiver s volume simultaneously Notes If System Audio Control does not function according to your TV setting refer to the operating instructions of the TV When Ctrl for HDMI is set to ON the Audio Out settings in the HDMI Settings menu will set automatically based on ...

Page 62: ...tal and analog audio INPUT MODE When you connect equipment to both digital and analog audio input jacks on the receiver you can fix the audio input mode to either of them or switch from one to the other depending on the type of material you intend to watch 1 Turn INPUT SELECTOR on the receiver to select the input You can also use the input buttons on the remote control 2 Press INPUT MODE repeatedl...

Page 63: ...o another input when they are not currently being used After you have reassigned the input jacks you can use the input button or INPUT SELECTOR on the receiver to select the equipment you connected You can reassign the COMPONENT VIDEO and DIGITAL input jacks to other input if the default settings of the jacks do not correspond to your connected equipment Example When you connect the DVD player to ...

Page 64: ...put jacks be sure to set Ctrl for HDMI to OFF 1 Press GUI MODE Press MENU if the GUI menu does not appear on the TV screen 2 Select Settings then press or b The Settings menu list appears on the TV screen 3 Select HDMI then press or b 4 Select HDMI Assign then press or b 5 Select the HDMI jack you want to assign then press 6 Select the input name you want to assign then press Default setting Input...

Page 65: ...als To exit the menu Press MENU Notes Set the SB Assign to BI AMP before you perform Auto Calibration If you set the SB Assign to BI AMP the speaker level and distance settings of the surround back speakers and front high speakers become invalid and those of the front speakers are used Using multi zone features You can enjoy images and sounds from the equipment connected to the receiver in zone 2 ...

Page 66: ...6 497 11 2 Outputs sound from speakers in zone 2 using the receiver and another amplifier Making a zone 2 connection Main zone Zone 2 ZONE 2 VIDEO OUT TV A B C D D E STR DH820 C AAudio equipment BVideo equipment CIR repeater not supplied DSpeakers ESony Amplifier Receiver RM AAP061 RM AAP062 IR REMOTE IN ZONE 2 AUDIO OUT ...

Page 67: ...2 To exit the zone 2 operation Press ZONE then press 1 Tips Even when this receiver is in standby mode press 1 on the remote control to turned off this receiver the receiver in zone 2 remains turned on To turn off all receivers press 1 and AV 1 on the remote control at the same time SYSTEM STANDBY Only signals from equipment connected to the analog input jacks are output through the ZONE 2 OUT jac...

Page 68: ...s on the TV screen 3 Select the menu item you want then press Example When you select Auto Cal 4 Select the parameter you want then press To return to the previous screen Press RETURN EXIT O To exit the menu Press MENU Settings menu list Adjusting Settings V v b GUI MODE MENU RETURN EXIT O Settings menu Description Auto Cal Sets the speaker level or distance and makes the measurement automatically...

Page 69: ...eft right surround back left right subwoofer 1 Select the speaker on the screen for which you want to adjust the level then press 2 Select Lvl 3 Set the level of the selected speaker then press You can adjust the level from 10 0 dB to 10 0 dB in 0 5 dB intervals Note When one of the sound fields for music is selected no sound is output from the subwoofer if all the speakers are set to Large Howeve...

Page 70: ...o Large if you want to output the bass frequencies from that speaker On the other hand if you are using a large speaker but prefer not to have bass frequencies output from that speaker set it to Small If the overall sound level is lower than you prefer set all speakers to Large If there is not enough bass you can use the equalizer to boost the bass levels The surround back speakers will be set to ...

Page 71: ...tal signal STD is the standard setting and enacts light compression Therefore we recommend using the MAX setting This greatly compresses the dynamic range and lets you view movies late at night at low volumes Unlike analog limiters the levels are predetermined and provide a very natural compression x Distance Unit Lets you select the unit of measurement for setting distances FEET The distance is d...

Page 72: ...ity digital audio signals and analog audio signals to be played back with high quality sound AUTO 1 This function is available for lossy compression audio formats and analog audio signals AUTO 2 This function is available for Linear PCM signals as well as lossy compression audio formats and analog audio signals OFF Note This function works when 2CH ST A F D AUTO MULTI ST or HP 2CH is selected Howe...

Page 73: ...in the standby mode the receiver continuously outputs HDMI signals from the receiver s HDMI TV OUT jack AUTO When the TV is turned on while the receiver is in the standby mode the receiver outputs HDMI signals from the receiver s HDMI TV OUT jack Sony recommends this setting if you use a BRAVIA Sync compatible Sony TV This setting saves power in the standby mode when compared with the ON setting O...

Page 74: ...you select the input that you have assigned the HDMI input sound does not output from the TV x HDMI Assign Lets you reassign the HDMI input jacks For details see HDMI input assign page 64 System Settings menu You can customize the settings of the receiver x Auto Standby Lets you set the receiver switch to standby mode automatically when you do not operate the receiver or when there is no signals i...

Page 75: ...Press V v repeatedly to select the menu you want then press or b 4 Press V v repeatedly to select the parameter you want to adjust then press or b 5 Press V v repeatedly to select the setting you want then press To return to the previous display Press B or RETURN EXIT O To exit the menu Press MENU Note Some parameters and settings may appear dimmed on the display panel This means that they are eit...

Page 76: ...0 dB Surround left speaker levelb SL LEVEL SL 10 0 dB to SL 10 0 dB 0 5 dB interval SL 0 dB Surround right speaker levelb SR LEVEL SR 10 0 dB to SR 10 0 dB 0 5 dB interval SR 0 dB Surround back speaker levelb SB LEVEL SB 10 0 dB to SB 10 0 dB 0 5 dB interval SB 0 dB Surround back left speaker levelb SBL LEVEL SBL 10 0 dB to SBL 10 0 dB 0 5 dB interval SBL 0 dB Surround back right speaker levelb SB...

Page 77: ...interval e SR 3 00 m SR 9 10 Surround back speaker distanceb SB DIST SB 1 00 m to SB 10 00 m SB 3 3 to SB 32 9 0 1 m 1 inch interval e SB 3 00 m SB 9 10 Surround back left speaker distanceb SBL DIST SBL 1 00 m to SBL 10 00 m SBL 3 3 to SBL 32 9 0 1 m 1 inch interval e SBL 3 00 m SBL 9 10 Surround back right speaker distanceb SBR DIST SBR 1 00 m to SBR 10 00 m SBR 3 3 to SBR 32 9 0 1 m 1 inch inter...

Page 78: ...s Name Input page 53 Audio settings AUDIO Digital Legato Linear D L L D L L OFF D L L AUTO1 D L L AUTO2 D L L OFFi Synchronizes audio with video output A V SYNC HDMI AUTO 0 ms to 300 ms 10 ms interval 0 ms Digital broadcast language selection DUAL MONO MAIN SUB MAIN SUB MAIN Digital audio input assignment A ASSIGN For details see Using the sound images from other inputs Input Assign page 63 Video ...

Page 79: ...r channel FL FR CNT SL SR SB SBL SBR LH RH SW d You can only select this parameter if SP PATTERN is not set to a setting with surround back or front high speakers page 34 e You can only adjust the distance in 0 01 meter interval when you have performed the Auto Calibration and saved the measurement result f FEET for USA and Canada models g You can only select this parameter if your speaker is set ...

Page 80: ...station Index name does not appear when only blank spaces have been entered or it is same as the input name Stream information may not be displayed Note Character or marks may not be displayed for some languages Tip You cannot switch the display while GUI MODE is shown on the display panel Press GUI MODE repeatedly to select GUI OFF Programming the remote control You can customize the remote contr...

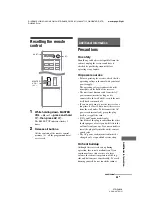
Page 81: ... in step 1 the batteries are weak Replace both batteries If the RM SET UP indicator flashes 5 times in quick succession while entering the numeric code an error has occurred Start again from step 1 Use the numeric codes in the tables below to program non Sony equipment and also Sony equipment that the remote control is normally unable to control Since the signal from the remote control received by...

Page 82: ...ENON 204 205 KENWOOD 206 207 208 209 NAKAMICHI 210 PANASONIC 216 PHILIPS 211 212 PIONEER 213 214 TECHNICS 215 216 YAMAHA 217 218 Maker Code s SONY 301 DENON 302 JVC 303 KENWOOD 304 Maker Code s SONY 307 308 309 Maker Code s SONY 310 311 312 PANASONIC 335 SAMSUNG 336 LG 337 Maker Code s SONY 313 314 315 Maker Code s SONY 401 402 403 BROKSONIC 424 DENON 405 HITACHI 416 JVC 415 423 MITSUBISHI 419 ORI...

Page 83: ...RANTZ 527 MITSUBISHI MGA 503 519 527 544 566 568 NEC 503 517 520 540 544 554 566 NORDMENDE 530 558 NOKIA 521 522 573 575 PANASONIC 509 524 553 559 572 PHILIPS 515 518 557 570 571 PHILCO 503 504 514 517 518 PIONEER 509 525 526 540 551 555 PORTLAND 503 QUASAR 509 535 RADIO SHACK 503 510 527 565 567 RCA PROSCAN 503 510 523 529 544 SAMSUNG 503 515 517 531 532 534 544 556 557 562 563 566 569 SAMPO 566 ...

Page 84: ...PS 729 730 731 PIONEER 729 RCA PROSCAN 722 729 730 731 741 747 SAMSUNG 742 743 744 745 SANYO 717 720 746 SHARP 748 749 TOSHIBA 747 756 Maker Code s SONY 801 802 803 804 824 825 865 AMSTRAD 845 846 BskyB 862 GENERAL ELECTRIC GE 866 GRUNDIG 859 860 HUMAX 846 847 THOMSON 857 861 864 876 PACE 848 849 850 852 862 863 864 PANASONIC 818 855 PHILIPS 856 857 858 859 860 864 874 NOKIA 851 853 854 864 RCA PR...

Page 85: ...ver The unit is not disconnected from the AC power source mains as long as it is connected to the wall outlet even if the unit itself has been turned off If you are not going to use the receiver for a long time be sure to disconnect the receiver from the wall outlet To disconnect the AC power cord mains lead grasp the plug itself never pull the cord USA and Canada models only One blade of the plug...

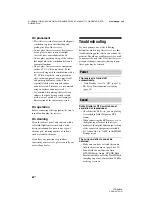
Page 86: ...controls with a soft cloth slightly moistened with a mild detergent solution Do not use any type of abrasive pad scouring powder or solvent such as alcohol or benzine If you have any questions or problems concerning your receiver please consult your nearest Sony dealer Troubleshooting If you experience any of the following difficulties while using the receiver use this troubleshooting guide to hel...

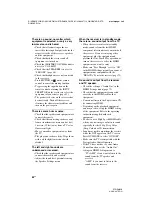
Page 87: ...scs have no Dolby Digital Surround EX flag even though the packages have Dolby Digital Surround EX logos Check that the subwoofer is connected correctly and securely Make sure you have turned on your subwoofer Depending on the selected sound field no sound will be available from the subwoofer When all speakers are set to Large and NEO6 CIN or NEO6 MUS is selected there is no sound from the subwoof...

Page 88: ...re connected correctly and securely Adjust the sound level parameters using the Speaker Settings menu When the receiver is in standby mode there is no sound output from the TV When the receiver enters into standby mode sound is from the last HDMI component selection before you turned off the receiver If you are enjoying other equipment play the equipment and perform the One Touch Play operation or...

Page 89: ...al with this receiver page 31 When you use an HDMI DVI conversion cable for the connection the image may not be output correctly Make sure that cables are correctly and securely connected to equipment Depending on the playback equipment you may need to set up the equipment Refer to the operating instructions supplied with each equipment Be sure to use a High Speed HDMI cable when you view images o...

Page 90: ...l RDS does not work Make sure that you are tuned to an FM RDS station Select a stronger FM station The RDS information that you want does not appear The service may be temporarily out of order Contact the radio station and find out whether they actually provide the service in question Europe Australia and Taiwan models only The sound is distorted Press MASTER VOL or 2 on the remote control repeate...

Page 91: ...llowing these guidelines Total folders on USB device 100 or less including ROOT folder Total files per folder 100 or less Erroneous display The data stored in the USB device may have been corrupted The character codes that can be displayed by this receiver are as follows Upper cases A to Z Lower case a to z Numbers 0 to 9 Symbols _ Other characters may not be displayed correctly The USB device is ...

Page 92: ...e Control for HDMI settings on the connected equipment Refer to the operating instructions of the connected equipment When Ctrl for HDMI is set to OFF the BRAVIA Sync does not work properly even if the equipment is connected to the HDMI IN jack The types and the number of equipment which can be controlled by the BRAVIA Sync are restricted in the HDMI CEC standard as follows Recording equipment Blu...

Page 93: ...s driven from 20 Hz 20 000 Hz rated 100 watts per channel minimum RMS power with no more than 0 09 total harmonic distortion from 250 milliwatts to rated output Amplifier section USA model1 Minimum RMS Output Power 8 ohms 20 Hz 20 kHz THD 0 09 100 W 100 W Stereo Mode Output Power 8 ohms 1 kHz THD 1 110 W 110 W Surround Mode Output Power2 8 ohms 1 kHz THD 10 150 W per channel Canada model1 Minimum ...

Page 94: ...put level FM tuner section Tuning range 87 5 MHz 108 0 MHz Antenna aerial FM wire antenna aerial Antenna aerial terminals 75 ohms unbalanced Intermediate frequency 10 7 MHz AM tuner section Tuning range Antenna aerial Loop antenna aerial Intermediate frequency 450 kHz Video section Inputs Outputs Video 1 Vp p 75 ohms COMPONENT VIDEO Y 1 Vp p 75 ohms PB 0 7 Vp p 75 ohms PR 0 7 Vp p 75 ohms 80 MHz H...

Page 95: ...dby mode 0 3 W When Ctrl for HDMI is set to OFF Dimensions width height depth Approx 430 mm 158 mm 322 6 mm 17 in 6 1 4 in 12 3 4 in including projecting parts and controls Mass Approx 8 5 kg 18 lb 12 oz Design and specifications are subject to change without notice Area Power requirements USA Canada Taiwan 120 V AC 60 Hz Europe Australia 230 V AC 50 60 Hz Halogenated flame retardants are not used...

Page 96: ... TV 23 USB device 32 video equipment 24 Control for HDMI 73 Crossover frequency 70 77 D DCAC DigitalCinemaAuto Calibration 36 Direct Tuning 51 Display panel 10 Distance Unit 71 77 Dolby Digital EX 57 Dual Mono 73 78 DVD player 27 DVD recorder 30 Dynamic range compression 71 76 E Effect level 71 EQ Settings 72 78 F FM 51 FM Mode 51 78 G GUI Graphical User Interface 41 H HDMI Settings 73 78 I iPhone...

Page 97: ...u 68 Sound field 54 SOUND OPTIMIZER 58 Speaker Pattern 69 76 Speaker Settings 69 76 SPEAKERS 36 Super Audio CD player 32 Surround Settings 71 78 System Audio Control 61 System Power Off 61 System Settings 74 78 T Test Tone 70 76 Theater Theatre Mode Sync 62 Treble 72 78 Tuner 51 Tuner Settings 78 TV 23 U Up converting 31 USB device 48 V VCR 30 Video Settings 78 Viewing information in the display 8...

Page 98: ......

Page 99: ......

Page 100: ...D NORM S JOB SONY HA SO0129 STR DH820_PMRF_01 4266497112_GB GB01COV_STR DH820 CELIX fm masterpage Left Sony Corporation Printed in Malaysia model name1 STR DH820 4 266 497 11 2 ...

Reviews: