31
GB
D:\NORM'S JOB\SONY HA\SO0062\STR-DN1010\GB\GB04GET_STR-DN1010-CEL.fm
masterpage: Right
STR-DN1010
4-174-068-
11
(1)
Co
nn
ecti
on
s
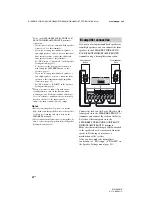
The following illustration shows how to connect a DVD player or DVD recorder.
A
Component video cord (not supplied)
B
Optical digital cord (not supplied)
C
Coaxial digital cord (not supplied)
Recommended connection
Alternative connection
* When you connect a component equipped with an
OPTICAL jack, set “Input Assign” in the Input
Option menu.
Notes
• The initial setting for the DVD input button is as
follows:
– RM-AAP051: DVD player
– RM-AAP052: DVD recorder
To control other components, be sure to change the
initial setting of the DVD input button on the
remote. For details, see “Programming the remote”
(page 112).
• You can also rename the DVD input so that it can
be displayed on the receiver’s display. For details,
see “Naming the input (Name Input)” (page 47).
• The initial setting of the COMPONENT VIDEO
IN 2 jacks are DVD player or DVD recorder.
If you want to connect your DVD player or DVD
recorder to the COMPONENT VIDEO IN 1 or IN
3 jacks, set “Input Assign” in the Input Option
menu (page 85).
• To input multi channel digital audio from the DVD
player or DVD recorder, set the digital audio
output setting on the DVD player or DVD recorder.
Refer to the operating instructions supplied with
the DVD player or DVD recorder.
Connecting a DVD player, DVD recorder
DVD player, DVD recorder
A
B
*
C
Video signals
Audio signals


