1-10(E)
SX-M700
18
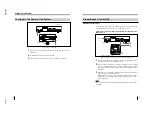
When connecting
When disconnecting
When connecting
When disconnecting
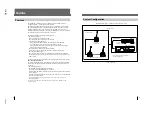
How to connect cables of SX-C700A/D700A
The figure below shows how to connect and disconnect the 20-pin multi-
connectors of the chairman’s/delegate’s unit, RK-1700/1705 and RK-1710/1713
connecting cables.
White mark
White mark
With the white mark on the 20-pin
multi-connector facing up, push the
connector home until it clicks.
Grasp the knurled part of the
connector and pull it towards you.
Grasp the knurled part
of the connector and
pull it towards you.
Meet the white marks on
each connector and push
the connectors each other
until they click.
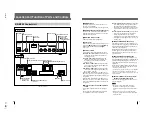
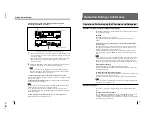
Turning On the Power of the System
1
Turn on the power of the units connected to the EXT IN-1/2 connectors of the
control unit.
2
Set the POWER switch of the control unit to ON.
3
When necessary, set the POWER switch of the telephone coupler to ON.
VU
I
O
POWER
PHONE
ON
OFF
MONITOR
MIN
MAX
1
2
3
4
5
6
7
8
9
MONITOR
ORIGINAL
INTRT[TRYRT
CHANNEL
1
2
3
4
5
6
0
10
1
2
3
4
5
6
7
8
9
MIC/LINE 1
MIC/LINE 2
MIC/LIMIT
ON/OFF
DIRECT ACCESS
ON/OFF
SEAT ASIGN
START/END
D/C UNIT SP
0
10
1
2
3
4
5
6
7
8
9
0
10
1
2
3
4
5
6
7
8
9
0
10
1
2
3
4
5
6
7
8
9
D/C UNIT MIC
ORIGINAL
2
3
Telephone coupler
Setting Up the System
Control unit
19
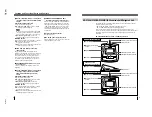
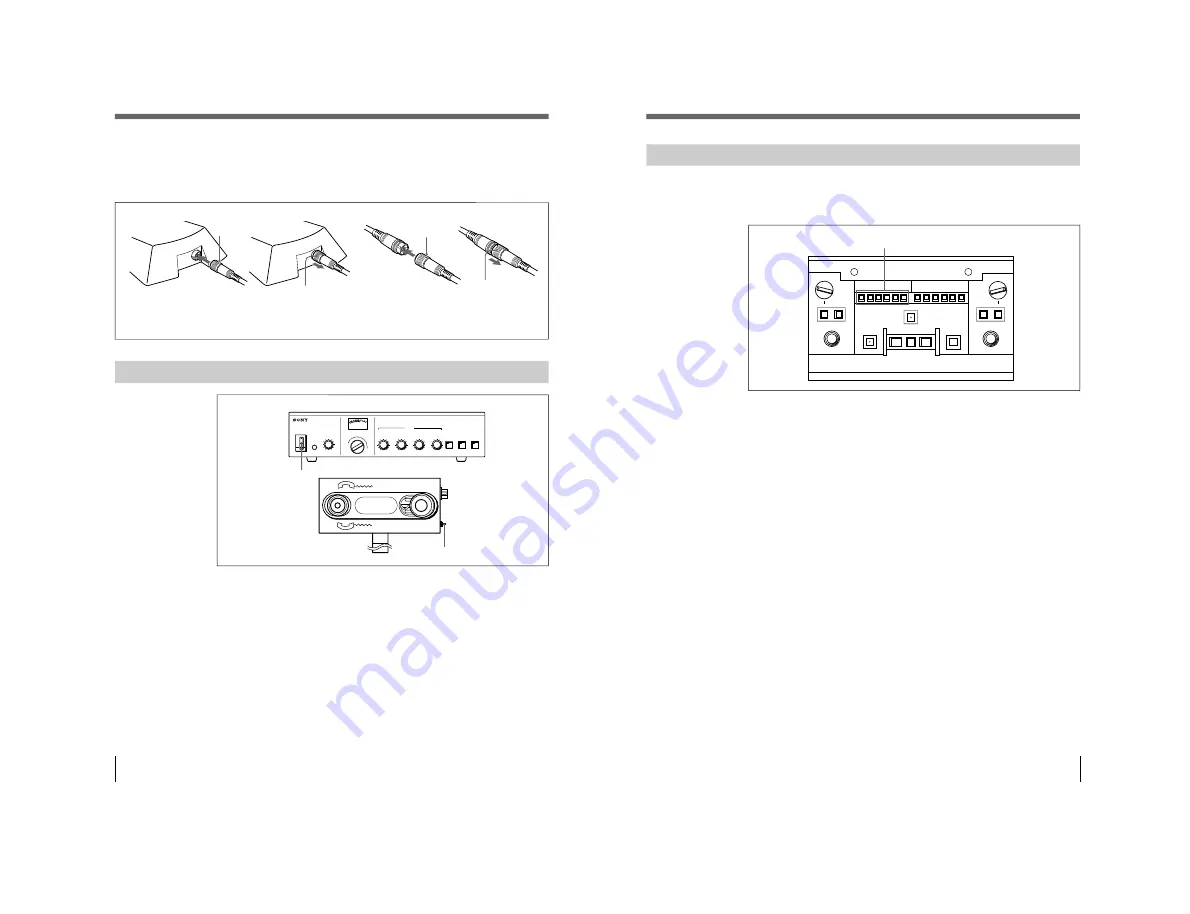
Assigning Interpreted Languages to Channels
Assign the interpreted languages to the channels (1 to 6) of the interpreter’s units
by using the MICROPHONE CHANNEL buttons of the interpreter’s unit before
the start of conference.
Press the MICROPHONE CHANNEL button corresponding to the channel
assigned to the target language of each interpreter.
MICROPHONE CHANNEL buttons
INTERPRETER'S UNIT SX-P700
MICROPHONE CHANNEL
MICROPHONE CHANNEL
MONITOR
1
2
3
4
5
6
1
2
3
4
5
6
MONITOR
ORIGINAL
RELAY
VOLUME
MIN
MAX
1
2
3
4
5
6
7
8
9
COUGH CUT
MICROPHONE
ON
ON
OFF
COUGH CUT
SLOW
VOLUME
MIN
MAX
1
2
3
4
5
6
7
8
9
ORIGINAL
RELAY
Summary of Contents for SX-M100
Page 75: ...SX M700 6 12 TMP68301AFR 16 TOSHIBA http getMANUAL com ...
Page 111: ...8 2 8 2 SX M700 SX M700 AUDIO SX M700 BLOCK SX M700 BLOCK AUDIO BLOCK ...
Page 112: ...8 3 8 3 SX M700 SX M100 BLOCK SX M100 BLOCK SX M100 AUDIO AUDIO BLOCK ...
Page 113: ...8 4 8 4 SX M700 SX E120 DIGITAL SX E120 BLOCK SX E120 BLOCK DIGITAL BLOCK ...
Page 114: ...8 5 8 5 SX M700 SX E120 BLOCK SX E120 BLOCK SX E120 AUDIO AUDIO BLOCK ...
Page 115: ...8 6 8 6 SX M700 SX T100 AU 202 SX T100 BLOCK SX T100 BLOCK AU 202 BLOCK http getMANUAL com ...
Page 116: ...8 7 8 7 SX M700 SXA 120 BLOCK SXA 120 BLOCK SXA 120 AUDIO CPU 188 BLOCK ...
Page 120: ......
Page 126: ......
Page 128: ......
Page 130: ......
Page 132: ......
Page 136: ......


