background image

Getting Started

6

   Getting Started

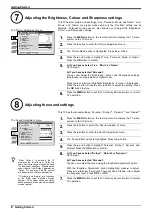
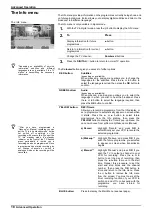
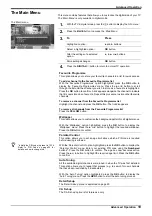
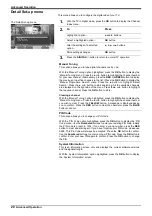
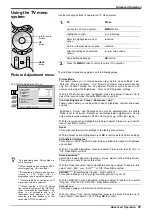
This TV has four picture mode settings, ‘Live’, ‘Personal’, ‘Movie’ and ‘Game’. ‘Live’,
‘Movie’ and ‘Game’ are preset modes and only the ‘Contrast’ setting can be
adjusted. ‘Personal’ mode however, also allows you to adjust the ‘Brightness’,
‘Colour’ and ‘Sharpness’ settings.

This TV has four sound settings, ‘Personal’, ‘Dolby V*, ‘Dynamic**’ and ‘Natural**’

1.

Press the MENU button on the remote control to display the TV menu
system on the TV screen.

2.

Press the 

b

 button to enter the ‘Picture Adjustment’ menu.

3.

The ‘Picture Mode’ option is highlighted. Press the 

b

 button.

4.

Press the 

V

 or 

v

 button to highlight ‘Live’, ‘Personal’, ‘Movie’ or ‘Game’.

Press the OK button to confirm.

5.

a) If you have selected ‘Live’, ‘Movie’ or ‘Game’:
Go to step 6.

b) If you have selected ‘Personal’:
You can now adjust the ‘Brightness’, ‘Colour’ and ‘Sharpness’ settings.
(Sharpness is not adjustable in digital mode).

Press the 

V

 or 

v

 button to highlight ‘Brightness’, ‘Colour’ or ‘Sharpness’.

Press the 

b

 button. Press the 

B

 or 

b

 button to adjust the setting. Press

the OK button to store.

6.

Press the MENU button to exit the TV menu system and return to normal
TV operation.

1.

Press the MENU button on the remote control to display the TV menu
system on the TV screen.

2.

Press the 

v

 button to select the ‘Sound Adjustment’ menu.

3.

Press the 

b

 button to enter the ‘Sound Adjustment’ menu.

4.

The ‘Sound Effect’ option is highlighted. Press the 

b

 button.

5.

Press the 

V

 or 

v

 button to highlight ‘Personal’, ‘Dolby V’, ‘Dynamic’ and

‘Natural’ Press the OK button to confirm.

6.

a) If you have selected ‘Dolby V’, ‘Natural’ or ‘Dynamic’:
Go to step 7.

b) If you have selected ‘Personal’:
You can now adjust the sound using the ‘Equaliser Adjustment’ option.

With the ‘Equaliser Adjustment’ option highlighted, press 

b

 to adjust.

Press 

B

 or 

b

 to select the required frequency band. Press 

V

 or 

v

 to adjust

the frequency level. Press OK to confirm.

7.

Press the MENU button to exit the TV menu system and return to normal
TV operation.

Adjusting the Brightness, Colour and Sharpness settings

7

Adjusting the sound settings

8

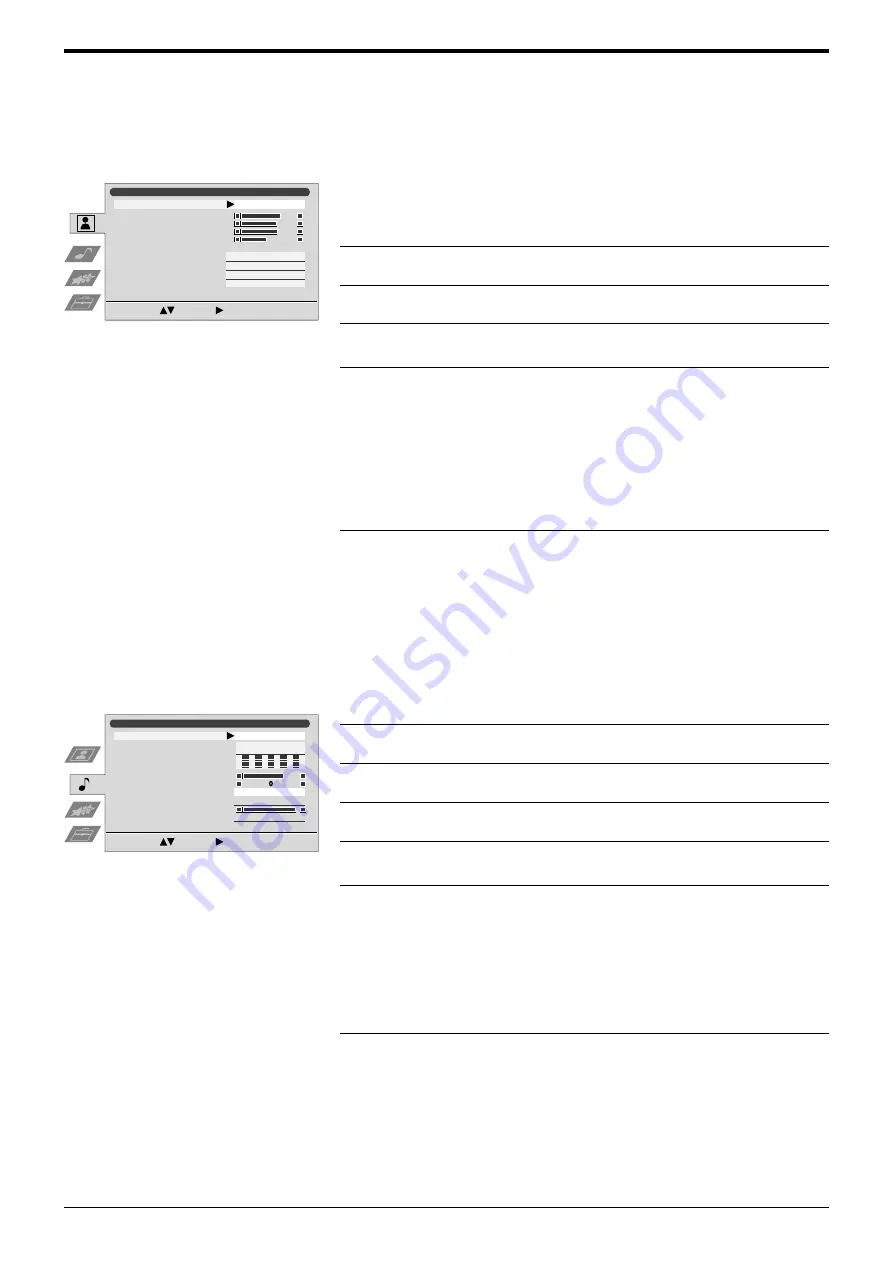
The ‘Picture Adjustment’ menu.

The ‘Sound Adjustment’ menu.

z

*When ‘Dolby V’ is selected, the TV
simulates the full effects of Dolby Pro
Logic Surround sound without the need
for additional speakers. Manufactured
under licence from Dolby Laboratories.
‘Dolby’, ‘Pro Logic’ and the 

symbol

are trademarks of Dolby Laboratories. 

**’Dynamic’ and ‘Natural’ are functions
of the ‘BBE High Definition Sound
System’. This system enhances clarity,
detail, presence of sound and increased
musical realism.

Sound Adjustment

Sound Effect

Equaliser

Adjustment

Virtual Effect

Balance

Auto Vol. Control

Dual Sound

Select:

Enter:

/Audio-out Vol.

i

Dual Sound

i

Stereo

Off

Stereo

Dolby V

Picture Adjustment

Personal

Picture Mode

Contrast

Brightness

Colour

Sharpness

Reset

AI

Noise Reduction

DRC-MF

Colour Tone

On

Auto

DRC1250

Cool

Select:

Enter:

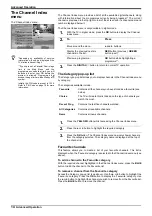
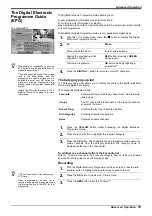
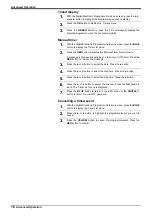
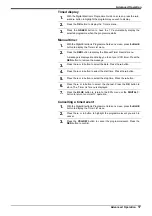
Summary of Contents for Trinitron KD-32NX200AUS

Page 1: ...200AUS 2004 Sony Corporation Operating Instructions Before operating the TV please read the Safety Information section of this manual Retain this manual for future reference Trinitron Integrated Digital Television 410251812 ...

Page 2: ... provided below Refer to these numbers whenever you call your dealer regarding this product Model No KD 32NX200AUS Serial No ______________ Please note The information in this manual was correct at the time of going to print However some minor changes may have been made late in the product s development All illustrations in this manual have been created during the product s development and may dif...

Page 3: ...igital Electronic Programme Guide EPG 15 The Info menu 17 The Main menu 18 Detail Set up menu 19 Using the TV menu system 20 Picture Adjustment menu 20 Sound Adjustment menu 21 Features menu 22 Set Up menu 23 Manual Set Up menu 23 Manual Programme Preset menu 24 Further Programme Preset menu 24 Connecting Other Equipment Overview of the rear sockets 25 Overview of the front sockets 26 Connecting o...

Page 4: ...ve a space of at least 10cm all around the set Never place the TV in hot humid or excessively dusty places Do not install the TV where it may be exposed to mechanical vibrations Clean the screen and cabinet with a soft lightly dampened cloth Do not use any type of abrasive pad alkaline cleaner scouring powder or solvent such as alcohol or benzine or antistatic spray As a safety precaution unplug t...

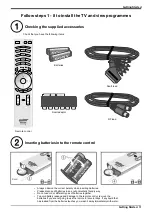
Page 5: ...battery leakage and damage to the remote control remove the batteries if you are not going to use the remote for several days If any liquid that has leaked from the batteries touches you wash it away immediately with water Batteries Checking the supplied accessories 1 Inserting batteries into the remote control 2 RF lead Remote control Scart lead Scart adaptor MADE IN INDONESIA FABRIQUÉ EN INDONÉS...

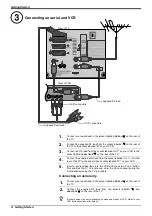
Page 6: ...o video sockets labelled TV on your VCR 5 Insert a pre recorded tape into the VCR and press the PLAY button This enables the TV to locate and store the video channel during the Automatically tuning the TV procedure Connecting an aerial only 1 Connect your aerial lead to the socket labelled DIGITAL on the rear of the TV 2 Connect the supplied RF lead from the sockets labelled and ANALOGUE on the re...

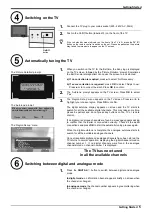
Page 7: ...logue channels have been stored the TV returns to normal operation displaying the digital channel stored on channel number 1 If no digital channels were found the analogue channel stored on channel number 1 is displayed The TV has now tuned in all the available channels 1 Press the DIGITAL a button to switch between digital and analogue mode In digital mode an information banner appears briefly on...

Page 8: ...djustment menu 4 The Sound Effect option is highlighted Press the b button 5 Press the V or v button to highlight Personal Dolby V Dynamic and Natural Press the OK button to confirm 6 a If you have selected Dolby V Natural or Dynamic Go to step 7 b If you have selected Personal You can now adjust the sound using the Equaliser Adjustment option With the Equaliser Adjustment option highlighted press...

Page 9: ... remote control can be programmed to operate the basic functions of most DVD players and VCRs Once programmed press this button repeatedly to select TV VCR or DVD mode Refer to page 28 qa REC VCR RECORD button With the remote control in VCR mode Press to start your VCR s RECORD function qs Text button In digital TV mode Press to access digital text Refer to page 12 In analogue TV mode Press to acc...

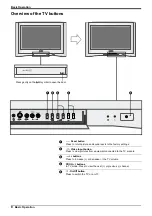
Page 10: ...ctures from equipment connected to the TV sockets 3 2 buttons Press to increase or decrease the TV volume 4 PROG buttons In TV mode Press to view the next or previous channel 5 On Off button Press to switch the TV on or off Overview of the TV buttons 100Hz Digtial Plus 100Hz Digital Plus Press gently on the symbol to open the door 4 4 o4 5 1 2 3 4 4 4 o4 ...

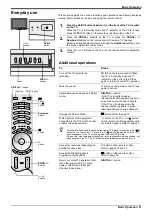
Page 11: ...appears briefly on screen when you change channels If the TV is in analogue mode the channel number appears in green lettering when you change channels Change the Screen Mode button Refer to page 10 Watch pictures from equipment connected to the TV s front and rear sockets video input mode t button on the TV or t button on the remote control repeatedly until the picture appears Refer to page 27 z ...

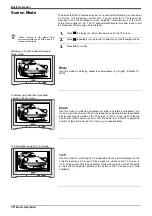
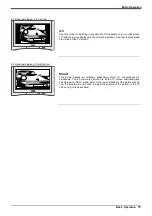
Page 12: ...e g movies in letter box format Due to the range of cinemascopic formats available black areas may be visible on the TV screen In Zoom mode parts of the top and bottom of the picture may be cut off Press the V or v button to adjust the position of the picture on the TV screen e g to read subtitles 14 9 Use this mode for watching 14 9 broadcasts with the picture displayed in the correct proportions...

Page 13: ... mode creates an imitation widescreen effect for conventional 4 3 broadcasts The 4 3 picture is stretched to fill the TV screen eliminating any black areas In Smart mode parts of the top and bottom of the picture may be cut off Press the V or v button to adjust the position of the picture on the TV screen e g to read subtitles 4 3 broadcast viewed in 4 3 mode 4 3 broadcast viewed in Smart mode 100...

Page 14: ...ng a dedicated digital text channel a Digital text from digital channels depending on availability of service This form of digital text is accessed the same way as analogue text b Digital text from a dedicated digital text channel depending on availability of service Some broadcasters provide a separate channel for accessing their digital text service To Press Load or exit digital text button Move...

Page 15: ...g This feature allows you to jump quickly from one page to another When viewing a page that contains several page numbers e g an index page press OK Press V or v to highlight the required page number Press OK to select Your chosen page appears on the TV screen 1 Select an analogue channel that provides a text service 2 Press the button to access the text service 3 To Press Select a page Numbered b...

Page 16: ...uttons Display the previous next six channels in the list RED button previous GREEN button next Preview a programme OK button while highlighting a programme 3 Press the DIGITAL a button to return to normal TV operation Favourite Contains all the channels you have stored as a favourite see below Choice The TV will create this list based on the type of channels you watch the most Recent Prog Contain...

Page 17: ...l available channels News Contains all news channels 1 Press the YELLOW button whilst accessing the Digital Electronic Programme Guide 2 Press the V or v button to highlight the required category 3 Press the OK button The Digital Electronic Programme Guide now only shows channels from the category selected The category name is displayed at the top of the channel list 1 With the Digital Electronic ...

Page 18: ...yed reminding you to set your VCR timer Press the RED button to remove the message 3 Press the V or v button to select the date Press the b button 4 Press the V or v button to select the start time Press the b button 5 Press the V or v button to select the stop time Press the b button 6 Press the V or v button to select the channel Press the OK button to store The Timer List menu is displayed 7 Pr...

Page 19: ...yed reminding you to set your VCR timer Press the RED button to remove the message 3 Press the V or v button to select the date Press the b button 4 Press the V or v button to select the start time Press the b button 5 Press the V or v button to select the stop time Press the b button 6 Press the V or v button to select the channel Press the OK button to store The Timer List menu is displayed 7 Pr...

Page 20: ...cord b Wakeup or c Manual a Record Highlight Record and press OK to automatically set your VCR to record the selected programme b Wakeup Highlight Wakeup and press OK if you wish the future programme you selected to appear on screen when transmission begins c Manual Highlight Manual and press OK if you wish the TV to output a channel to your VCR for recording Press the V or v button to set the day...

Page 21: ...gramme list Press the YELLOW button Wallpaper This option allows you to customise the background pattern for all digital menus With the Wallpaper option highlighted press the OK button to display the Wallpaper menu Press the V or v button to highlight the required wallpaper Press the OK button to confirm Parental Control This option allows you to set an age limit above which a PIN code is required...

Page 22: ...store Clearing a channel With the Manual Tuning option highlighted press the OK button to display the Manual Tuning menu Press the V or v button to highlight the channel number you wish to clear Press the YELLOW button A message is displayed asking you to confirm Press the RED button to clear the channel or press the BLUE button to cancel PIN Code This option allows you to change your PIN code Wit...

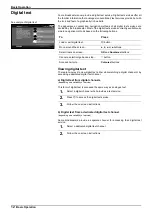
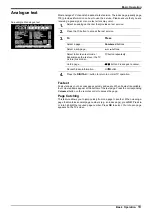
Page 23: ...restore default picture settings AI Artificial Intelligence This option monitors the picture and limits any sudden increases in brightness and contrast With the AI option highlighted press b to adjust Press V or v to select On or Off Press OK to confirm Noise Reduction Sometimes a weak signal can result in a snowy picture called Picture Noise This option can help to reduce this effect With the Noi...

Page 24: ...ion allows you to choose which language to listen to With the Dual Sound option highlighted press b to adjust Press V or v to select Stereo to listen to the sound in stereo A to listen to the first language or B to listen to the second language Press OK to confirm When receiving a stereo broadcast this option allows you to choose between mono and stereo sound With the Dual Sound option highlighted...

Page 25: ...Please note the TV outputs an audio video signal for all types of input signal For example to record from a camcorder to a video tape Connect your camcorder to the 4 sockets audio and either the t4 or r4 socket video or S Video on the front of the TV Connect a VCR to the i3 r3 socket on the rear of the TV Set the AV3 Output option to AV4 front sockets Press PLAY on the camcorder The picture is sen...

Page 26: ...e other characters in the same way up to a maximum of five characters After selecting all required characters press OK to store Manual Set Up With the Manual Set Up option highlighted press b to display the Manual Set Up menu The Manual Set Up menu is explained below Manual Programme Preset With the Manual Programme Preset option highlighted press b to display the Manual Programme Preset menu The ...

Page 27: ...name is displayed briefly on screen when the channel is selected Press V or v until the letter or number you require appears in the display select for a blank space Press b to confirm Repeat this until the name is complete Press OK to confirm 6 Press B or b to highlight Skip This option allows you to skip unused analogue channels when selecting channels with the PROG buttons You can still select a...

Page 28: ...onnect audio equipment such as a Hi Fi Surround Sound system 6 DIGITAL Aerial socket Digital Use to connect your existing aerial 7 Aerial socket RF Out If you are connecting a VCR Use to connect to the RF IN socket on your VCR If you are not connecting a VCR Use the supplied RF lead to connect to the socket labelled ANALOGUE 8 SERVICE Service socket For service use only 9 MODEM MODEM socket For se...

Page 29: ...AV4 Video input Use to connect equipment such as camcorders PlayStation 2 4 o4 AV4 Audio input Use to connect equipment such as camcorders PlayStation 2 Overview of the front sockets 100Hz Digtial Plus 100Hz Digital Plus Press gently on the symbol to open the door z To avoid picture distortion do not connect equipment to the r4 and t4 sockets at the same time 4 4 o4 4 4 o4 1 2 3 3 ...

Page 30: ... Sockets Socket type s Inputs supported 1 Scart YUV HD Audio Video 2 Scart YUV HD Audio Video i3 r3 Scart S Video Audio Video o4 and r4 Phono x2 4 pin DIN Audio S Video audio via o4 sockets S Video via r4 socket o4 and t4 Phono x3 Audio Video audio via o4 sockets video via t4 socket 1 Switch on press PLAY on the connected equipment The picture if any from the equipment appears on the TV screen If ...

Page 31: ...ns refer to Controlling a DVD player Controlling a VCR on the next page for details If not repeat steps 2 4 and enter the next three digit number for your brand 6 Press the MODE button repeatedly until the green TV light illuminates DVD Brand List VCR Brand List Brand Code Brand Code SONY 001 SONY VHS 301 302 303 308 309 AIWA 021 SONY BETA 303 307 310 DENON 018 027 020 002 SONY DV 304 305 306 GRUN...

Page 32: ... DVD Mode Function in VCR Mode VIDEO I 1 Switch the DVD player on off Switch the VCR on off TV I 1 Switch the TV on off Switch the TV on off DIGITAL a Return to TV mode from Video Input mode Return to TV mode from Video Input mode Select TV screen mode Select TV screen mode Select Video Input mode Select Video Input mode Numbered buttons No function Select VCR channel number Display on screen TV i...

Page 33: ...2 21 pin Euro connector CENELEC standard including audio video input YUV input HD Input TV audio video output i3 r3 21 pin Euro connector CENELEC standard including audio video input S VIDEO input selectable audio video output DIGITAL RF In Digital ANALOGUE RF In Analogue RF Out Audio output phono jacks PCMCIA for future use only MODEM MODEM jack for service only OPTICAL OUTPUT Digital Out Optical...

Page 34: ...Upgrade to a higher gain aerial Upgrade to a higher gain aerial Some channels are blank Scrambled Subscription only channel Channel not being transmitted Channel used only for data no picture or sound Subscribe to the pay per view service Contact the broadcaster for transmission details Standby indicator flashing Digital programme set for Timer Record regular flash Fault irregular flashing Refer t...

Page 35: ...de 11 Sound adjustment menu 6 22 Sound Effect 6 22 Sound settings adjusting 6 22 Specifications 30 Subtitles digital 18 Supplied accessories 3 Switching on the TV 5 9 System Information 20 T Table of contents 1 Text analogue 13 digital 12 Timed display 15 16 Timer digital cancelling 16 digital setting manually 16 Sleep 23 Troubleshooting 31 TV buttons overview 8 TV menu system 21 Tuning automatic ...

Page 36: ...Sony Corporation Printed in UK Recyclable Printed on 100 recycled paper KD 32NX200AUS 4 102 518 12 1 410251812 ...

Reviews: