1-6 (E)
UY
A-S90SF
10
(GB)
4
Adjust the prescanned image as required.
When you have set “Mode” to “Prescan all slides (50 slides max),”
select the images to be scanned.
5
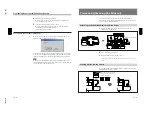
Click the Scan button on the preview window.
When the Scan Utility is used, specify the saving method for the
scanned images and click the Save button.
The selected slides are scanned.
To scan more than 50 slides continuously
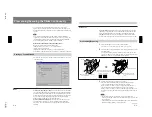
When you have set “Mode” to “Prescan only first slide (No limit),” the
following window appears during scanning.
Click the Pause button to temporarily stop scanning. Then you can insert
more slides into the holder for prescanning on the auto slide feeder. After
setting the required slides, click the Continue button to restart scanning.
Note
When you have added slides to the holder for prescanning, remove the
scanned slides in the holder for scanning. If the holder is full of slides, the
ejected slides may clog, causing an error.
Prescanning/Scanning the Slides Continuously
11
(GB)
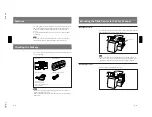
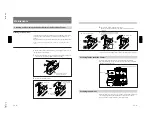
Slide attachment (supplied)
Prescanning/Scanning One Slide only
To prescan/scan only one slide, use the supplied slide attachment.
For details on the prescanning/scanning operations, refer to the software
manual of the UY-S90 film scanner.
Attaching the Slide Attachment to the Slide Carrier
1
Open the lid of the slide carrier and attach the supplied slide
attachment to the slide carrier.
2
Close the lid of the slide carrier.
3
Mount the slide carrier to the film scanner.
For mounting, “Mounting the Slide Carrier to the Film Scanner” on page
5(GB).
Loading a Slide into the Carrier
Insert a slide into the slide attachment with the emulsion side facing you,
and lightly press the slide to the left.
Insert a slide with the emulsion side
facing you and the picture sidelong.
This way
Not this way


