background image

Welcome

Ergonomic Considerations

Sony

 Not

e

book

 Com

p

ut

er

 Us

er

 Gui

d

e

13

n

N

Furniture and posture –

Sit in a chair with good back support. Adjust the level of

the chair so your feet are flat on the floor. A footrest may make you more
comfortable. Sit in a relaxed, upright posture and avoid slouching forward or
leaning far backwards.

Viewing angle of the computer’s display –

Use the display’s tilting feature to find

the best position. You can reduce eye strain and muscle fatigue by adjusting the tilt
of the display to the proper position. Adjust the brightness setting of the display
as well.

Lighting –

Choose a location where windows and lights do not create glare and

reflection on the display. Use indirect lighting to avoid bright spots on the display.
You can also purchase accessories for your display that help reduce glare. Proper
lighting adds to your comfort and work effectiveness.

Placement of an external display –

When using an external display, set the display

at a comfortable viewing distance. Make sure the display screen is at eye level or
slightly lower when you are sitting in front of the monitor.

Summary of Contents for Vaio PCG-C1VE

Page 1: ...n N y Notebook mputer r Guide ...

Page 2: ...e arising out of or in connection with this manual the software or other information to use thereof eserves the right to make any modification to this manual or the information contained without notice The software described herein is governed by the terms of a separate user KTM JogDialTM Mavica PictureGear Memory Stick and the Memory Stick logo VAIO are trademarks of Sony Corporation Windows the ...

Page 3: ... ugh the use of computers and their office equipment The program backs the issemination of products with functions that effectively reduce energy consumption It n which business proprietors can participate voluntarily The targeted products are office computers displays printers facsimiles and copiers Their standards and logos are ticipating nations S registered mark ...

Page 4: ...4 n N ation and serial number are located on the bottom of your Sony notebook computer Record n the space provided here Refer to the model and serial number when you call VAIO ____________________ ...

Page 5: ...or moisture modem or telephone wiring during a lightning storm elephone jacks in wet locations unless the jack is specifically designed for wet locations ninsulated telephone wire or terminals unless the telephone line has been disconnected interface hen installing or modifying telephone lines he modem during an electrical storm modem or a telephone to report a gas leak in the vicinity of the leak...

Page 6: ...ltage Directive EEC EMC Directives rking Directive ies with EN 55022 Class B and EN 50082 1 for use in following areas residential ht industrial en tested and found compliant with the limits set out in the EMC Directive for using horter than 3 metres 9 8 feet ...

Page 7: ...or equivalent type by the manufacturer Discard used batteries according to the manufacturer s instructions see k used in this device may present a fire or chemical burn hazard if mistreated Do not at above 100 C 212 F or incinerate Dispose of used battery promptly m children s equipped with an internal backup memory battery For changing this battery please contact ...

Page 8: ... use without AC and video quality A high resolution LCD screen enables you to take of today s advanced multimedia applications games and ent software Your system includes the latest operating system from Microsoft ations Access popular online services send and receive e mails Internet ustomer support If you have any problem with your computer you VAIO Link by Internet and e mail see your Customer ...

Page 9: ...e Sony Notebook Computer shows you how to use the standard s of your system g Peripheral Devices explains how you can add functionality by various peripherals lp explains the support options available to you and offers basic oting tips se provides facts and advice about using your notebook computer ons provides details on your computer drivers and accessories The ity Table indicates which devices ...

Page 10: ...the software pre your system roduct Recovery CD ROMs explains how to perform a System and an n Recovery Online Help files of the software you re using for detailed information and troubleshooting Microsoft Getting started manual for more information on Windows ...

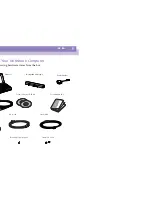
Page 11: ...ebook Computer owing hardware items from the box Rechargeable battery pack Product Recovery CD ROMs Power cord Display Adapter Spare stick covers Documentation Pack Phone plug country specific Phone cable Main unit e ...

Page 12: ...e environments your computer Place the computer directly in front of you as you p your forearms horizontal with your wrists in a neutral comfortable hile using the keyboard touchpad or external mouse Let your upper naturally at your sides Take breaks during sessions with your Excessive use of the computer may strain muscles or tendons Computer positioned directly in front of you el xed and flat ...

Page 13: ...e by adjusting the tilt ay to the proper position Adjust the brightness setting of the display Choose a location where windows and lights do not create glare and n the display Use indirect lighting to avoid bright spots on the display o purchase accessories for your display that help reduce glare Proper ds to your comfort and work effectiveness of an external display When using an external display...

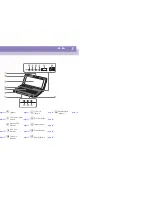
Page 14: ...er cribes how to start using your computer and how to use your rnal and external devices such as the pointing device and PC cards he Controls and Connectors connector page 60 Memory Stick slot page 37 page 43 Ventilation slot 2 4 ...

Page 15: ...cator page 26 page 64 Left center right buttons page 32 1 Power button page 23 Memory Stick indicator page 37 Capture button page 40 page 26 Num Lock indicator page 26 Power indicator page 23 page 32 Caps Lock indicator page 26 Battery indicator page 26 6 11 16 7 12 8 13 9 14 10 15 ...

Page 16: ...16 n N USB connector page 65 page 59 DC In page 18 nector page 63 Mini VGA Out Connector page 55 nnector page 64 Jog Dial page 34 5 6 7 8 ...

Page 17: ...17 n N Battery release lever page 19 window page 37 Battery connector page 19 4 5 ...

Page 18: ... Adapter ble attached to the AC adapter into the DC In connector on the nd of the power cord into the AC adapter her end of the power cord into an AC outlet SELV according to EN 60950 Notebook computer Power cord hazardous voltage according to EN 60950 supplied DC in AC adapter supplied ...

Page 19: ...arge the battery pack tery pack hat the Lock lever on the bottom of the computer is on the Release rooves on the battery with the tabs and notches on the back of the nd then slide the battery towards the computer until it clicks into place ck lever into the LOCK position to secure the battery on the computer LOCK UNLOCK LOCK UNLOCK 1 3 2 Battery pack Grooves ...

Page 20: ...roximately one to one and half hour To ery completely continue charging for an additional hour battery pack provides power for hours based on your system configuration and the software you use See guide in Battery Information rs indicator light indicates the status of the battery pack r Light Status Meaning The computer is using battery power The battery is running out of power The battery is char...

Page 21: ...rPanel utility See your e in Controlling Power Management ck supplied with your computer is a lithium ion battery and can be recharged anytime Charging harged battery does not affect battery life icator light is on while you use the battery pack as a power source When the battery life is d the battery indicator starts flashing are applications and some peripheral devices your computer may not ente...

Page 22: ...22 n N attery pack computer lease lever to the UNLOCK position and slide the battery away from er Battery release lever Battery lock lever ...

Page 23: ...s when e cover you may break the camera ower button of the computer until the green power indicator light turns adjust the brightness controls for the LCD display with Fn F5 To brightness use the up or right arrow keys To decrease use the down w keys MOTION EYE ton Power indicator ...

Page 24: ...the bottom of the Start menu to display the Shut Down ialog box down if it is not already selected ur computer to turn off automatically The power indicator will turn off y peripheral connected to your computer ur computer make sure that the tabs on both sides of the display panel e grabs ...

Page 25: ...by Internet or e mail see your Customer de for addresses Protect your investment See the Guarantee sheet for the terms and and please refer to your Customer Service Guide for more information eps to use the Sony Notebook Computer s online registration service e Welcome button on your desktop net Registration card fields n to the bottom of the form and click Send ...

Page 26: ...alculator Use the numeric keypad area to type numbers or to perform mathematical calculations such as addition and subtraction Note that you must press the Num Lock key to activate the numeric keypad When you do so the Num Lock light will illuminate Print screen key Windows key Correction keys Navigation keys Alt key Function keys ape key Shift key Application key Numeric keypad area ...

Page 27: ...n shot into a document and print it Several keys are always used with at least one other key Ctrl Alt and Shift When held down with another key the Ctrl Control and Alt Alternate keys offer another way to give commands For example in many applications instead of choosing the Save command from a menu you can hold down Ctrl and press S referred to as Ctrl S The Shift key is used to produce capital l...

Page 28: ... on the taskbar Displays Windows Explorer Displays the Search Results window to find a file or folder This is equivalent to selecting Search and then For Files or Folders from the Start menu Displays the Search Results Computer window where you can locate other computers Minimizes all displayed windows Returns all minimized windows to their previous size Displays the Run window This is equivalent ...

Page 29: ...r when this indicator light is on The Memory Stick is not being accessed Turns on when the number keys area in the numeric keypad are active Turns off when the alphanumeric character keys in the keypad area are active Turns on when the letters appear in uppercase as you type The Shift key lowers the case of typed letters when Caps Lock is on Turns off when letters appear in lower case as you type ...

Page 30: ... To increase light intensity press Fn F5 and then V or b To decrease light intensity press Fn F5 and then v or B F7 Toggles between the LCD external display connected to the Monitor connector and both LCD and external display F8 Toggles between the LCD and both LCD and TV Only LCD h LCD and TV ion Provides for the lowest level of power consumption When you execute this command the states of the sy...

Page 31: ...31 n N Toggles the Bass Boost function off and on This feature is available with headphones only Darkens the LCD in order to save power eature Functions ...

Page 32: ...scriptions Press the stick in the appropriate direction to position the pointer on he desired item or object Press the left button once Press the left button twice Press the right button once In many applications this action displays a shortcut menu containing context sensitive choices Pointer Right button Center button ton ...

Page 33: ...stick cover supplied with Press the stick in the appropriate direction to position the pointer on he desired item or object While holding the left button press the stick hen let it go at the desired point Press the stick while pressing the center button Attach the cover firmly ...

Page 34: ...Jog Dial on the right side of your computer You can ress the Jog Dial to scroll the window select a software adjust the r volume etc ndow always appears in the display The Jog Dial window is either in or in guide mode turn press Jog Dial ...

Page 35: ...use Dial window is active n the guide mode if a software or a program is in use and the window ding on the software you can select an item from the selection list that he List View mode using the Jog Dial g Dial window in the launcher mode og Dial window in the guide mode ...

Page 36: ...ch to the launcher mode g Dial to select an item then press the Jog Dial l window switches to the guide mode and shows the Jog Dial s ss the Jog Dial to use the Jog Dial s function other item switch to the launcher mode and repeat from step 1 Jog Dial in the guide mode when Speaker is selected ...

Page 37: ... for external data storage emory Stick our Memory Stick front label facing down until it clicks into place ory Stick is connected properly you can see the contents of the card Removable Disk S icon nd the Removable Disk S icon in My Computer on the desktop ws rol Panel click View all Control Panel options if all options are not k on the System icon then click on the Device Manager tab sh Memory St...

Page 38: ...38 n N Memory Stick ccess light is off Push the Memory Stick in toward the computer out pull it out The Memory Stick window closes automatically when Memory Stick ...

Page 39: ...uld back up important data ging data a Memory Stick or turn off the power while the access light is on mory Sticks in locations that are subject to static electricity or electrical noise he Memory Stick connector with your finger or metallic objects abels other than the supplied label to a Memory Stick drop or apply strong shock to Memory Sticks mble or modify Memory Sticks Memory Sticks to get we...

Page 40: ...des a built in MOTION EYE camera You can use the camera to es and record video clips till image apture button Smart Capture application starts Viewer Movie Player from the application list l by clicking the Capture mode button Capture button ...

Page 41: ...41 n N window appears Turn the Motion Eye lens towards the subject ocus ring he Capture button on the computer The image remains still To ther image release the Capture button and press again ...

Page 42: ...mode to take a still elf A mirror image appears in the finder window of the display while shooting however after ormal image appears e the following still images sizes 640 x 480 320 x 240 160 x 120 and 80 x 60 tach the camera is not available while another software that uses the built in camera is in use Close this e using Smart Capture nsfer still images or video clips from the built in camera wh...

Page 43: ...pears on the Device Manager tab in the System Properties dialog remove the software n reinstall it e able to use some PC cards or some functions within the PC card with this computer ed to shut down the computer before inserting or removing a PC card t can accommodate one Type I or Type II PC card This slot is compatible with 16 bits cards and deo port is not available may not function properly if...

Page 44: ...n normal power operation and the system suspend or system wer management modes while the card is inserted you may find that a device connected to not recognized Reboot your system to correct the problem is inserted your computer may not enter the System Hibernation power management mode It System Suspend mode It is recommended to remove the card when your computer enters the ation mode by pressing...

Page 45: ... and you may lose data that you did not save our computer is off skip steps 1 to 4 k the Unplug or Eject Hardware icon in the task tray C Card that you want to unplug and click Stop when the You may safely remove this device dialog box appears C card release button p the card and pull it out RELEASE button ...

Page 46: ...r automatically Hibernation mode when the remaining battery charge drops below 7 ess of the power management setting you select See your Software olling Power Management for more information power button and hold for more than four seconds the computer will switch off automatically puter is in System Suspend or System Hibernation mode you cannot insert a disk g from System Hibernation mode the sys...

Page 47: ...ate of the system in RAM and switches off power to mber power light flashes in this mode m Suspend mode r press the power button quickly You can also use the PowerPanel System Suspend mode mal mode nation Mode system is saved on the hard drive and power is turned off The power s off in this mode m Hibernation mode You can also use the PowerPanel utility to enter System Hibernation ...

Page 48: ...ur computer by connecting or using any of these enjoy the software described in the About the Software user guide dem page 49 k Drive page 50 Drive page 53 ge 54 splay page 55 evice page 60 eakers page 63 crophone page 64 erial Bus USB Device page 65 ...

Page 49: ...er and software online C card modem in the slot of the computer label facing up push it the release button ejects completely Put back the release button Do cover too much it may cause malfunction one line jack into the connector on the PC card her end into the wall jack using a phone plug if needed Phone cable ug country specific Phone line jack RELEASE button ...

Page 50: ...n N k Drive t an optional floppy disk drive to the USB connector on your computer loppy disk drive ble into the USB connector The VAIO logo on the disk drive should be To USB ve SELV according to EN 60950 ...

Page 51: ...en button to remove the diskette oppy disk drive s below to remove the floppy disk drive while your computer is on If d properly your system may crash and you may lose data that you did Do not follow these instructions if your computer is turned off k the Unplug or Eject Hardware icon on the task tray Floppy from the list and click Stop 3 5 diskette Eject button LED indicator ...

Page 52: ...m the device that you want to when the You may safely remove this device dialog box appears nplug or Eject Hardware window fely unplug the USB floppy disk drive py disk drive disk cable into the compartment on the side of the floppy disk drive ...

Page 53: ...s ase the Sony PCGA CD51 A CD ROM drive as accessory For more ease contact your dealer puter is in System Suspend or System Hibernation mode you cannot insert a disk s for connecting the CD ROM drive may vary depending on the CD ROM drive l supplied with your CD ROM drive for more information on use ...

Page 54: ...t a USB printer compatible with your version of Windows to your ymbol to locate the USB port on your computer and printer ional USB printer cable into the USB connector driver software supplied with your printer d Printer Printer cable optional or supplied with the printer To Printer Notebook computer To USB ...

Page 55: ...r with the following display monitor nal display as a second screen or set up a virtual desktop Please refer ual Display Function in your Software Guide for further details Computer display Display adapter Connecting cable SELV according to EN 60950 To VGA Out Connector Display cable ...

Page 56: ...nect your external display to the computer pplied Display Adapter into the computer s mini VGA Out connector play cable to the VGA Out connector of the Display Adapter plug one end of the display power cord into the display and the other AC outlet ...

Page 57: ... connector and the nal cable to the VGA Out connector of the Display Adapter ymbol to locate the Earphone connector Plug the speaker audio cable nnector ymbol to locate the Microphone connector Plug the microphone cable nnector Projector wer cord Notebook computer Audio cable RGB signal cable Display adapter Connecting cable SELV according to EN 60950 To VGA Out Connector ...

Page 58: ...play to the monitor connector you can press Fn F7 tput between the Liquid Crystal Display LCD the external monitor are Guide in Selecting the Display Mode for more information display adapter mputer then unplug the display adapter ...

Page 59: ...onnector ree pin jack of the AV cable to the TV as shown below splay ect a TV to the monitor connector you can press Fn F8 to toggle the the Liquid Crystal Display LCD the TV or both devices are guide in Selecting the Display Mode for more information T r cord AV cable supplied Notebook computer TV monitor ...

Page 60: ...o camera recorder or another computer ital video camera recorder nd of the i LINK cable into the i LINK connector of the computer er end into the DV Out connector on the digital video camera recorder DVgate application Please refer to DVgate in your Software Guide for ails era To i LINK To DV Out i LINK cable ...

Page 61: ... the use of more than one digital video camera recorder or i LINK device at the same l video cameras connectors labeled DV Out DV In Out or i LINK are i LINK onnector of your notebook computer does not supply power to external devices generally INK connectors onnector supports transfer rates up to 400 Mbps however the actual transfer rate depends on e of the external device eatures available may v...

Page 62: ...r computer includes Windows Me and can be connected through ther VAIO computer that also has Windows Me installed or that has 3 0 e one computer to copy edit or delete files from another VAIO int a document on a printer connected to another VAIO computer i LINK cable SELV according to EN 60950 not supplied ...

Page 63: ...63 n N peakers e the sound quality of your computer by connecting external speakers nal speakers ymbol to locate the Headphone connector Plug the speaker cable into tor To Headphone i ...

Page 64: ...64 n N Microphone e the quality of sound input by using an external microphone xternal microphone o locate the Microphone connector Plug the microphone cable into this To Microphone ...

Page 65: ...al Bus USB Device t a USB device to your computer USB device ymbol to locate the USB connector Plug one end of the USB cable into d the other end into the USB device Notebook computer USB connecting cable e To USB ...

Page 66: ...is guide gives you the information to access VAIO Link Up Poster gives you a list of the contents you find in the box a f the bundled applications and the list of specifications of your nd accessories uides supplied on your computer s hard drive explains how to use your computer connect peripheral devices It packing list and the list of specifications of your computer and re guide lists the pre in...

Page 67: ... service answers your questions by electronic mail Just uestion in an e mail message and a Customer Service Analyst will send with the answer To send a question to Sony e mail support please instructions in your Customer Service Guide Response Centre Before contacting VAIO Link Response Centre try problem by reading your User Guide troubleshooting chapter or the d helpfiles for the peripherals or ...

Page 68: ...olutions so try these suggestions before IO Link omputer and software see page 69 tal Video Captures and DVgate see page 72 display see page 73 MOTION EYE Camera see page 74 ROMs and diskettes see page 75 nd see page 76 modem see page 77 pherals see page 79 mory Stick see page 80 er Saving Modes see page 80 ...

Page 69: ...k that you have switched to the external display and that the and contrast controls are adjusted correctly Please refer to the manual ith your display for details ondensation may have occurred Do not use the computer for at least nd then turn it on nternal backup battery is low on power it may not be able to start your perly Please plug your computer to AC power e Press F1 to resume F2 to setup wo...

Page 70: ...n turn it on again computer and press the F2 key when the Sony logo appears The BIOS u screen appears row keys to select the Exit menu row keys to select Get Default Values and then press the Enter key The ad default configuration now appears Yes is selected and then press the Enter key row keys to select Exit Save Changes and then press Enter The ve configuration changes and exit now appears Yes ...

Page 71: ...from your ocks up ng the computer On the Windows taskbar click the Start button click n and then choose Restart ot restart as described in the preceding step you can restart the y pressing Ctrl Alt Delete once and then clicking Shut Down in the ger of Windows ous step does not work press the power button and hold it for at least s This turns off the power puter locks up while playing a CD ROM stop...

Page 72: ...ugged into nnector es off re it was and press it until it clicks he key top intentionally or press it excessively when you replace it it lfunction Handle it with care ey top on page 83 Video Captures and DVgate ing images to a digital video device using DVgate my system displays the ing to DV device failed Check the power and cable connections to and try the operation again pplications and restart...

Page 73: ...t display anything the computer is plugged into a power source and that it is turned on the power indicator on the front panel of the computer is on the battery packs are inserted properly and that they are charged brightness of the LCD ter may be in LCD video standby mode Press any key to activate the e on my external display is not centered or sized properly s on your external display to adjust ...

Page 74: ...re may be a gap However malfunction ured with MOTION EYE are not clear nder fluorescent light may result in reflections n noises may occur if the captured images include dark parts the lens of the MOTION EYE is clean us ring for focus adjustment e gaps and sound gaps when importing video images ccur based on the effect settings in the Smart Capture software See the p of the Smart Capture software ...

Page 75: ...ely in the PC card slot in the computer PC card slot for bent or broken pins of the CD ROM drive is OFF over is installed in your drive Remove the pickup cover before disc lick an application icon a message such as You must insert the into your CD ROM drive appears and the software does not start require specific files that are located on the application s DVD ROM disk Insert the disk and try star...

Page 76: ...rly s charged sing an application that has its own volume control check that the urned up volume controls in Windows xternal speakers check that the speakers are properly connected and is turned up If the speakers have a mute button make sure it is off If wer the speakers check that the batteries are inserted properly and e charged connected an audio cable to the Headphone connector disconnect the...

Page 77: ...gged into your PC card the phone line is working You can check the line by plugging in an hone and listening for a dial tone the phone number the program is dialing is correct the communication software you are using is compatible with the PC sure that the driver selected in your communication software matches rd programming refer to your communication software user manual your PC card modem respo...

Page 78: ... there are no problems with the fax u are calling and that it is compatible with fax modems aving a problem connecting with your Internet Service Provider check is not experiencing technical problems a second phone line available try connecting the modem to that line not Establish a Connection ling mode may be incompatible with your telephone line ng mode Computer ontrol Panel all Control Panel op...

Page 79: ...LINK device once then connect it again mputers that I want to connect via the i LINK device cannot communicate uter includes Windows Me To be able to communicate with another puter the other VAIO computer must have Windows Me or Smart on of Smart Connect on the other VAIO is not 3 0 you need to install nect for legacy in your Windows Me system Smart Connect for legacy with your Application Recover...

Page 80: ...matter software which is installed on your machine k does not work I cannot access the S Drive rol Panel click View all Control Panel options if all options are not k on the System icon then click on the Device Manager tab sh Saving Modes computer in any Standby mode Hibernation or supend the system gets lications you launched and restart the system If you don t succeed he question My computer doe...

Page 81: ...card and remove it See To remove a PC Card for details s menu select System Configuration Utility nced in the General tab The Advanced Troubleshooting Settings ears he Standby feature is enabled message is displayed If the Standby isabled message is displayed click the Enable button he Hibernation feature is enabled message is displayed If the n feature is disabled message is displayed click the E...

Page 82: ...odules use high precision components and ectors technology To avoid the invalidation of your Guarantee by is recommended that t your dealer to install a new memory module install it yourself if you are not familiar with upgrading memory on computer touch the connectors or open the memory panel O Link if you need assistance ...

Page 83: ...mes off replace the key top as it is shown below If p comes off put it where it was and push it until it clicks key top e from key top then catch on the hook Align the center of the key top m the top Enter key Wire Space key Hook Wire ...

Page 84: ...r void damaging data a shock to your computer e your computer in a location subject to mechanical vibration or in uation ve your computer while the power is on off the power or restart the computer while reading or writing data your computer in a place subject to extreme change of temperature disk is damaged the data cannot be restored e important data once your computer is damaged you should back...

Page 85: ...nt residual images becomes warm during operation This is normal and does not indicate on manufactured using high precision technology You may however see oints and or bright points red blue or green that continuously he LCD This is a normal result of the manufacturing process and does e a malfunction ource uter operates on 100V 240V AC 50 60 Hz e the AC outlet with other power consuming equipment ...

Page 86: ... alcohol or benzine as these may damage the finish of your solid object or liquid fall into the computer shut down your computer nplug it You may want to have the computer checked by qualified efore operating it any further p the computer or place heavy objects on top of the computer e your computer in a location subject to urces such as radiators or air ducts unlight ve dust re or rain nical vibr...

Page 87: ...he set ecified peripheral equipment and interface cables otherwise may result cut or damaged connection cables uter cannot be connected to a coin operated telephone and may not a private branch exchange PBX ndensation is brought directly from a cold location to a warm one moisture may e your computer In this case allow at least an hour before turning on If any problem occurs unplug your computer a...

Page 88: ...ff any remaining ith a dry soft cloth es e the battery pack in temperatures above 60 C such as in a car parked r under direct sunlight is shorter in a cold environment This is due to decreased battery t low temperatures batteries at temperatures between 10 C to 30 C Lower temperatures nger charging time attery is in use or being discharged the battery pack heats up This is is not cause for concern...

Page 89: ... to play your earphones at high volume while pecially at pedestrian crossings You should exercise extreme caution nue use in potentially hazardous situations hearing damage Avoid using earphones at high volume Hearing ise against continuous loud and extended play If you experience a our ears reduce the volume or discontinue use o disconnect the power cord before cleaning the computer ing the LCD s...

Page 90: ... XGA TFT ry xxx KB CPU integration MPEG 1 Digital Video Supports full screen playback ATI Rage Graphics chip with 8 MB Video RAM and 3D accelerator ies 16 bit CD quality stereo sound One PCMCIA type II Card and Card Bus support ties Microphone Stereo Speakers MOTION EYE Camera Pointing Device and Jog Dial Jog Dial and Capture 12 0 128 192 512 ...

Page 91: ... year free VAIO Link Service 1 year guarantee parts and labour ment 40 watts maximum 16 V DC AC100 240V ment Energy Star compliant ACPI Advanced Configuration Power Interface Lithium ion 248 mm 27 mm 152 mm 970 g 5 C t 35 C temperature gradient less than 10 C hour ature 20 C t 60 C Temperature gradient less than 10 C hour idity 20 t 80 Not condensed provided that humidity is less than 65 at 35 C h...

Page 92: ...han 35 C mera 350 000 pixels square pixels 1 6 inch progressive scan 350 000 pixels CCD Focus distance f 2 8 mm F 2 8 f 39 mm translated to a 35 mm camera Automatic Indoor Outdoor Hold Auto 1 50 Hold YUY2 24 bit RGB Motion JPEG JPEG size VGA hVGA qVGA es 30 frames s max overlay s 30 frames s max 320 x 240 motion JPEG 15 frames s max 640 x 480 motion JPEG PCG C1VE ...

Page 93: ...atibility table ins an overview of the devices that are compatible or not with your Compatible Not compatible Sony USB mouse PCGA UMS1 Series PCGA AC16V VMC IL4415 VMC IL4408Series ve PCGA UFD5 PCGA CD51Series ...

Page 94: ...14 phone 14 power cord 18 video 14 cameras digital video recorder 60 canceling commands 27 Caps Lock 15 indicator light 29 CD ROM drive connecting 43 CD ROM DVD ROM discs cleaning 88 handling 87 88 charge status indicator light 20 charging battery pack 20 charging battery packs 20 choosing power source 19 cleaning computer 86 computer cleaning 86 condensation 87 lithium ion battery 7 ...

Page 95: ... drive 51 troubleshooting 75 drives floppy disk 14 50 DV In Out 14 60 E earphone 57 earphones precautions 89 Eject button 51 ejecting diskettes 51 ergonomic considerations 12 13 Escape key 27 external devices display 13 See also monitor 55 speakers 30 63 F floppy disk drive 14 cable 14 connecting 50 disconnecting 51 troubleshooting 75 Fn key 27 Function keys 27 function keys 28 ...

Page 96: ...7 connector 15 L LCD 85 lock lever 23 troubleshooting 73 74 lever LCD 23 lithium ion battery disposal 7 safety precautions 7 loading battery pack 19 M maintenance 86 89 Memory Stick 37 Memory Stick slot 37 microphone 15 16 connecting 64 connector 57 troubleshooting 76 77 modem troubleshooting 77 moisture condensation 87 monitor connecting 55 ...

Page 97: ...ions 87 pre installed software 66 Print Screen key 27 printer connecting 54 port 54 R radio interference 87 rechargeable battery pack 19 rechargeable battery packs 18 recharging battery pack 20 recharging battery packs 20 registering your computer 25 Registering Your Computer 25 26 regulatory information 6 removing battery pack 22 diskettes 51 floppy disk drive 51 S Scroll Lock 15 indicator light ...

Page 98: ...7 cations 66 t 66 67 68 3 87 65 connector 16 65 V VAIO Link 67 response center 67 software 67 ventilation 87 video cable 14 video camera 60 Video Standby mode 31 W weight saver 14 Windows taskbar 71 Windows key 27 key combinations 28 Start button 24 taskbar 24 SID Last revision 9 1 00 ...

Reviews: