Changing Your Computer’s Memory
141
❑
Do not open the memory module package until you are ready to install the
module. The package protects the module from ESD.
❑
Use the special protective package to store a memory module and prevent
ESD, or wrap the memory module in aluminum foil.
Typical expansion memory configuration
Removing and installing memory modules
Make sure you read “Precautions and procedures” before you remove or install a
memory module. When installing a memory module, do not open the module
package until you are ready to install it. The package protects the module from
Electrostatic discharge (ESD).
To remove a memory module
1
Turn off the computer and all peripheral devices.
2
Disconnect the power cord, all cables, and remove the battery if it is
installed. See “To remove the battery.”
3
Wait for the computer to cool down.
4
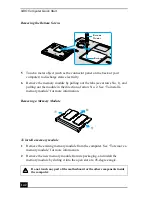
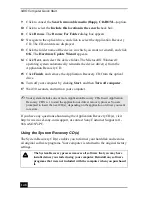
Use an appropriate screwdriver to loosen and remove the screw on the
bottom of the computer.
Total System Memory (MB)
On board (MB)
Slot (MB)
512
256
256
✍
The interior of the computer becomes extremely hot during operation. Wait at least
one hour for the computer to cool down before you remove the screws.
To avoid damaging the computer, do not remove or loosen any other screws.
Summary of Contents for VAIO PCG-GRV550
Page 8: ...VAIO Computer Quick Start 8 ...
Page 52: ...VAIO Computer Quick Start 52 ...
Page 68: ...VAIO Computer Quick Start 68 ...
Page 69: ...69 Printer Connections Printing With Your Computer ...
Page 74: ...VAIO Computer Quick Start 74 ...
Page 88: ...VAIO Computer Quick Start 88 ...
Page 89: ...Changing the Window Design of Sony Programs 89 ...
Page 90: ...VAIO Computer Quick Start 90 ...
Page 91: ...91 Connecting Mice and Keyboards Using External Mice and Keyboards ...
Page 95: ...95 Floppy Disk Drives and PC Cards Using Floppy Disk Drives Using PC Cards ...
Page 138: ...VAIO Computer Quick Start 138 ...
Page 139: ...139 Memory Upgrades Changing Your Computer s Memory ...
Page 145: ...145 Using the Recovery CDs Application and System Recovery CDs Using Your Recovery CDs ...


