3-877-504-
11
(1) © 2008 Sony Corporation Printed in U.S.A.
3
2
1
4
3
2
1
1
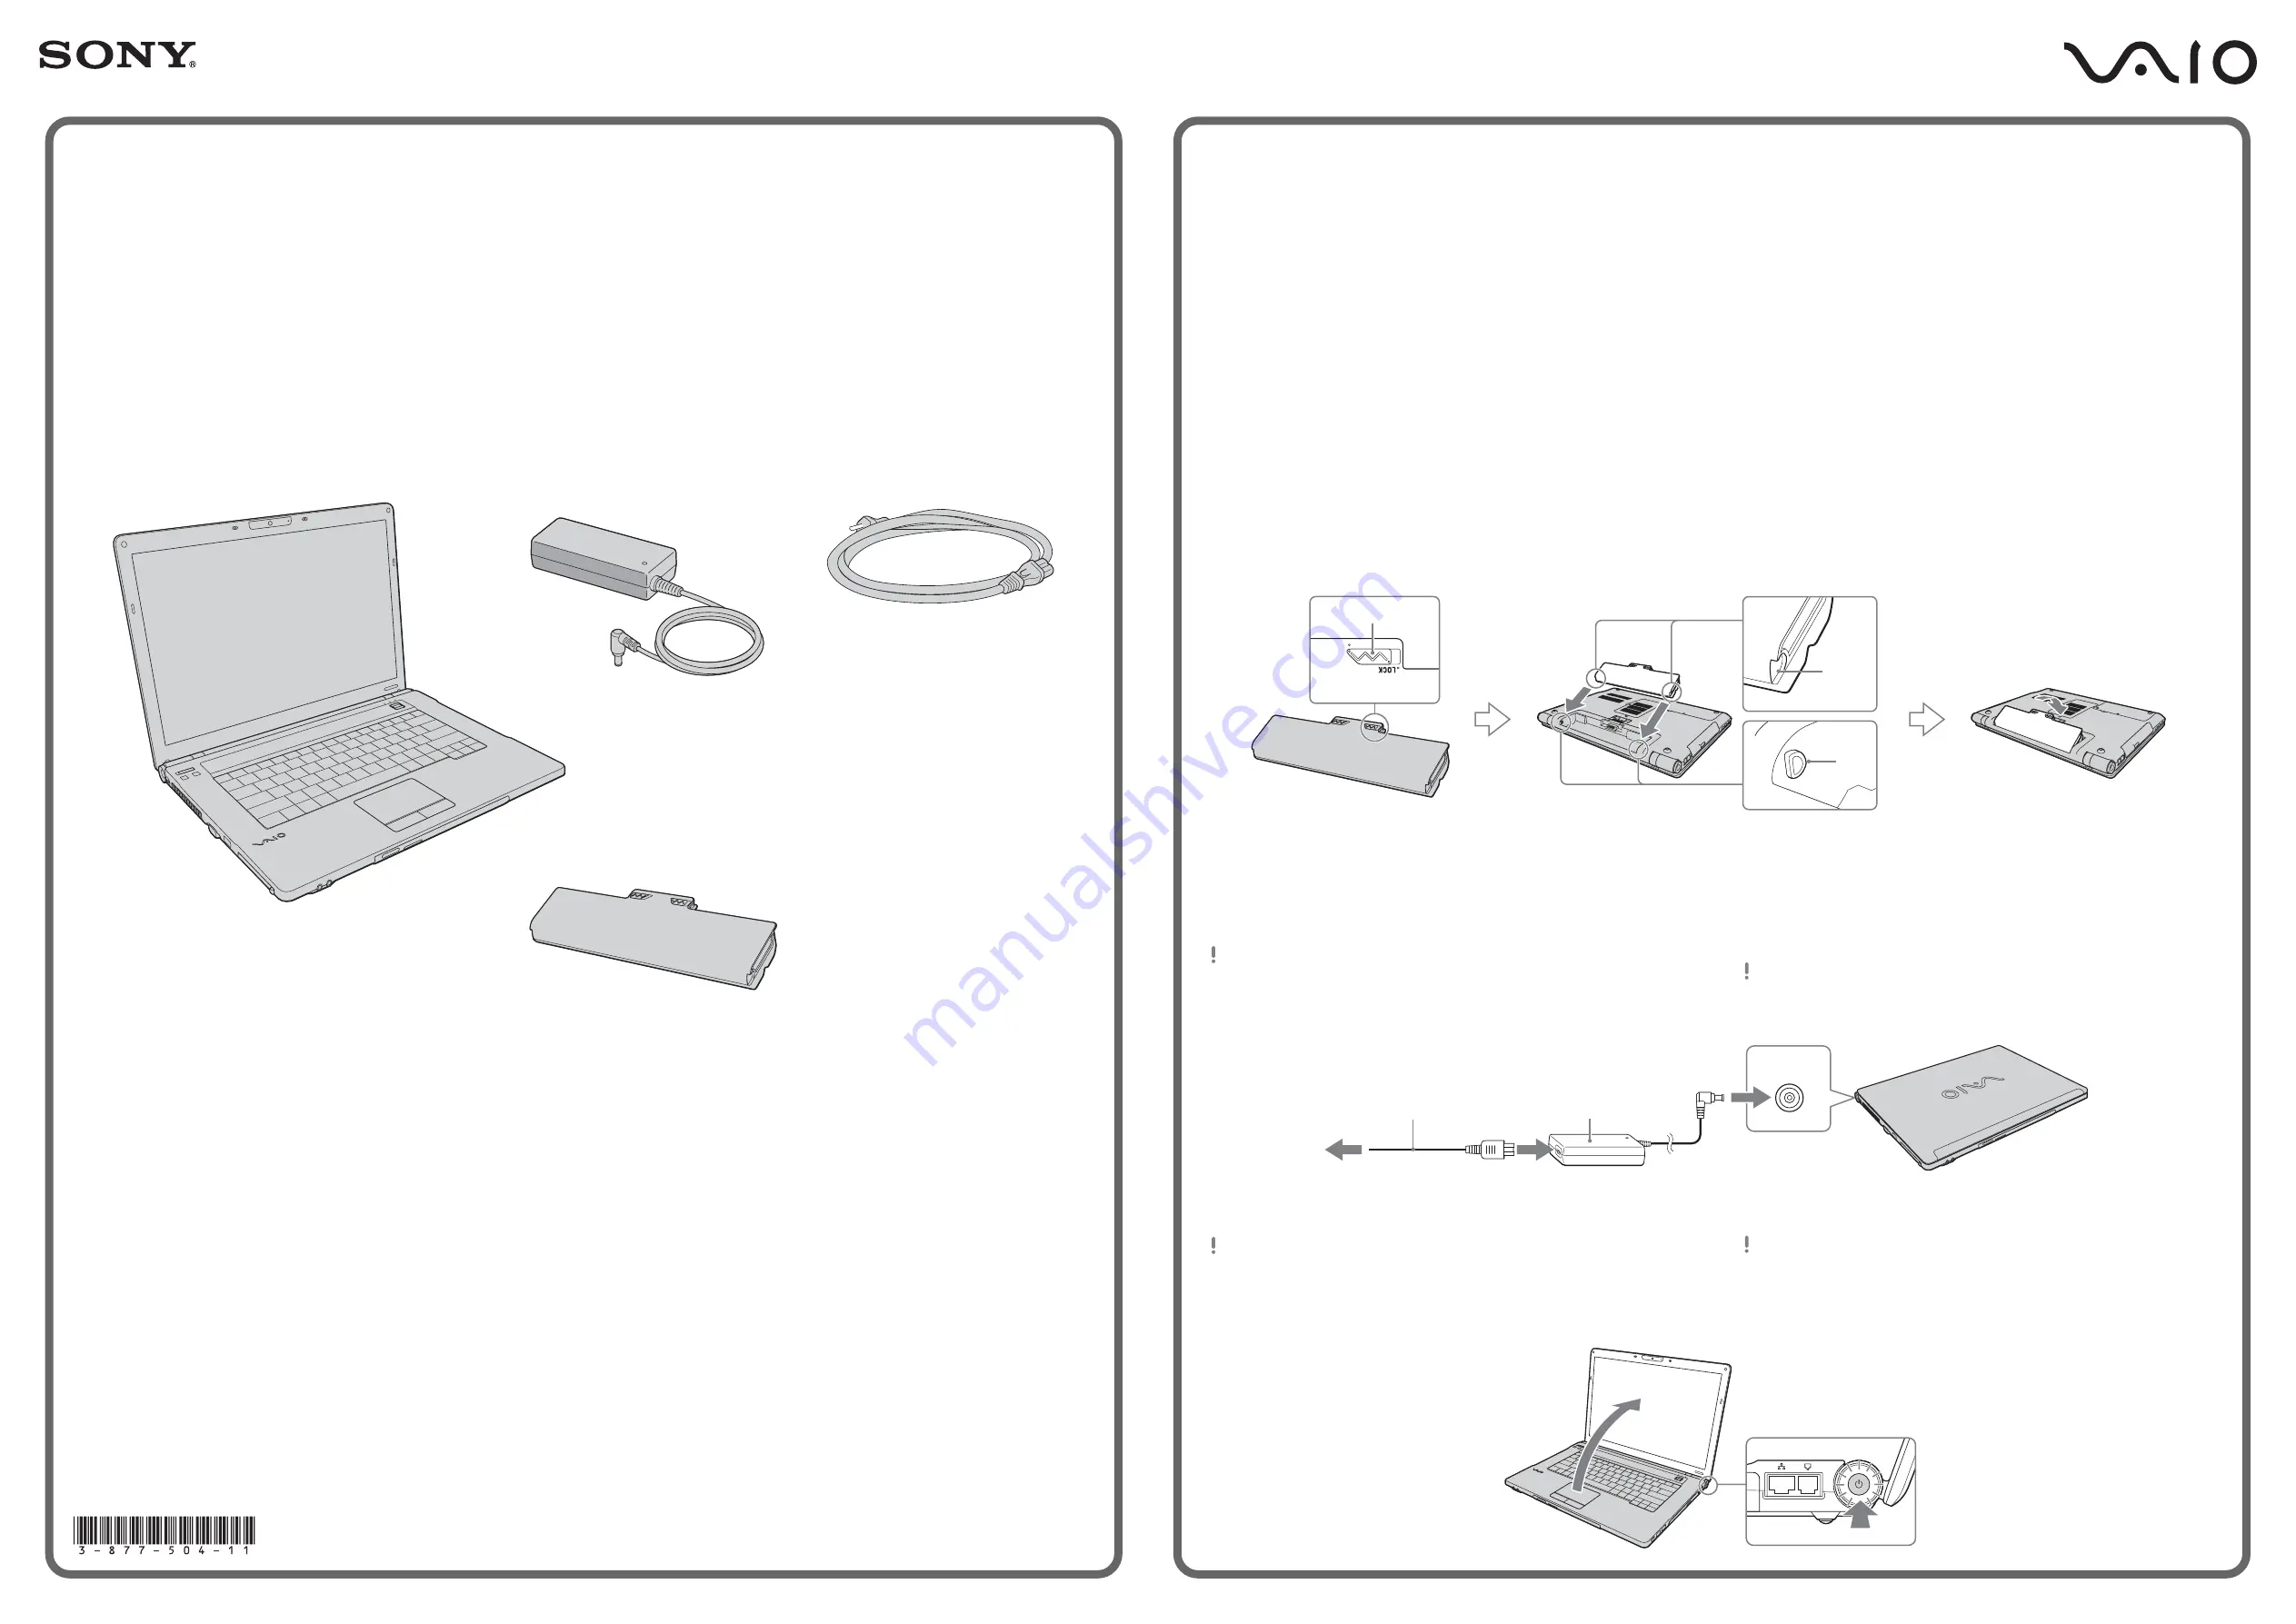
Install Battery Pack
1
Slide the battery
LOCK
switch
1
inward.
2
Slide the battery pack diagonally into the battery compartment until the
projections
2
on either side of the battery compartment fit into the
U-shaped cuts
3
on either side of the battery pack.
3
Rotate the battery pack in the direction of the arrow, and push the battery
pack down into the compartment until it clicks into place.
4
Slide the battery
LOCK
switch outward to secure the battery pack on the
computer.
2
Connect AC Adapter
1
Plug one end of the power cord
1
into the AC adapter
2
and the other
end into an AC outlet
3
.
2
Plug the AC adapter cable into the
DC IN
port
4
on the computer.
Be sure to connect the AC adapter to your computer when using it for the
first few times to ensure the battery becomes fully charged.
1
Instale la batería
1
Deslice el interruptor
LOCK
1
hacia adentro.
2
Deslice la batería diagonalmente en el interior del compartimiento de la
batería hasta que las proyecciones
2
de cada lado del compartimiento de
la batería encajen en las ranuras con forma de U
3
a cada lado de la
batería.
3
Gire la batería en la dirección de la flecha y empújela dentro del
compartimiento hasta que encaje en su lugar.
4
Deslice el interruptor
LOCK
hacia afuera para asegurar la batería en la
computadora.
2
Conecte el adaptador de CA
1
Conecte un extremo del cable de alimentación
1
al adaptador de CA
2
y el otro extremo, a una toma de CA
3
.
2
Conecte el cable del adaptador de CA en el puerto
DC IN
4
de la
computadora.
Conecte el adaptador de CA a la computadora las primeras veces que la
use para asegurarse de que la batería se cargue completamente.
To turn on your computer
Before starting your computer for the first time, do not connect any other
hardware that did not originally come with your computer. Make sure to start
up your computer with only the supplied accessories connected and set up
your system. Upon completion, connect one device (for example, a printer,
an external hard disk drive, a scanner, and so on) at a time, following the
manufacturers’ instructions.
Meet your
VGN-BZ560 Series
personal computer
Conozca su computadora personal
Serie VGN-BZ560
Main unit and supplied items
Unidad principal y artículos suministrados
A
Main unit
Unidad principal
B
AC adapter
Adaptador de CA
D
Rechargeable battery pack
Batería recargable
3
Abra la tapa y encienda la unidad
Al abrir la tapa de la pantalla LCD, sostenga la base con una mano y
levante la tapa suavemente con la otra.
1
Levante la tapa de la pantalla LCD.
2
Pulse el botón de encendido hasta que el indicador de encendido se
ilumine.
Para encender la
computadora
Antes de iniciar por primera vez su computadora, no conecte ningún otro
hardware que no venga incluido originalmente con ella. Asegúrese de
iniciar su computadora sólo con los accesorios suministrados conectados y
asegúrese de configurar el sistema. Una vez finalizado lo anterior, conecte
un dispositivo (por ejemplo, una impresora, una unidad de disco duro
externa, un escáner, etc.) a la vez, de acuerdo con las instrucciones del
fabricante.
3
Open Lid and Power On
When opening the LCD screen lid, hold the base with one hand and gently
lift the lid with the other.
1
Lift the LCD screen lid.
2
Press the power button until the power indicator turns on.
A
B
C
D
C
Power cord
Cable de alimentación
The illustrations in this document may appear different from your model, depending on the country or area of your purchase.
Es posible que las ilustraciones de este documento difieran de su modelo, según su país o región de compra.
¡IMPORTANTE!
Por favor lea detalladamente este manual de instrucciones antes de conectar y operar este equipo. Recuerde que un mal uso de su aparato podria anular la
garantia.


