1-43
VPH-G90E/G90U/G90M
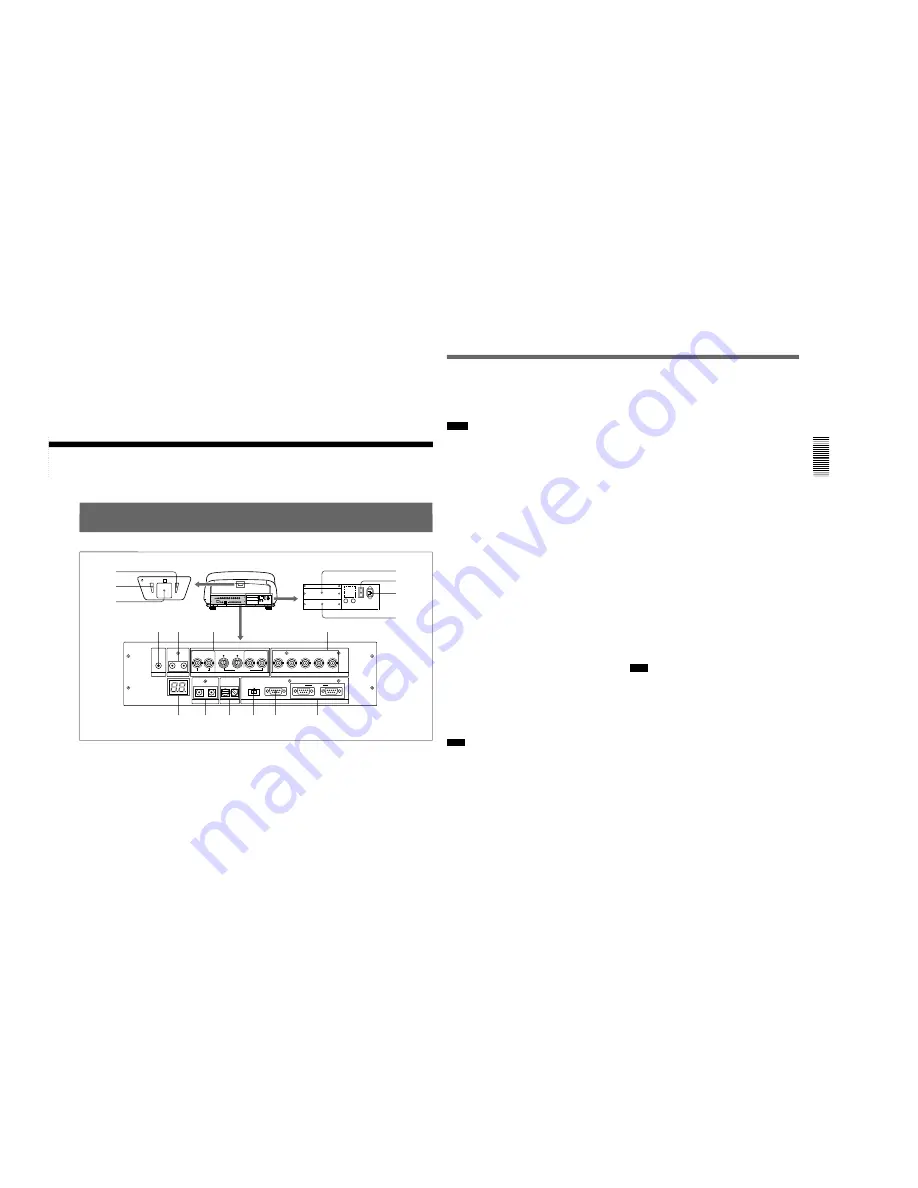
Connections
25
Connections
4
Signal interface board attachment part (INPUT
C)
An optional signal interface board can be attached to
this section.
Notes
• The IFB-40 cannot be attached to INPUT C.
• When the IFB-12/12A is attached, the IFB-12/12A
cannot be set to output mode.
5
ON indicator
When the projector is turned on, this indicator lights in
green.
6
u
STANDBY indicator
When the MAIN POWER switch on the projector is
turned ON, this indicator lights in orange, indicating
that the projector can be turned on/off using the remote
commander.
7
Rear remote control detector
8
INPUT A connectors (BNC type)
R/R-Y/P
R
, G/Y, B/B-Y/P
B
, SYNC/HD, VD
connectors: Connect to the outputs of a computer or a
video camera. According to the connected
equipment, the RGB (R, G, B), component (R-Y,
Y, B-Y) or HDTV (P
R
, Y, P
B
) signal is selected.
9
VIDEO connectors*
VIDEO IN connector (BNC type): Connects to the
composite video output of the video equipment.
VIDEO OUT connector (BNC type): Connects to the
composite video input of a color monitor.
S VIDEO IN/OUT connectors (4-pin, mini-DIN
type): Connects to the S video output or input of the
video equipment.
Y IN, C IN connectors (BNC type): Connects to the
Y and C video outputs of the video equipment.
Note
The S VIDEO IN connector is disconnected when a
cable is connected to the Y IN/C IN connectors.
* Note on the VPH-G90E model
The optional IFB-G90E Video Interface Board is
required for using the VIDEO connectors.
!º
LINK IN/OUT jacks (stereo minijack)
When connecting multiple projectors, connect the
LINK OUT jack to the LINK IN jack on another
projector. Then the ABL LINK function can be used.
For details of the link function, see page 146.
!¡
TRIGGER connector (minijack)
When the projector is turned on, 12 V is output. When
it is turned off, 0 V is output. However, the connector
cannot be used as the power source.
!™
LED display window
Self-diagnosis results and PJ COM communication
conditions, etc. are displayed using two-digit numbers
and alphabets.
Self-diagnosis codes are displayed in red or orange,
and the warning and communication conditions in
green.
For details, see “Self-diagnosis functions” on page 148.
!£
CONTROL S jacks
IN/PLUG IN POWER jack (stereo minijack):
Connects to the CONTROL S OUT jack of other
Sony equipment. Also connects to the CONTROL
S OUT jack of the supplied remote commander
with the supplied remote control cable (stereo
cable) to be used as a wired remote control. In this
case, this jack supplies the power to the remote
commander to save the battery power.
OUT jack (stereo minijack): Connects to the
CONTROL S IN jack of other Sony equipment.
Note
When using this jack, the remote control detector on
the projector does not function.
24
Connections
Connections
TRIGGER
LINK
S VIDEO
OUT
IN
C IN
Y IN
VIDEO
VIDEO
R-Y/P
R
R
B-Y/P
B
G
B
SYNC/HD
VD
INPUT A
Y
CONTROL S
PLUG IN POWER
DEVICE INDEX
IN
OUT
IN
OUT
IN
OUT
REMOTE
RS-232C/422A
RS-232C RS-422A
IN
OUT
PJ COM
STANDBY
ON
R
5
6
7
1
2
3
4
!¡
!º
9
8
!™
!£
!¢
!∞
!§
!¶
Connections
Location and Function of the Rear Panel
1
Signal interface board attachment part (INPUT
B)
An optional signal interface board such as IFB-12/12A
and IFB-40 can be attached to this section.
When the IFB-12/12A is attached, the signal input to
the INPUT A connectors can be output from the IFB-
12/12A by setting it to output mode.
2
MAIN POWER switch
3
AC IN socket
Connect the supplied AC power cord.
Summary of Contents for VPH-G90E
Page 10: ......
Page 120: ......
Page 122: ...2 2 VPH G90E G90U G90M 2 1 3 Location 3 ME MB MC PB M L MA BA F BC NA BB ...
Page 190: ......
Page 204: ......
Page 210: ......
Page 224: ......
Page 337: ...9 1 9 1 VPH G90E G90U G90M SECTION 9 BLOCK DIAGRAMS ...
Page 363: ...2 3 4 5 A B C D E F G H 1 10 1 10 1 VPH G90J G90E G90U G90M SECTION 10 DIAGRAMS ...
Page 437: ...2 3 4 5 A B C D E F G H 1 10 75 10 75 VPH G90J G90E G90U G90M ...
Page 474: ...2 3 4 5 A B C D E F G H 1 10 112 10 112 VPH G90J G90E G90U G90M ...


