GB
28
When Using the Projector by Mounting It to a Ceiling
When Using the
Projector by
Mounting It to a
Ceiling
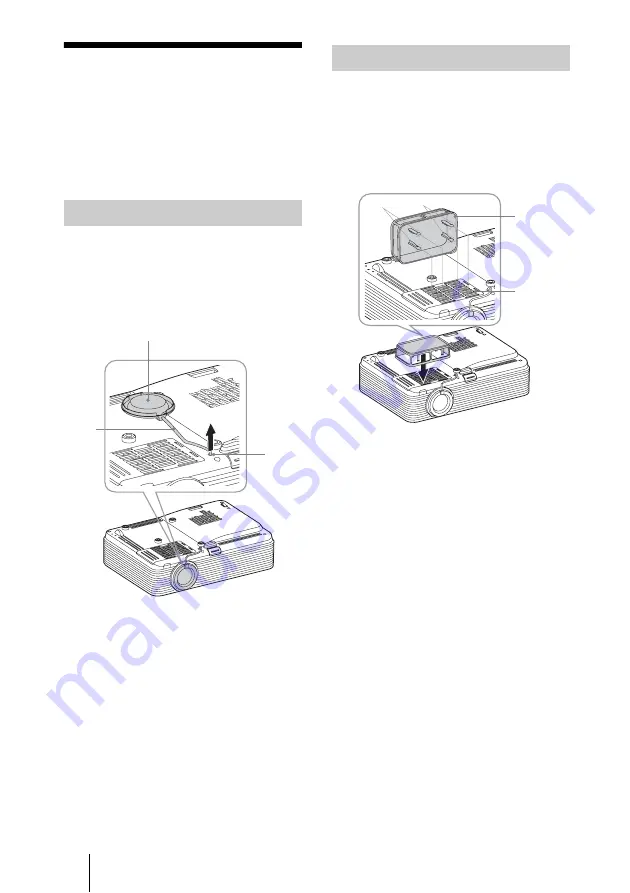
If the lens cap is unnecessary when
mounting the unit to the ceiling, remove it.
Pull the string of the lens cap a little bit
strongly to remove it from the unit. If the
lens cap is necessary, insert the edge of the
string into the hole.
When mounting the projector to the ceiling,
you can attach the dust cover to the unit to
avoid dust from piling in the air filter.
Place the air filter cover so that the dust
cover covers the air filter cover then insert
the four claws (inside of the dust cover) into
the holes of the air filter cover.
Removing the lens cap
Lens cap
String
Hole
Attaching the dust cover
Claw
Claw
Dust
cover
Air filter
cover
Summary of Contents for VPL-DW241
Page 21: ...21JP 投写する 映像を調整する 画面のフォーカス フォーカス 画面のサイズ ズーム 画面の位置 フォーカスリング ズームリング 前脚部 調整 可 後脚部 脚調整ボタン ...
Page 89: ......
Page 117: ......
Page 173: ......
Page 181: ...9CS 准备 2 插入锂电池 3 合上锂电池舱 3 正 面朝 上 ...
Page 187: ...15CS 投影 调节投影图像 聚焦 尺寸 变焦 位置 聚焦环 变焦环 后撑脚 撑脚调节按 钮 前撑脚 可 调节 ...
Page 229: ......
Page 238: ...CT 10 準備 1 拉出鋰電池艙 用細棍拉出電池艙 如圖所示 2 插入鋰電池 3 關閉鋰電池艙 安裝電池 3 加號 面 朝上 ...
Page 244: ...CT 16 投影 調整投影圖像 對焦 尺寸 縮放 位置 對焦環 縮放環 腳座調整鈕 前腳座 可 調整 後腳座 ...
Page 245: ...17CT 投影 顯示圖案以調整圖像 按下遙控器的 PATTERN 鍵以顯示圖案 用於調整投影圖像上的圖像 再次按下 PATTERN 鈕 回到上一個圖像 用於調整圖像的圖案 ...


