Photograpy Basics
EXPOSURE
: the amount of light entering the camera, controlled by the IRIS.
FOCUS
: point at which objects in front of the lens form a sharp image. Focus is determined by the
distance between the lens and the subject.
WHITE BALANCE
: adjusts the color of the image. The video image is made up of red, green and blue;
adjusting the white balance changes the amount of each of these colors to compensate for the color
temperature of ambient light. Fluorescent lights and sunlight, for example, have different color temper-
atures (“warmer” or “cooler”), and the camera must be adjusted accordingly to accurately reproduce
proper color.
AUTO vs. MANUAL:
In most situations, while you are still learning how to use the camera,
AUTO mode will get you decent-looking results. As you become more comfortable using the
camera, you will find that more professional-looking results can be obtained by setting some
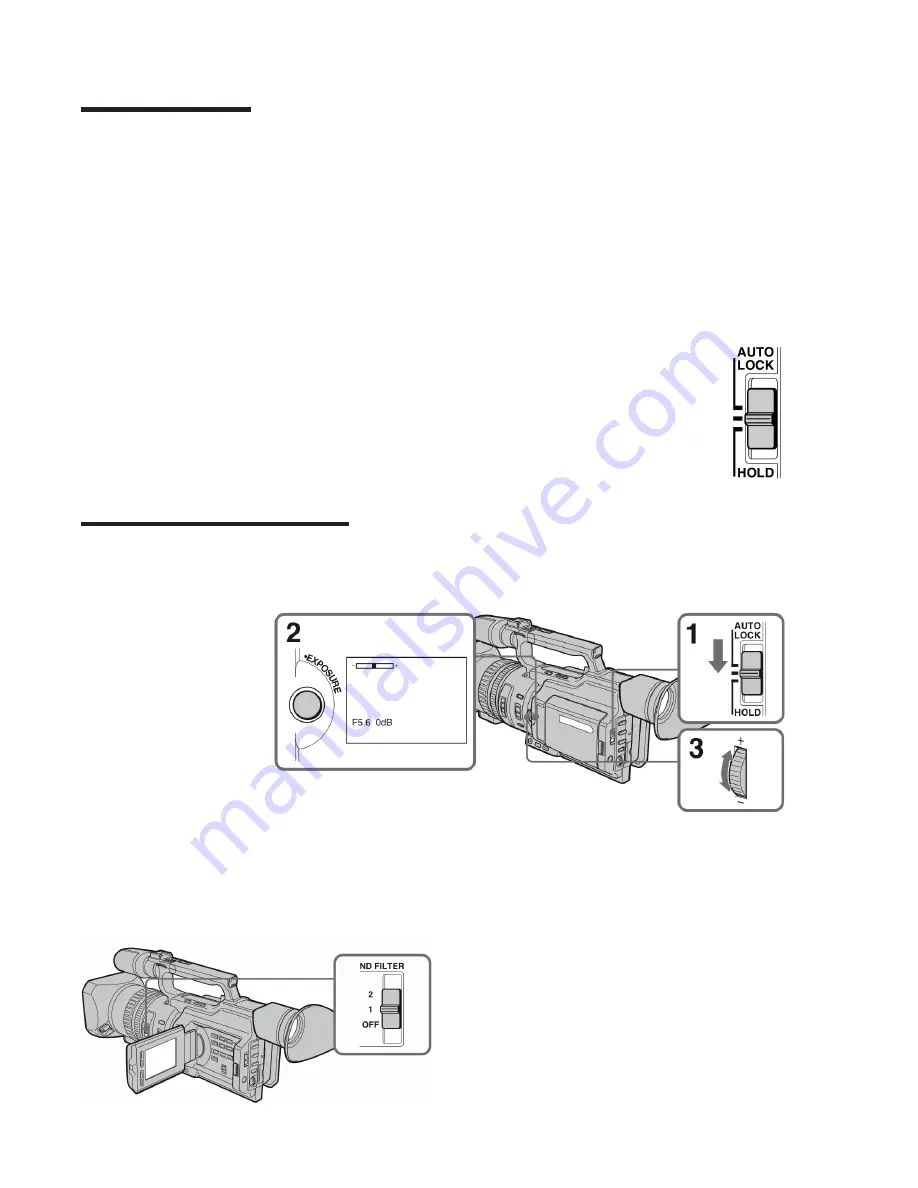
or all of these controls manually. Turn the AUTO LOCK switch to the center position to enable
manual modes.
Manually adjusting exposure
In AUTO, flashy subject matter (such as reflections of sunlight on a lake) may cause the iris to open
and close erratically. Setting the exposure to MANUAL will eliminate this.
1. Set the AUTO LOCK
selector to the center.
2. Press EXPOSURE. The
exposure indicator appears
on the screen.
3. Turn the EXPOSURE dial
up or down to adjust the
exposure.
If you want to return to Auto, press EXPOSURE again.
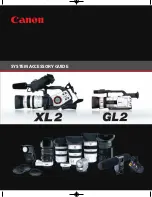
If you’re shooting outside in sunlight, you may notice that it is difficult to turn the iris down enough
get good exposure. If this happens, use the ND FILTER switch on the side of the lens. This will use a
neutral density filter to knock down some of the
light entering the iris, without changing the color
temperature. Normally, the iris F-Stop should
not have to be higher than F8; if it is, use the ND
filter.
NEVER USE THE ND FILTER INDOORS. If “ND
OFF” flashes on the screen, turn the ND filter OFF.
3


