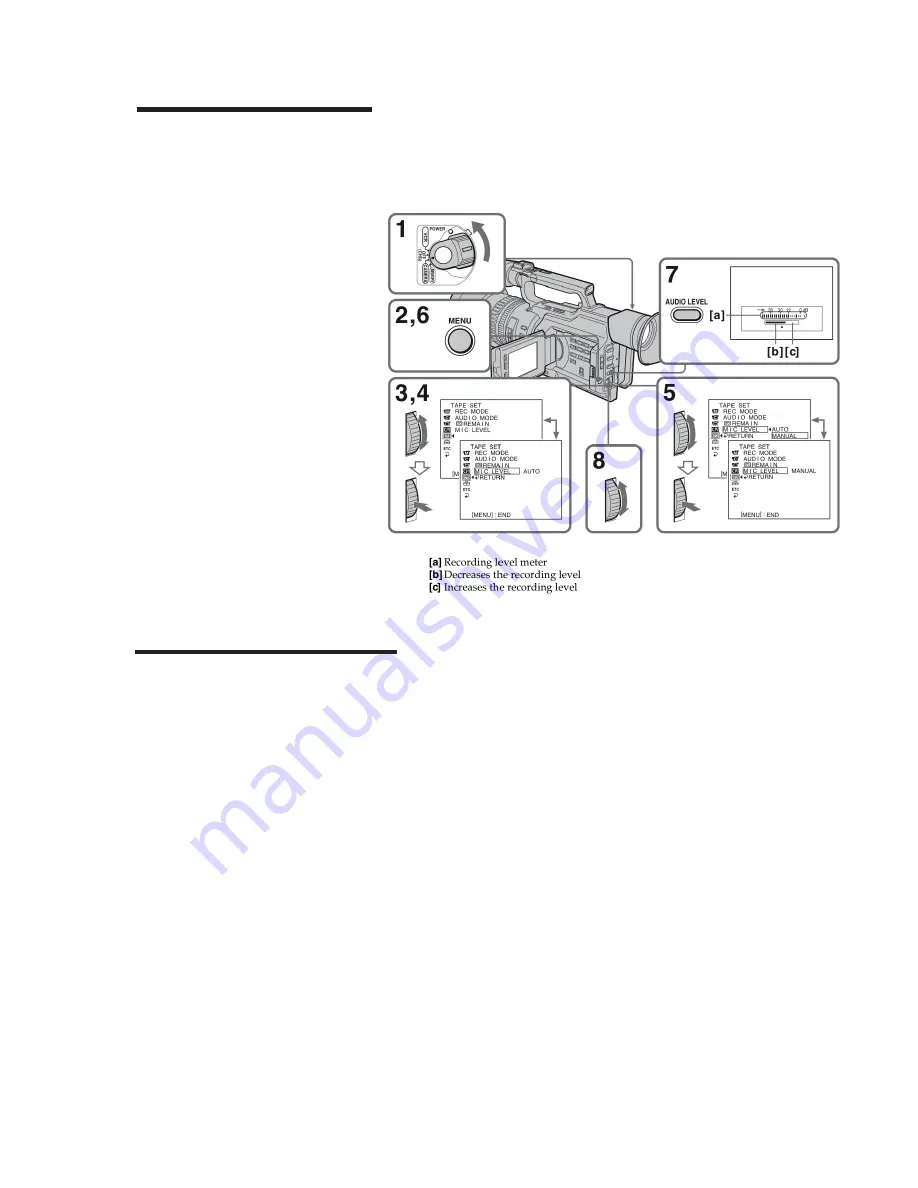
Manually adjusting audio
The same concepts for AUTO vs. MANUAL settings apply to audio: AUTO will get you acceptable
results in most cases, but MANUAL is better once you are comfortable with the camera and want the
most professional results. To change the recording level to manual:
1. Turn the camera on.
2. Press MENU.
3. Turn the SEL/PUSH EXEC dial
to select the tape icon, then press
the dial.
4. Turn the SEL/PUSH EXEC dial to
select MIC LEVEL, then press the
dial.
5. Turn the SEL/PUSH EXEC dial
to select MANUAL, then press the
dial.
6. Press MENU to erase the menu
display.
Adjusting the recording level
7. Press AUDIO LEVEL to display the recording level adjustment display.
8. Turn the SEL/PUSH EXEC dial to adjust the level.
You should always test the audio level before recording, by having the subject talk in a normal voice
and then setting the level so that the loudest sounds do not go over 0 (or “clip”) and cause distortion.
Always use headphones to monitor the audio. Use the VOLUME - + buttons on the LCD screen adjust
headphone volume.
5


