background image

1


1


NWD-E023F/E025F.GB 3-875-124-11(1)

Listening to FM Radio

 Listening to FM Radio

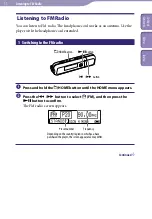
You can listen to FM radio. The headphone cord works as an antenna. Use the 

player with the headphone cord extended.

1  Switching to the FM radio

/

 button



 button

/HOME button

  Press and hold the  /HOME button until the HOME menu appears.

  Press the 

/

 button to select   (FM), and then press the 



 button to confirm.

The FM radio screen appears.

Preset number

Frequency

Depending on the country/region in which you have 
purchased the player, the screen appearance may differ.

Continued 

Listening to FM Radio

Table of 

Cont

ents


Menu


Inde
x

Summary of Contents for Walkman NWD-E023F

Page 1: ... 2008 Sony Corporation 3 875 124 11 1 Operation Guide NWD E023F E025F Table of Contents Menu Index ...

Page 2: ...ide explains standard and advanced features enabling you to make full use of the player and troubleshoot problems Browsing the Operation Guide To use the buttons in the Operation Guide Click the buttons located in the upper right of this manual to jump to Table of Contents HOME Menu List or Index Jumps to the table of contents Find what you are looking for from a list of topics in the manual Jumps...

Page 3: ...procedure may differ depending on your Adobe Reader version To change the page layout The buttons at the bottom of the Adobe Reader screen enable you to select how pages are displayed Single Page Pages are displayed one at a time When you scroll the display changes to a previous or succeeding page Continuous Pages are displayed as a continuous roll of pages When you scroll the previous or next pag...

Page 4: ...olume Level Dynamic Normalizer 31 Changing the Display Mode Display Mode 32 Setting the Volume Level Volume Mode 34 Setting to a Manual Volume Manual Volume 34 Setting a Preset Volume Preset Volume 35 Setting a Preset Volume value 36 Limiting the Volume AVLS 37 Turning Off the Beep Sound Beep 38 Setting the Current Time Set Date Time 39 Setting the Date Format Date Disp Type 41 Setting the Time Fo...

Page 5: ...n Audio Files 60 Upgrading the Player s Firmware 61 Troubleshooting Troubleshooting 62 Messages 70 AdditionalInformation Precautions 72 About Copyrights 79 Specifications 80 Index 84 Note Depending on the country region in which you have purchased the player some models may not be available Table of Contents Menu Index ...

Page 6: ...icons may differ depending on the function you use By pressing the button you can select an icon and press the button to confirm Search 21 Sports Shuffle 20 All Songs 19 FM 51 Settings File Disp Language 23 Sound 25 Equalizer 26 Clear Stereo 30 Display Mode 32 Scan Sens 56 Mono Auto 57 FM Auto Preset 52 Advanced Settings Date Time Set Date Time 39 Date Disp Type 41 Time Disp Type 42 Power Save Mod...

Page 7: ...mory of the player 2 The Auto Transfer software is stored in the built in flash memory of the player For details about this software see Transferring music automatically using the Auto Transfer software page 17 About the serial number The serial number provided for this player is required for the customer registration The number is shown on the rear of the player You can also check the serial numb...

Page 8: ... Place the supplied Style Up Panel on the front face of the player alongside the guide line and then slide in to attach Guide line Attach the supplied matching USB cap Notes Be sure to attach the Style Up Panel when you use the player Be sure to attach Style Up Panel properly Otherwise you may not be able to operate the buttons of the player properly Handle the Style Up Panel with care If the Styl...

Page 9: ...playback appears in the display If this button is pressed again appears and playback pauses This button is also used to confirm menu items To turn off the power When you pause song playback or FM reception by pressing the button after a few seconds POWER OFF appears and the display goes off automatically then the player enters Sleep status The player consumes very little battery power in Sleep sta...

Page 10: ... forward or fast rewind as follows Pressing the button Skips to the beginning of the current or next song folder Pressing and holding the button during playback and releasing it at the desired point in Song control mode Fast rewinds or fast forwards the current song Pressing and holding the button soon after entering pause mode Skips to the beginning of the current or next song folder and if held ...

Page 11: ...If you slide the HOLD switch to the opposite position the HOLD function is released RESET button Resets the player when you press the RESET button with a small pin etc page 62 Strap hole Used to attach a strap sold separately Accessory hole Used to attach the optional accessories USB cap Remove the USB cap and connect the USB connector of the player to a USB port on your computer To remove the USB...

Page 12: ...ge 44 Playing status indication Displays the current play mode playback pause fast rewinds fast forwards skips to the beginning of the current or next song folder Lapse time indication Displays the elapsed time Play mode indication Displays the current play mode icon page 22 If the play mode is set to Normal no icon appears Sound quality setting indication Displays the current sound quality icon p...

Page 13: ...ate charging time when the battery power is low and the USB Bus Powered setting page 43 is High Power 500mA under room temperature The charging time will vary depending on remaining battery power and battery condition If the battery is charged in a low temperature environment the charging time will be longer It will also be longer if you transfer audio file s to the player while charging Rechargin...

Page 14: ...nnected to the computer may interfere with proper operation of the player We do not guarantee the recharge of the battery using personally assembled computers or modified computers If the computer enters a power saving mode such as the sleep or hibernation mode even during USB connection the player s battery is not charged Instead the player continues to draw power from the battery discharging it ...

Page 15: ...d to import audio data from the Internet or audio data from CDs to your computer before using the player To import audio data from CDs you need to use appropriate software for importing For details about supported file formats see Supported file format page 80 Table of Contents Menu Index ...

Page 16: ...s the data being transferred may be damaged Do not delete or change the name of the MUSIC folder Otherwise songs will not be played back on the player Transferring music inWindows Explorer Connect the USB connector of the player to your computer Insert the USB connector fully Select the player on Windows Explorer and then drag and drop data The player appears on Windows Explorer as WALKMAN or Remo...

Page 17: ...esktop are specified checked by default If you want to search audio files from folders other than My Music and Desktop select a folder to search from Specified folder s Folders to be searched except for My Music and Desktop appear When you click Add the folder select screen appears and you can add a folder that is in Specified folder s If you want to delete a folder from Specified folder s select ...

Page 18: ... all audio files in Specified folder s are transferred to the player Hints To stop transferring audio files click Stop transfer on the screen for transfer When you click Settings on the screen for transfer the Settings screen appears When you click Display destination folder the root folder of the player WALKMAN or Removable Disk appears on Windows Explorer Note The Auto Transfer software is store...

Page 19: ...f the current or next folder Hints Songs are played back on the player in the following order The files under the MUSIC folder at the 1st level are played back And then the folders at the 1st level are selected in folder name order When the folder is selected the files under the selected folder are played back in file name order Subsequent folders files are similarly played back in hierarchical or...

Page 20: ...en press the button to confirm The selected playback time appears and songs are randomly selected from all transferred songs and played back Elapsed time appears during playback When the specified period passes playback pauses After a few seconds POWER OFF appears the display turns off automatically and the player enters Sleep status Hints When the specified period has passed and playback pauses t...

Page 21: ... but data under the MUSIC folder appears on the player Press and hold the HOME button until the HOME menu appears Press the button to select Search and then press the button to confirm The folder list or the song appears Press the button to select a folder or song and then press the button to confirm When you select a folder the song or folder list s appear When you select a song the playback scre...

Page 22: ...case songs folders under the folder containing the current song cannot be played back Repeat All all repeat The current song is played and then all transferred songs are played repeatedly Repeat Folder folder repeat All transferred songs of the folder containing the current song are played repeatedly In this case songs folders under the folder containing the current song cannot be played back Repe...

Page 23: ...purchased the player the default setting may differ Press and hold the HOME button until the HOME menu appears Press the button to select Settings and then press the button to confirm Press the button to select File Disp Language and then press the button to confirm The language list appears Press the button to select a language page 24 and then press the button to confirm When you select a langua...

Page 24: ...olders and audio files are displayed in Ukrainian Folders and audio files are displayed in Korean Folders and audio files are displayed in Simplified Chinese Folders and audio files are displayed in Traditional Chinese Notes After you select OK in step it may take time until updating completes If you display audio data that is not one of the 8 setting languages will be displayed instead of the aud...

Page 25: ...d quality Equalizer Clear Bass You can select preset sound quality settings from either Equalizer or Clear Bass Default settings Sound quality Indication Sound 1 1 Sound 2 2 Sound OFF None Equalizer EQ Custom 0 0 0 0 0 EQ Custom 0 0 0 0 0 Off Clear Bass bass 1 3 0 PLAY MODE SOUND button Note This function is not available while after using FM radio If you want to use this function after FM radio o...

Page 26: ...E button until the HOME menu appears Press the button to select Settings and then press the button to confirm Press the button to select Sound and then press the button to confirm Press the button to select Equalizer and then press the button to confirm Press the button to select Edit displayed under Sound 1 or Sound 2 to change and then press the button to confirm The list of equalizer settings a...

Page 27: ...sizes high and low ranges so that a small sound can be listened easily EQ Custom User customizable sound settings See page 28 for setting Default setting Notes If the sound quality setting you select is distorted when you turn up the volume turn it down If your personal settings saved as EQ Custom seem to produce a different volume level than the other settings you may have to adjust the volume ma...

Page 28: ... use this function after FM radio operate from the HOME menu to select All Songs or Sports Shuffle to confirm Press and hold the HOME button until the HOME menu appears Press the button to select Settings and then press the button to confirm Press the button to select Sound and then press the button to confirm Press the button to select Equalizer and then press the button to confirm Press the butt...

Page 29: ... be set to one of 4 sound levels Press the button to set the Clear Bass value and then press the button to confirm The slider of Equalizer appears highlighted Equalizer can be set to one of 7 sound levels Press the button to select the Equalizer value and then press the button to confirm To return to the previous menu Press the HOME button Table of Contents Menu Index ...

Page 30: ...n press the button to confirm Press the button to select Clear Stereo and then press the button to confirm Press the button to select the setting and then press the button to confirm Clear Stereo ON Activates the Clear Stereo function when you use the supplied headphones Default setting Clear Stereo OFF Disables the Clear Stereo function and plays back normal sound To return to the previous menu P...

Page 31: ... or Sports Shuffle to confirm Press and hold the HOME button until the HOME menu appears Press the button to select Settings and then press the button to confirm Press the button to select Advanced Settings and then press the button to confirm Press the button to select Dynamic Normalizer and then press the button to confirm Press the button to select the setting and then press the button to confi...

Page 32: ...operate from the HOME menu to select All Songs to confirm Press and hold the HOME button until the HOME menu appears Press the button to select Settings and then press the button to confirm Press the button to select Display Mode and then press the button to confirm Press the button to select the display page 33 and then press the button to confirm To return to the previous menu Press the HOME but...

Page 33: ...dio format and bit rate Clock Time information Displays the year month date and current time For information on setting the time see Setting the Current Time Set Date Time page 39 Hint Set Power Save Mode page 44 to Save OFF to show the screen constantly Notes When the Clear Stereo function page 30 is set to OFF icons do not appear on the Property screen The display does not change to the one you ...

Page 34: ...Volume Press and hold the HOME button until the HOME menu appears Press the button to select Settings and then press the button to confirm Press the button to select Advanced Settings and then press the button to confirm Press the button to select Volume Mode and then press the button to confirm Press the button to select Manual Volume and then press the button to confirm With this setting you can...

Page 35: ... the button to select Volume Mode and then press the button to confirm Press the button to select Preset Volume and then press the button to confirm With this setting you can select the volume level Low Mid or High by pressing the VOL button To return to the previous menu Press the HOME button Note If AVLS page 37 is set the actual volume may be lower than the settings Releasing AVLS AVLS OFF retu...

Page 36: ...e button to select Edit displayed under Preset Volume and then press the button to confirm The Low value appears selected Press the button to set each value for Low Mid or High and then press the button to confirm With this setting you can select the set value of the volume level Low Mid or High by pressing the VOL button To return to the previous menu Press the HOME button Note If AVLS page 37 is...

Page 37: ...e button to select Settings and then press the button to confirm Press the button to select Advanced Settings and then press the button to confirm Press the button to select AVLS and then press the button to confirm Press the button to select AVLS ON and then press the button to confirm The volume is kept at a moderate level To set to off Select AVLS OFF in step and press the button to confirm To ...

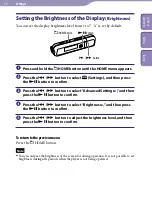
Page 38: ...Settings and then press the button to confirm Press the button to select Advanced Settings and then press the button to confirm Press the button to select Beep and then press the button to confirm Press the button to select Beep OFF and then press the button to confirm To change the setting to on Select Beep ON in step and press the button to confirm To return to the previous menu Press the HOME b...

Page 39: ...vanced Settings and then press the button to confirm Press the button to select Date Time and then press the button to confirm Press the button to select Set Date Time and then press the button to confirm The year value appears selected Press the button to adjust the year setting and then press the button to confirm The month value appears selected As you did in step adjust the settings for month ...

Page 40: ...displayed for the current time from either a Time 24h or Time 12h display For details see Setting the Date Format Date Disp Type page 41 or Setting the Time Format Time Disp Type page 42 Notes If the player is not used for a long time your settings for date and time may need to be set again If the current time is not set and the display is set to Clock page 33 appears If you press a button while t...

Page 41: ...ss the button to confirm Press the button to select Date Time and then press the button to confirm Press the button to select Date Disp Type and then press the button to confirm The screen used to set the display format appears Press the button to select the format and then press the button to confirm You can select the format from the following 3 types Date yy mm dd The date appears as year month...

Page 42: ...ss the button to select Advanced Settings and then press the button to confirm Press the button to select Date Time and then press the button to confirm Press the button to select Time Disp Type and then press the button to confirm The screen used to set the display format appears Press the button to select the setting and then press the button to confirm Time 24h Displays a 24 hour display Defaul...

Page 43: ...ings and then press the button to confirm Press the button to select Advanced Settings and then press the button to confirm Press the button to select USB Bus Powered and then press the button to confirm Press the button to select the setting and then press the button to confirm High Power 500mA Sets the power rating from computer to 500mA Default setting Low Power 100mA Sets the power rating from...

Page 44: ...rm Press the button to select Power Save Mode and then press the button to confirm Press the button to select the power save setting and then press the button to confirm To return to the previous menu Press the HOME button List of the power save settings Setting item Description Save ON Normal The power save screen appears in the display when no operation is performed for about 15 seconds Default ...

Page 45: ...the button to select Settings and then press the button to confirm Press the button to select Advanced Settings and then press the button to confirm Press the button to select Contrast and then press the button to confirm The contrast adjustment screen appears Press the button to adjust the contrast level and then press the button to confirm To return to the previous menu Press the HOME button Tab...

Page 46: ...rm Press the button to select Advanced Settings and then press the button to confirm Press the button to select Brightness and then press the button to confirm Press the button to adjust the brightness level and then press the button to confirm To return to the previous menu Press the HOME button Note You can only set the brightness of the screen for during operation It is not possible to set brig...

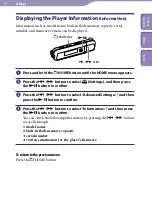
Page 47: ...elect Settings and then press the button to confirm Press the button to select Advanced Settings and then press the button to confirm Press the button to select Information and then press the button to confirm You can check the following information by pressing the button to scroll through 1 model name 2 built in flash memory capacity 3 serial number 4 version information for the player s firmware...

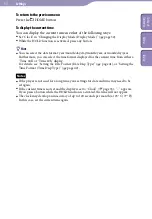
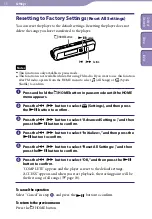
Page 48: ...u appears Press the button to select Settings and then press the button to confirm Press the button to select Advanced Settings and then press the button to confirm Press the button to select Initialize and then press the button to confirm Press the button to select Reset All Settings and then press the button to confirm Press the button to select OK and then press the button to confirm COMPLETE a...

Page 49: ...u want to use this function after FM radio operate from the HOME menu to select All Songs or Sports Shuffle to confirm If you format the built in flash memory of the player data in the MUSIC folder is erased but the MUSIC folder is left on the player Press and hold the HOME button in pause mode until the HOME menu appears Press the button to select Settings and then press the button to confirm Pre...

Page 50: ...e button to confirm To return to the previous menu Press the HOME button Note Do not format the built in flash memory of the player in Windows Explorer When you formatted the player in Windows Explorer accidently do it again on the player page 49 Table of Contents Menu Index ...

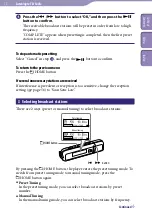
Page 51: ...ching to the FM radio button button HOME button Press and hold the HOME button until the HOME menu appears Press the button to select FM and then press the button to confirm The FM radio screen appears Preset number Frequency Depending on the country region in which you have purchased the player the screen appearance may differ Continued Table of Contents Menu Index ...

Page 52: ...ardless of the VOL button The display does not change to the one you set in Display Mode page 32 during FM reception 2 Presetting broadcast stations automatically FM Auto Preset You can preset receivable broadcast stations up to 30 stations in your area automatically by selecting FM Auto Preset When you use the FM radio for the first time or when you move to a new area we recommend to preset recei...

Page 53: ...received If interference is prevalent or reception is too sensitive change the reception setting page 56 to Scan Sens Low 3 Selecting broadcast stations There are 2 ways preset or manual tuning to select broadcast stations Manual tuning Preset tuning button HOME button By pressing the HOME button the player enters the preset tuning mode To switch from preset tuning mode to manual tuning mode press...

Page 54: ...efly Select the previous receivable broadcast station 1 Press and hold the button Select the next receivable broadcast station 1 Press and hold the button 1 By pressing and hold the button during FM reception the previous or next broadcast station is found If the broadcast station is receivable the reception is accepted If interference is prevalent or reception is too sensitive change the receptio...

Page 55: ...pears to the left of the frequency Hint You can preset up to 30 stations P01 to P30 Note The preset numbers are stored in order from low to high frequency Deleting preset broadcast stations Select the preset number of the frequency to delete Press and hold the button Press the button to select OK and then press the button to confirm The preset broadcast station is deleted and the next one appears ...

Page 56: ... button HOME button Press and hold the HOME button while displaying the FM radio screen until the HOME menu appears Press the button to select Settings and then press the button to confirm Press the button to select Scan Sens and then press the button to confirm Press the button to select Scan Sens Low and then press the button to confirm To set the reception sensitivity back to the default Select...

Page 57: ... button Press and hold the HOME button while displaying the FM radio screen until the HOME menu appears Press the button to select Settings and then press the button to confirm Press the button to select Mono Auto and then press the button to confirm Press the button to select Mono and then press the button to confirm To return to the automatic setting Select Auto in step and press the button to c...

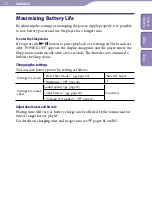
Page 58: ...cally after a few seconds The batteries are consumed a little in the Sleep status Changing the settings You can save battery power by setting as follows Settings for screen Power Save Mode page 44 Save ON Super Brightness page 46 1 Settings for sound effect Sound quality page 25 Deactivate Clear Stereo page 30 Dynamic Normalizer page 31 Adjust data format and bit rate Playing time will vary as bat...

Page 59: ...oduces the same sound quality as that of MP3 format with a smaller file size Linear PCM Linear PCM is an audio recording format without digital compression You can listen to the sound with the same quality as CD music by recording with this format What is bit rate Bit rate refers to the amount of data used to store each second of audio Generally higher bit rates provide better sound quality but re...

Page 60: ...r Removable Disk Notes Do not disconnect the player while DATA ACCESS appears on the player during data transfer The data could be damaged Do not format the built in flash memory of the player in Windows Explorer When you formatted the player in Windows Explorer accidently do it again on the player page 49 Do not delete or change the name of the MUSIC folder or transfer data other than audio data ...

Page 61: ...e http support sony europe com DNA For customers in Latin America http www sony latin com index crp For customers in other countries regions http www sony asia com support For customers who purchased the overseas models http www sony co jp overseas support Download the update program to your computer from the web sites Connect the player to your computer and then start up the update program Follow...

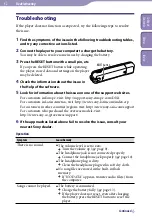
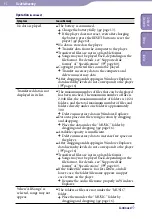
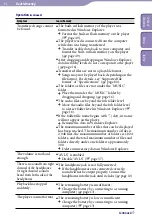
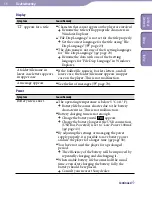
Page 62: ...n Latin America visit http www sony latin com index crp For customers in other countries regions visit http www sony asia com support For customers who purchased the overseas models visit http www sony co jp overseas support 6 If the approaches listed above fail to resolve the issue consult your nearest Sony dealer Operation Symptom Cause Remedy There is no sound The volume level is set to zero Tu...

Page 63: ...ers is 1 024 folders and the total maximum number of files and folders directly under one folder is approximately 300 Delete unnecessary data in Windows Explorer Data was placed in the wrong location by dragging and dropping Place the data under the MUSIC folder by dragging and dropping page 16 Available capacity is insufficient Delete unnecessary data to increase free space on the player After dr...

Page 64: ...he arrow Slide the HOLD switch to the opposite direction of the arrow page 11 Style Up Panel is not attached to the player properly Attach the Style Up Panel properly page 8 The player contains moisture condensation Wait a few hours to let the player dry The remaining battery is low or insufficient Charge the battery by connecting to a running computer page 13 If you charge the battery and nothing...

Page 65: ...xplorer page 16 If the folder file name begins with dot its name will not appear on the player Rename the data in Windows Explorer The maximum number of files that can be displayed has been reached The maximum number of files is 2 048 files the maximum number of folders is 1 024 folders and the total maximum number of files and folders directly under one folder is approximately 300 Delete unnecess...

Page 66: ... malfunction A message appears See the list of messages page 70 Power Symptom Cause Remedy Battery life is short The operating temperature is below 5 C 41 F Battery life becomes shorter due to the battery characteristics This is not malfunction Battery charging time is not enough Charge the battery until appears Charge the battery longer if the USB connection USB Bus Powered is set to Low Power 10...

Page 67: ...layer to the computer double click My Computer WALKMAN or Removable Disk AutoTransfer exe You may have deleted the Auto Transfer software Download the Auto Transfer software from the support web sites page 18 and store it in the built in flash memory of the player USB CONNECT does not appear on the player or the player is not recognized when the player is connected to the computer The player s USB...

Page 68: ...ormal data exists on the player Transfer usable data back to your computer and format the built in flash memory on the player page 49 Audio files may be damaged Delete the audio files that cannot be transferred from your computer then import them to the computer again When importing transferring the audio files close any other applications to avoid file damage Only a small number of songs can be t...

Page 69: ...ne cord functions as an antenna Extend the headphone cord as far as possible Other Symptom Cause Remedy There is no beep sound when the player is operated Beep is set to Beep OFF Set Beep to Beep ON page 38 The player gets warm The player may become warm during and just after battery charging The player also may get warm when a large amount of data is transferred This behavior is normal and not a ...

Page 70: ...ongs which cannot be played are unnecessary erase them from the built in flash memory Transfer the usable audio files back to your computer and format the built in flash memory on the player page 49 DATA ACCESS Accessing the built in flash memory Please wait for access to complete This message appears while the built in flash memory is being accessed DRM ERROR The player cannot play copyright prot...

Page 71: ...dropping page 16 NO DATABASE There is not enough space in the built in flash memory Transfer the usable audio files back to your computer If the problem persists format the built in flash memory on the player page 49 NO ITEM No song exists in the selected item Transfer the usable audio files using the Auto Transfer software or Windows Explorer PRESET FULL 30 broadcast stations are already preset Y...

Page 72: ...ehold waste disposal service or the shop where you purchased the product Applicable accessories Headphones Disposal of waste batteries applicable in the European Union and other European countries with separate collection systems This symbol on the battery or on the packaging indicates that the battery provided with this product shall not be treated as household waste By ensuring these batteries a...

Page 73: ... to your body or clothes wash it off immediately If you do not it may cause burns or injury If you get burned or injured by the liquid from the battery consult a doctor Do not pour water or put any foreign object in the player Doing so may cause fire or electric shock If this occurs turn off the player immediately disconnect the player and consult your nearest Sony dealer or Sony Service Center Do...

Page 74: ...he precautions below in order to avoid warping the cabinet or causing the player to malfunction Make sure not to sit down with the player in your back pocket Make sure not to put the player into a bag with the headphones earphones cord wrapped around it and then subject the bag to strong impact Do not expose the player to water The player is not waterproof Remember to follow the precautions below ...

Page 75: ... the player take off the headphones immediately If you experience an allergic reaction to the supplied headphones stop using them at once and contact a doctor On the use When using a strap sold separately be careful to avoid hooking it on objects you pass by Furthermore be careful not to swing the player by the strap to avoid bumping people Refrain from using the player according to the in flight ...

Page 76: ...h as cleaning cloth for eyeglasses If the player s case becomes very dirty clean it with a soft cloth slightly moistened with water or a mild detergent solution Do not use any type of abrasive pad scouring powder or solvent such as alcohol or benzene as it may mar the finish of the case Be careful not to let water get into the player from the opening near the connector Clean the headphone plug per...

Page 77: ...gnated Please note that due to continued efforts to improve quality the software specifications may be changed without notice Operation of this player with software other than that provided is not covered by the warranty The ability to display the languages on supplied software will depend on the installed OS on your computer For better results please ensure that the installed OS is compatible wit...

Page 78: ...s the text shown on the player may not be displayed properly on device This is due to The capacity of the connected player The player is not functioning normally Content information is written in language or character that are not supported by the player About the customer support web sites If you have any questions or issues with this product or would like information on compatible items with thi...

Page 79: ...achines Corporation Macintosh is a trademark of Apple Inc Pentium is a trademark or a registered trademark of Intel Corporation Style Up is a trademark or a registered trademark of Sony Ericsson Mobile Communications AB US and foreign patents licensed from Dolby Laboratories All other trademarks and registered trademarks are trademarks or registered trademarks of their respective holders In this m...

Page 80: ... File may not correspond to all encoders 2 Copyright protected files cannot be played back 3 MP4 files with video are not playable 4 Non standard bit rates or non guaranteed bit rates are included depending on the sampling frequency Maximum recordable number of songs and time Approx The approximate times are based on a transferred 4 minute MP3 or Linear PCM format song Other playable audio file fo...

Page 81: ...y A portion of the memory is used for data management functions Output headphones Output 5 mW 5 mW 16 Ω Frequency response 20 to 20 000 Hz when playing data file single signal measurement FM radio Preset 30 presets FM Frequency range 87 5 to 108 0 MHz IF FM 375 kHz Antenna Headphone cord antenna Interface Headphone Stereo mini Hi Speed USB USB 2 0 compliant Operating temperature 5 C to 35 C 41 F t...

Page 82: ... the status of use NWD E023F NWD E025F Status of the player Playback at MP3 128 kbps Approximately 28 hours Playback at WMA 128 kbps Approximately 24 hours Playback at AAC LC 128 kbps Approximately 28 hours Playback at Linear PCM 1 411 kbps Approximately 25 hours At receiving FM broadcasting Approximately 10 hours Display 3 line Color LCD Dimension w h d projecting parts not included 81 9 22 1 13 ...

Page 83: ...ive 200 MB or more of available space 1 5 GB or more is recommended More space may be required depending on the version of the operating system Additional space is required for storing music data Display Screen Resolution 800 600 pixels or higher recommended 1 024 768 or higher Colors High Color 16 bit or higher CD ROM drive supporting Digital Music CD playback Sound board USB port Hi Speed USB is...

Page 84: ...sages 70 Mono Auto 57 MP3 59 80 P Playback 9 12 PLAY MODE 22 Power 9 58 66 Power Save Mode 44 Preset tuning 53 Preset Volume 35 36 Index Continued Symbols 12 12 12 1 25 2 25 1 Repeat 1 Song 22 Repeat All 22 Repeat Folder 22 SHUF Repeat Shuffle All 22 SHUF Repeat Shuffle Folder 22 A AAC 59 AAC LC 80 Adobe Reader 3 All Songs 19 Auto Transfer 17 AVLS 37 B Battery 58 82 Beep Beep sound 38 Bit rate 59 ...

Page 85: ...ffle 22 Sleep status 9 58 Song control mode 9 Sound 25 Sound preset 25 Sound quality 25 26 28 Sports Shuffle 20 Style Up Panel 8 T Time Disp Type 42 Time information 33 Time setting 39 Troubleshooting 62 Tuner 51 U Upgrading 61 USB Bus Powered USB connection setting 43 V Volume 9 31 34 Volume Limit 37 Volume Mode 34 VOL button 9 W Windows Explorer 16 60 WMA 59 80 Table of Contents Menu Index ...

Reviews: