4. MOUNT THE PLASMA TO THE WALL BRACKETS
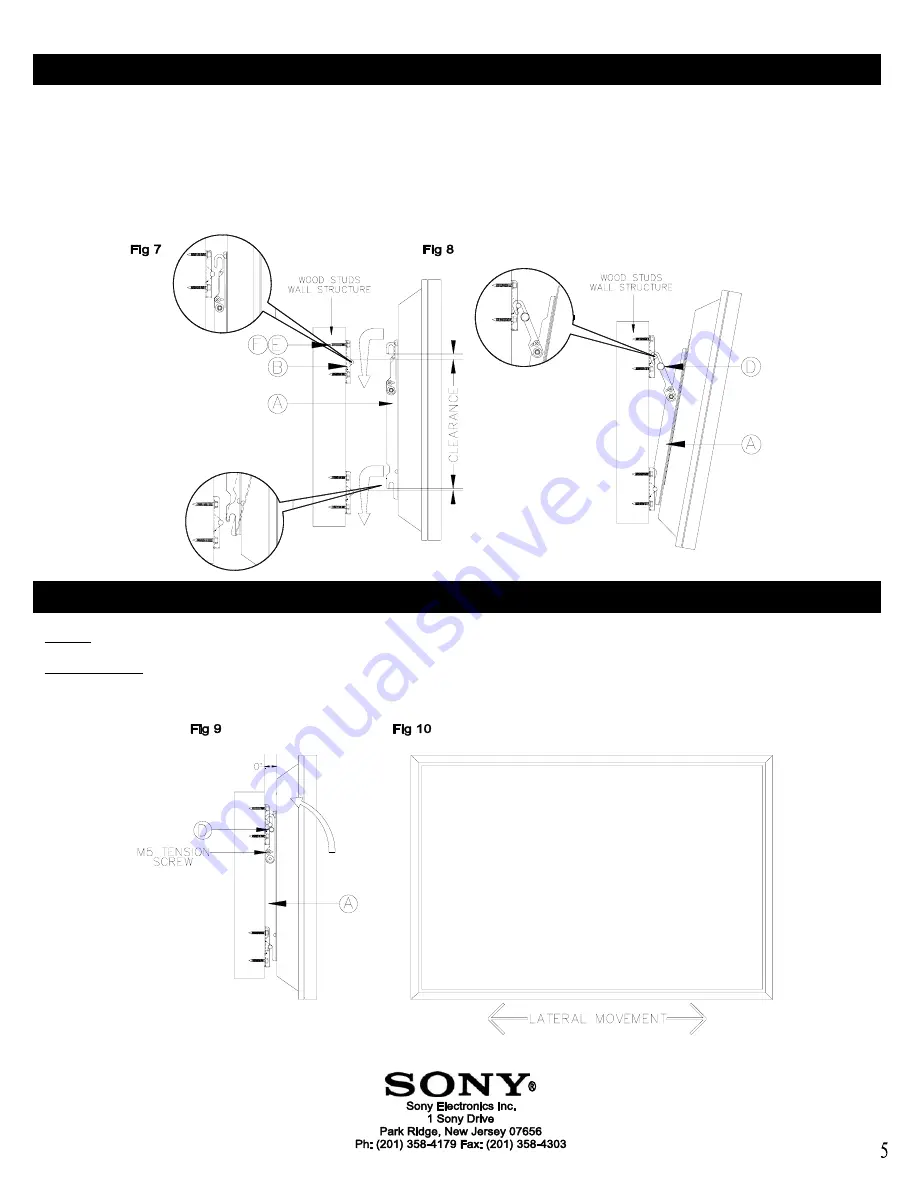
With the upper tilt hooks on the plasma brackets in the flat position, raise the plasma display with brackets attached (2 people minimum recommended) and place the
plasma display flat against wall with the upper and lower plasma bracket attaching slots slightly higher than the steel receiving rods of the upper and lower wall plates, see
Fig 7. With the plasma reasonably level, lower the display until the display brackets receiving slots are fully installed into the upper and lower wall plate steel rods. Gently
pull the left and right upper edges of the display to extend the mount to its maximum 10° tilt and install the two 6 (mm) safety screw knobs on each mounting bracket for
security.
Note: To remove the display from the wall simply extend the display to its maximum tilt range, remove the two 6 (mm) safety screws push the display back to
its flat wall position and lift the unit up and out from the wall. See Fig 8.
5. ADJUST TENSION AND LATERAL MOVEMENT
Tension:
To adjust the tilting tension, tighten the 5 (mm) screws on both sides of the brackets.
See Fig 9.
Lateral Movement:
Once the display on wall installation is complete you can still move the display from left to right or right to left to optimize the final position of the display on the wall by
gently sliding the unit on the steel rods of the wall plate. This adjustment distance will vary depending on the display model being installed. See Fig 10.


