5
Overview
XC-HR57
Location and Function of Parts and Controls
Front/Top/Bottom
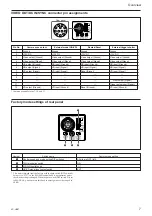
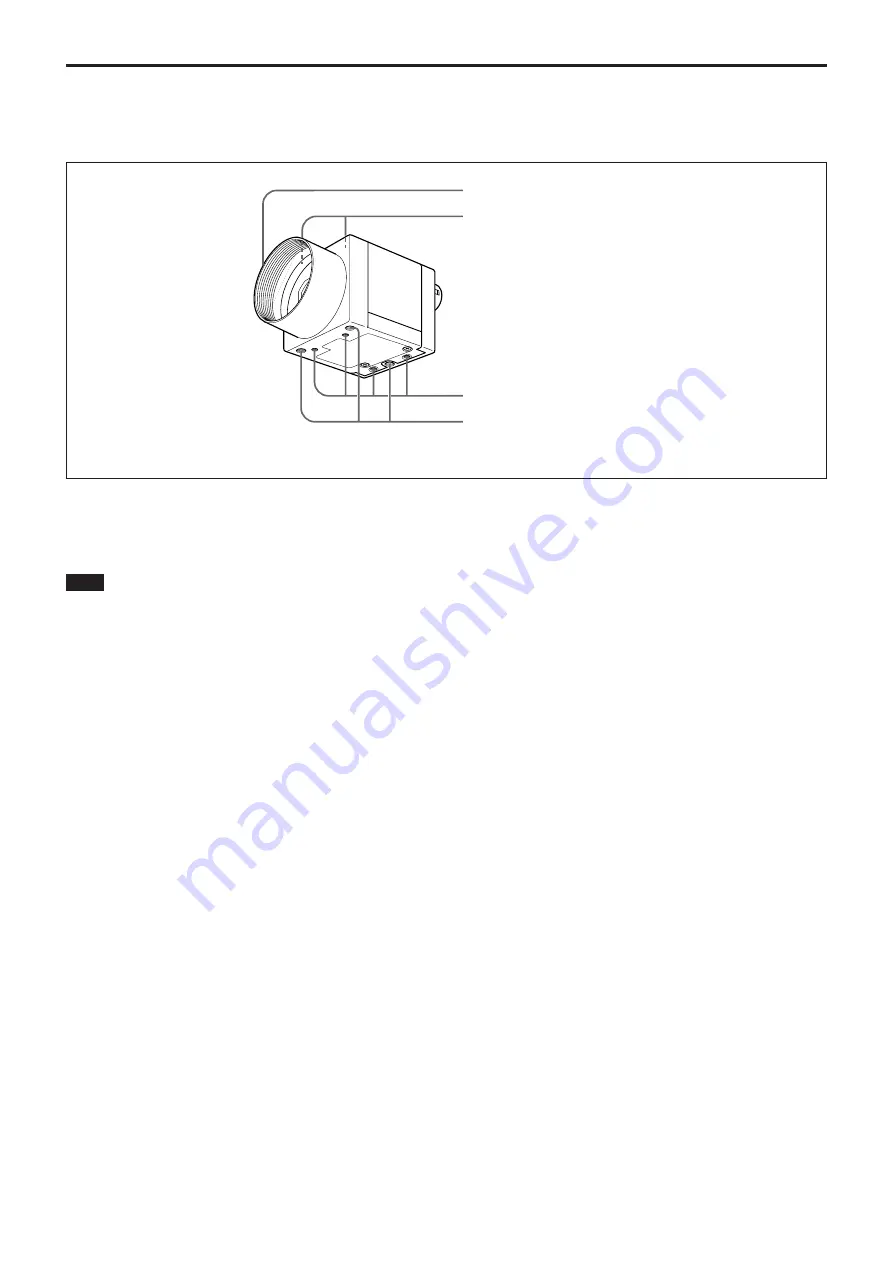
1
Lens mount (C-mount)
Attach any C-mount lens, such as the VCL-12YM
standard lens, or other optical equipment.
Note
The lens must not project more than 7 mm (9/32 inch)
from the lens mount.
2
Reference holes (at the top)
These precision screw holes are for locking the camera
module. Locking the camera module using these holes
secures the optical axis alignment.
3
Reference holes/Tripod screw holes (at the
bottom)
These precision screw holes are for locking the camera
module. Locking the camera module using these holes
secures the optical axis alignment.
You can install the camera on a tripod. To install on a
tripod, you will need to install the VCT-333I tripod
adaptor using the reference holes on the bottom of the
camera.
4
Reference holes (at the bottom)
These precision screw holes are for locking the camera
module. Locking the camera module using these holes
secures the optical axis alignment.
1
Lens mount (C-mount)
2
Reference holes (at the top)
3
Reference holes/Tripod screw holes (at the bottom)
4
Reference holes (at the bottom)


