Chapter
2
28
Starting the Unit
Cha
p
te
r 2
Pr
epar
at
io
ns
Preparations
Starting the Unit
When you use this unit for the first time
after purchasing, the initial settings are
required
Connecting the unit to a
power source
Use the supplied MPA-AC1 AC Adaptor to
connect the unit an AC power source.
When this unit is supplied with power, the
power indicator on the front panel lights in
red. (The unit enters the standby state.)
Starting the unit
To start this unit, press the power button
with the power indicator lit in red (when the
unit is in the standby state).
No signal is output from the
COMPONENT, COMPOSITE, S-VIDEO,
HDMI, HD/SD SDI OUTPUT, and HDV/
DV connectors until the start-up completes.
When the start-up of the unit is completed,
the power indicator lights in green.
When the initial setting display
appears on the LCD display
The initial setting display appears on the
LCD display in the following situations.
• When turning on the unit for the first time
• When turning on the unit after the clock
setting is cleared because of exhaustion
of the backup battery while no operation
power was being supplied (no AC power
connection)
For details on the initial settings, see “Setting the
Clock” (page 29).
DC I
N
MPA-AC1 AC Adaptor (supplied)
To an AC
power source
AC power cord
(supplied)
DC power cord
(supplied)
Note
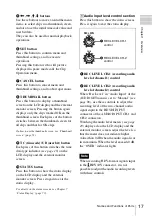
REC LEVEL
CH-1
VIDEO INPUT
PHONES
DISPLAY
MENU
TC/UB
STATUS
F REV
PLAY/PAUSE
m
u
SLOT
SELECT
CH-2
iLINK
HD SDI
SG
AUDIO INPUT
PHONE LEVEL
PREV
.
NEXT
>
F FWD
M
SET
A
B
THUMBNAIL
CANCEL
ANALOG
HD SDI
CH-1/2
HD SDI
CH-3/4
ACCESS
1
STOP
x
REC
z
TOP
END
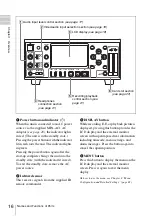
Power indicator
Power button
VIDEO INPUT switch
LCD display
Summary of Contents for XDCAM EX PMW-EX30
Page 111: ......


