XDR-S40DBP
4
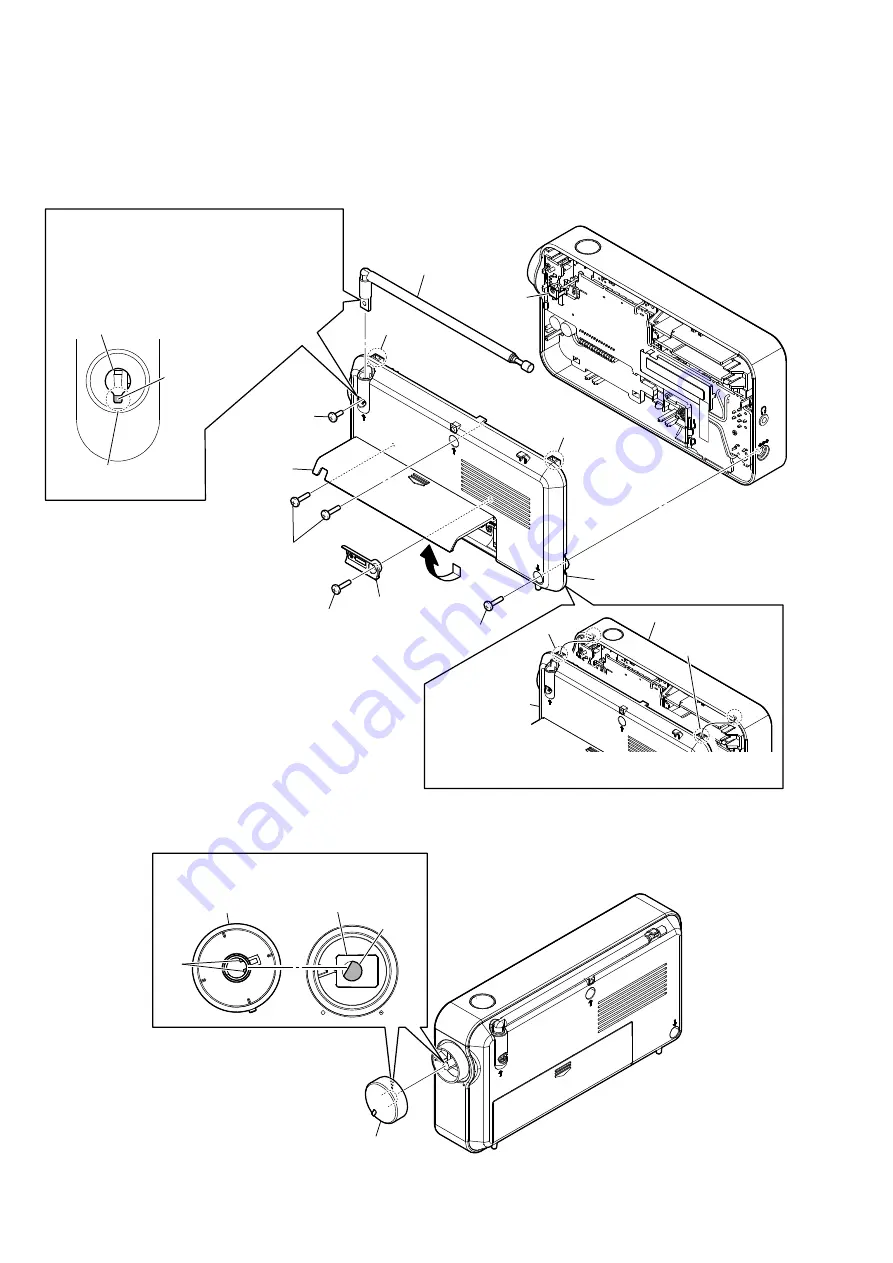
2-3. VOL KNOB BLOCK
Note:
Follow the disassembly procedure in the numerical order given.
2-2. CABINET REAR BLOCK
Note 1:
Before removing the cabinet rear block, remove the always telescopic antenna (ANT1).
1
VOL knob block
VOL knob
rib
RV201
shaft
Note:
When installing the VOL knob block, aline
the two ribs of VOL knob and shaft of RV201.
–
Rear side view
–
1
screw
(M3
u
6
lock
ace)
4
tapping screw
(B2.6)
5
connector lid
6
claw
4
tapping screw
(B2.6)
4
two tapping screws
(B2.6)
3
Open the
battery
lid.
2
telescopic antenna
(ANT1)
ANT terminal
6
claw
claw
7
cabinet rear block
cabinet rear block
cabinet front
–
Rear side view
–
–
Rear side view
–
Note 4:
When installing the cabinet rear block,
attach two claws to the cabinet front first.
claw
ANT terminal
square hole
screw hole
Note 2:
When installing the telescopic antenna (ANT1),
install it on after installing the cabinet rear block.
Note 3:
Before inserting the telescopic antenna (ANT1)
to cabinet rear block, make sure that the ANT
terminal is pressed against the cabinet rear side.
check for the existence of the ANT terminal from
the square hole on the below of the screw hole.
Summary of Contents for XDR-S40DBP
Page 27: ...MEMO XDR S40DBP 27 ...


