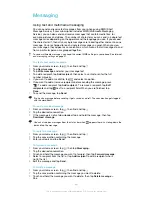
To forward an email message
1
From your Home screen, tap .
2
Find and tap . The inbox of your default email account appears. If you want
to check another email account that you have set up on your phone, tap the
bar containing , then select the account you want to check.
3
Find and tap the message you want to forward.
4
Tap , then tap
Forward
.
5
Tap
To
and enter the recipient's address.
6
Enter your message text, then tap .
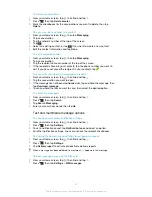
To delete an email message
1
From your Home screen, tap .
2
Tap . The inbox of your default email account appears. If you want to check
another email account that you have set up on your phone, tap the bar
containing , then select the account you want to check.
3
In your email inbox, mark the checkbox for the email you want to delete, then
tap .
To manage your email in batches
1
From your Home screen, tap , then find and tap . The inbox of your
default email account appears. If you want to check another email account that
you have set up on your phone, tap the bar containing , then select the
account you want to check.
2
Mark the checkboxes for the emails you want to select.
3
When you are finished, tap one of the icons in the tool bar to, for example,
move the selected emails to another folder.
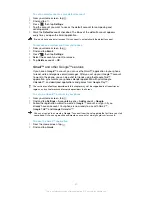
To view all folders for one email account
1
From your Home screen, tap , then find and tap . The inbox of your
default email account appears. If you want to check another email account that
you have set up on your phone, tap the bar containing , then select the
account you want to check.
2
Tap to view all the folders in the account.
To change the inbox check frequency
1
From your Home screen, tap .
2
Find and tap .
3
Press
, then tap
Settings
.
4
If you are using several email accounts, tap the account you want to adjust.
5
Tap
Inbox check frequency
and select an option.
Using email accounts
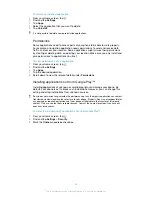
To add an extra email account in your phone
1
From your Home screen, tap .
2
Find and tap .
3
Press
, then tap
Settings
.
4
Tap
Add account
.
5
Enter the email address and password, then tap
Next
.
6
If the settings for the email account cannot be downloaded automatically,
complete the setup manually. If necessary, contact your email service provider
for detailed settings.
7
When prompted, enter a name for your email account so that it is easily
identifiable. The same name shows in the emails that you send from this
account.
8
When you are finished, tap
Next
.
50
This is an Internet version of this publication. © Print only for private use.


