background image


Working Instruction Repair Instruction Mechanical 

1263-4086

  Rev 6


© Sony Mobile Communications AB – Company Internal                                                      

38(53) 


Replacement 


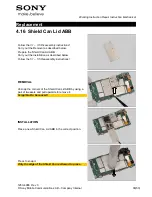
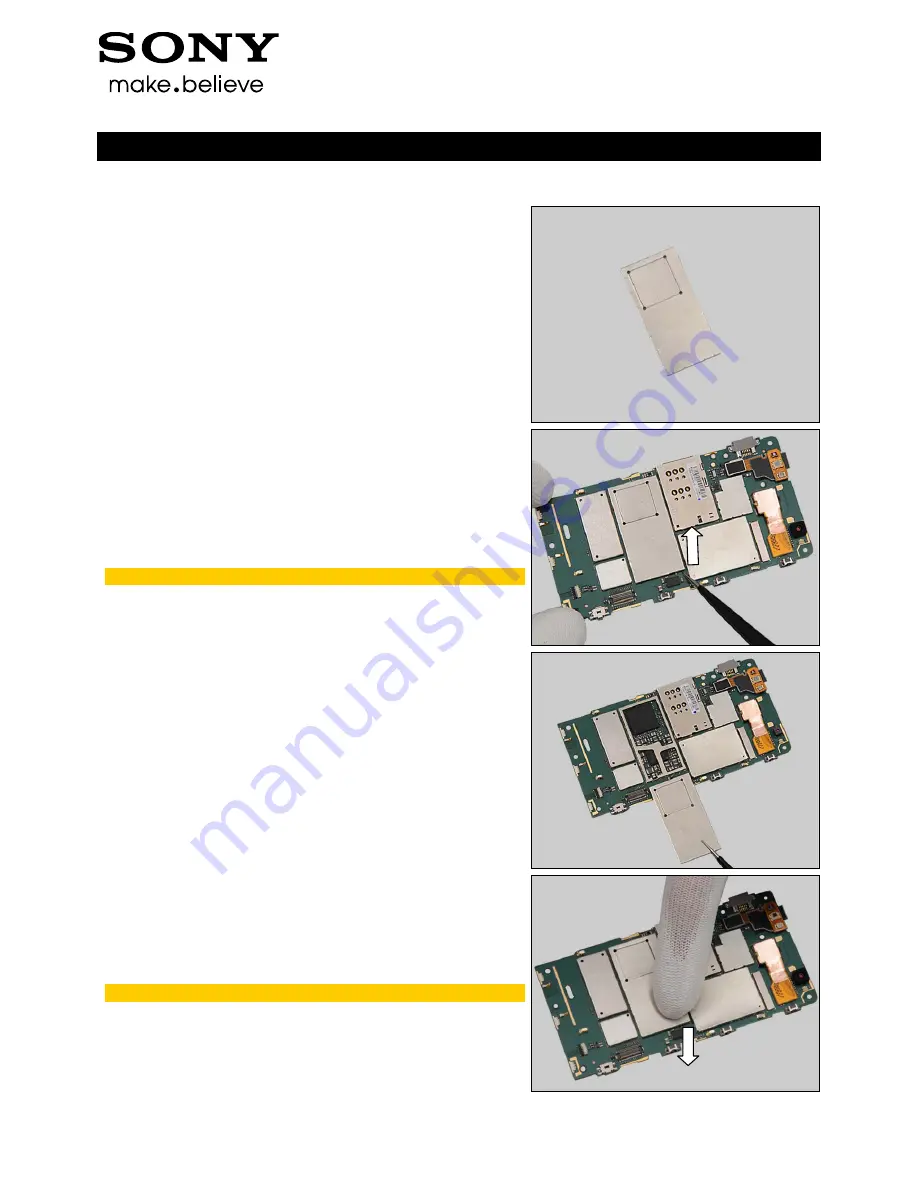
4.16  Shield Can Lid ABB 

Follow the 3.1 – 3.5 Disassembly instructions! 

Carry out the Removal as described below. 
Prepare the Shield Can Lid ABB. 
Carry out the Installation as described below. 

Follow the 5.1 – 5.5 Reassembly instructions! 


REMOVAL 

 
Unsnap the corners of the Shield Can Lid ABB by using a 
pair of tweezers and pull upwards to remove it. 

Scrap! Not to be reused! 


INSTALLATION 
 

Place a new Shield Can Lid ABB in the correct position. 


Press to snap it. 

Only the edge of the Shield Can is allowed to press. 


Summary of Contents for XPeria ST25a

Page 1: ...1263 4086 Rev 6 Sony Mobile Communications AB Company Internal Working Instructions mechanical ST25i ST25a ...

Page 2: ...dhesive 17 4 7 Audio Jack Sensor FPC Assy 19 4 8 Core Unit Label 20 4 9 Touch Panel Glass Window 3 5 with Gasket 22 4 10 Display 26 4 11 Carrier Window Front assy 29 4 12 Ear Speaker Receiver adhesive 30 4 13 Loudspeaker Speaker adhesive 32 4 14 kMain Camera 34 4 15 Main Camera Copper Main Camera Film 36 4 16 Shield Can Lid ABB 38 4 17 Shield Can Lid BT GPS 39 4 18 Shield Can Lid DBB 40 4 19 Sub C...

Page 3: ... 4086 Rev 6 Sony Mobile Communications AB Company Internal 3 53 6 Country of Origin Barcodes for Brazil VIVO Labels 52 7 Revision History 53 For general information about mechanical repair related issues refer to 1220 1333 Generic Repair Manual mechanical ...

Page 4: ...Working Instruction Repair Instruction Mechanical 1263 4086 Rev 6 Sony Mobile Communications AB Company Internal 4 53 1 Exterior Views 1 1 ST25i ST25a ...

Page 5: ... 5 53 2 Tools SPECIAL TOOLS 1 Torque Screwdriver 2 Flex Film Assembly Tool 3 Front Opening Tool 4 Bits JCIS No 0 5 Bits T5 6 Bits T6 7 Guitar Pick 8 Pressure Tool 9 Pressure Fixture For part no s on the tools above refer to the Tools Catalogue Matrix STANDARD TOOLS 1 Tweezers ESD safe non metallic 2 Nylon Pointer ...

Page 6: ... The disassembly is done in the following order 1 Battery Cover Assy a Battery b 2 Antenna Cap 3 Carrier Frame Assy 4 Carrier Window Front assy 5 Main PBA a Transparent Belt Total Assy b 3 1 Battery Cover Assy Battery Push upwards the Battery Cover Assy with fingers Remove the Battery Cover Assy Lift up the battery from its cavity ...

Page 7: ...obile Communications AB Company Internal 7 53 Disassembly Remove the battery 3 2 Antenna Cap Release the hook of Antenna Cap from the gap between Antenna Cap and Transparent Belt Total Assy from left side with fingers Release the hook from right side Remove the Antenna Cap ...

Page 8: ...Other Len 4 0 Diam 1 4 by a screwdriver with Bits T5 Scrap Not to be reused Remove the Screw Torx Len 5 4 Diam 2 5 by using a screwdriver with Bits T6 Scrap Not to be reused Remove the Screw Torx Len 3 4 Diam 3 0 by using a screwdriver with Bits T5 Scrap Not to be reused Insert the Front Opening Tool to release the hook in the middle of right side on Carrier Frame Assy ...

Page 9: ...assembly Insert the Front Opening Tool to release the hook at top of right side on Carrier Frame Assy Insert the Front Opening Tool to release the hook in the middle of left side on Carrier Frame Assy Insert the Front Opening Tool to release the hook at top of left side on Carrier Frame Assy Remove the Carrier Frame Assy ...

Page 10: ... Push the Carrier Window Front assy with your thumb to release the hook in the middle of right side and turn upwards the Transparent Belt Total Assy Push the Carrier Window Front assy with your thumb to release the hook at bottom of left side and turn upwards the Transparent Belt Total Assy Push the Carrier Window Front assy with your thumb to release the hook at top of left side and turn upwards ...

Page 11: ...pany Internal 11 53 Disassembly The three hooks have all been released as shown in the picture Move the Main PBA 5mm away from the Carrier Window Front assy Do not stretch the FPC of BtB connector Turn over the phone to show the BtB connector Unsnap the BtB connector by using a Front Opening Tool 5mm ...

Page 12: ...y Remove the Carrier Window Front assy 3 5 Main PBA Transparent Belt Total Assy Remove the Screw Torx Len 3 1 Diam 1 4 by using a screwdriver with Bits JCIS No 0 Scrap Not to be reused Unlock the ZIF connector by using a Front Opening Tool Insert Front Opening Tool to release the hook and pull out the Transparent Belt Total Assy ...

Page 13: ...Working Instruction Repair Instruction Mechanical 1263 4086 Rev 6 Sony Mobile Communications AB Company Internal 13 53 Disassembly Separate the Main PBA from Transparent Belt Total Assy carefully ...

Page 14: ...e new Antenna Cap Follow the 5 4 5 5 Reassembly instructions 4 3 Carrier Frame Assy Follow the 3 1 3 3 Disassembly instructions Follow the 4 6 4 13 4 20 Removal instructions Prepare the new Carrier Frame Assy Follow the 4 6 4 13 4 20 Installation instructions Follow the 5 3 5 5 Reassembly instructions 4 4 Transparent Belt Total Assy Follow the 3 1 3 5 Disassembly instructions Follow the 4 5 Remova...

Page 15: ...the Removal as described below Prepare the new Antenna Main Carry out the Installation as described below Follow the 5 4 5 5 Reassembly instructions REMOVAL Remove the Screw Other Len 4 0 Diam 1 4 by using a screwdriver with T5 Scrap Not to be reused Detach the Antenna Main from right bottom side by using a Front Opening Tool Detach the Antenna Main from left bottom side by using a Front Opening T...

Page 16: ...le Communications AB Company Internal 16 53 Replacement Antenna Main Remove the Antenna Main INSTALLATION Place a new Antenna Main in the correct position Press to secure its position Apply 6 1 Ncm torque when tightening the Screw Other Len 4 0 Diam 1 4 with T5 Take new screws ...

Page 17: ...bed below Prepare the new Audio Jack Audio jack adhesive Carry out the Installation as described below Follow the 5 3 5 5 Reassembly instructions REMOVAL Push against the Audio Jack by using a Nylon Pointer Remove the Audio jack adhesive from the back side of Audio Jack by using a Flex Film Assembly Tool Scrap The Audio jack adhesive is not allowed to reuse INSTALLATION Place a new Audio Jack and ...

Page 18: ...8 53 Replacement Audio Jack Audio jack adhesive Align the Audio jack adhesive as shown and press to secure its attachment Place the new Audio Jack with Audio jack adhesive in correct position as shown Press to secure its position and attachment by using a Flex Film Assembly Tool Do not touch the pins on Audio Jack ...

Page 19: ... 4 Disassembly instructions Carry out the Removal as described below Prepare the new Audio Jack Sensor FPC Assy Carry out the Installation as described below Follow the 5 2 5 5 Reassembly instructions REMOVAL Unsnap the BtB connector by using a Front Opening Tool and remove the Audio Jack Sensor FPC Assy INSTALLATION Prepare the Audio Jack Sensor FPC Assy Snap the BtB connector ...

Page 20: ...described below Prepare the new Core Unit Label Carry out the Installation as described below Follow the 5 5 Reassembly instructions REMOVAL Copy old Core Unit Label information into the LabelMake program Carefully remove the Label by using a pair of tweezers INSTALLATION Check that the proper label format is loaded in the Zebra printer and print a new Label by using the LabelMake software One lab...

Page 21: ...Working Instruction Repair Instruction Mechanical 1263 4086 Rev 6 Sony Mobile Communications AB Company Internal 21 53 Replacement Core Unit Label Press along the surface to secure the attachment ...

Page 22: ...al instructions Prepare the new Touch Panel Glass Window 3 5 with Gasket Follow 4 10 Installations Carry out the Installation as described below Follow the 5 2 5 5 Reassembly instructions Touch panel calibration has to be performed for all replaced units 1257 2706 Trouble Shooting Application mechanical REMOVAL Unlock the ZIF connector by using a Front Opening Tool Detach the foil of FPC by using ...

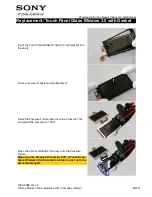
Page 23: ...le of bottom side Pull out the FPC through Carrier Window Front assy Remove the Touch Panel Glass Window 3 5 with Gasket Scrap The Touch Panel Glass Window 3 5 with Gasket and Carrier Window Front assy are not allowed to reuse INSTALLATION Insert the FPC of Touch Panel Glass Window 3 5 with Gasket through Carrier Window Front assy Make sure the Touch Panel Glass Window 3 5 with Gasket and Display ...

Page 24: ...he Touch Panel Glass Window 3 5 with Gasket into the cavity Press to secure its position and attachment Install the Pressure Fixture insert onto the Pressure Tool and adjust the pressure to 150 N Place the Carrier Window Front assy onto the Pressure Fixture Make sure the Display FPC and the FPC of Touch Panel Glass Window 3 5 with Gasket outside in order not to be pressed damaged ...

Page 25: ...et Close the Pressure Fixture insert Press down the Pressure Tool to press this Carrier Window Front assy for 10 seconds Turn over the Carrier Window Front assy Attach Display FPC onto Carrier Window Front assy in right position Lock the ZIF connector of Touch Panel Glass Window 3 5 with Gasket first Attach its FPC onto Carrier Window Front assy in right position then ...

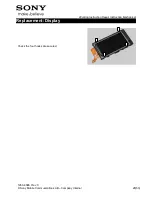
Page 26: ...bed below Prepare the new Display Carry out the Installation as described below Follow the 4 9 Installation instructions Follow the 5 2 5 5 Reassembly instructions Touch panel calibration has to be performed for all replaced units 1257 2706 Trouble Shooting Application mechanical REMOVAL Detach the foil of FPC carefully There are four hooks to secure the Display as shown in the picture Release the...

Page 27: ...PC through the hole and lift to remove the Display Scrap The Carrier Window Front assy is not allowed to reuse INSTALLATION Prepare new Display and new Carrier Window Front assy Insert the FPC through the hole as shown in the picture Place the Display into the cavity of Carrier Window Front assy Press to secure its position Do not touch the Display ...

Page 28: ...Working Instruction Repair Instruction Mechanical 1263 4086 Rev 6 Sony Mobile Communications AB Company Internal 28 53 Replacement Display Check the four hooks are secured ...

Page 29: ...s Follow the 4 9 4 10 4 12 Removal instructions Prepare the new Carrier Window Front assy Follow the 4 9 4 10 4 12 Installation instructions Follow the 5 2 5 5 Reassembly instructions Scrap The Touch Panel Glass Window 3 5 with Gasket and Carrier Window Front assy are not allowed to reuse Touch panel calibration has to be performed for all replaced units 1257 2706 Trouble Shooting Application mech...

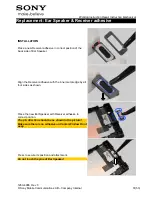
Page 30: ...moval as described below Prepare the new Ear Speaker Receiver adhesive Carry out the Installation as described below Follow the 5 2 5 5 Reassembly instructions REMOVAL Detach the Ear Speaker by using a pair of tweezers Remove the Receiver adhesive from Ear Speaker Scrap The Receiver adhesive is not allowed to reuse Remove the Receiver adhesive from Carrier Window Front assy Scrap The Receiver adhe...

Page 31: ...esive in correct position of the back side of Ear Speaker Align the Receiver adhesive with the inner metal edge by all four sides as shown Place the new Ear Speaker with Receiver adhesive in correct position The pin direction should be as shown in the picture Make sure there is no adhesive on Carrier Window Front assy Press to secure its position and attachment Do not touch the pins of Ear Speaker...

Page 32: ...Removal as described below Prepare the new Loudspeaker Speaker adhesive Carry out the Installation as described below Follow the 5 3 5 5 Reassembly instructions REMOVAL Detach the Loudspeaker by using a Flex Film Assembly Tool Remove the Speaker adhesive from Loudspeaker Scrap The Speaker adhesive is not allowed to reuse Remove the Speaker adhesive from Carrier Frame Assy Scrap The Speaker adhesiv...

Page 33: ...proper position of the back side of Loudspeaker Align the Speaker adhesive with the inner metal edge by all four sides as shown and press to secure its attachment Place the new Loudspeaker with Speaker adhesive in correct position The pin direction should be as shown in the picture Make sure there is no adhesive on Carrier Frame Assy Press to secure its attachment Do not touch the pins of the Loud...

Page 34: ...t the Removal as described below Prepare the new Main Camera Follow the 4 15 Installation instructions Carry out the Installation as described below Follow the 5 2 5 5 Reassembly instructions REMOVAL Unsnap the BtB connector Remove the Main Camera INSTALLATION Place a new Main Camera in the correct position Make Sure that Main Camera Copper Main Camera Film are assembled on Main Camera Refer to 4 ...

Page 35: ...struction Mechanical 1263 4086 Rev 6 Sony Mobile Communications AB Company Internal 35 53 Replacement Main Camera Snap the BtB connector Make Sure that Main Camera Copper Main Camera Film are assembled on Main Camera Refer to 4 15 ...

Page 36: ...ut the Installation as described below Follow the 4 14 Installation instructions Follow the 5 2 5 5 Reassembly instructions REMOVAL Peel off the Main Camera Copper from three sides as shown in the picture Scrap Not to be reused Peel off the Main Camera Film Scrap Not to be reused INSTALLATION Place a new Main Camera Film in the upper middle position to cover two soldering pads Using Main Camera Fi...

Page 37: ...pper Place a new Main Camera Copper in the correct position Note the guiding hole The guiding hole must be aligned between the Main Camera and the Main Camera Copper Make sure the Main Camera Film is assembled before pressing Main Camera Copper Press the Main Camera Copper four sides as shown in the picture to secure its position and attachment ...

Page 38: ...emoval as described below Prepare the Shield Can Lid ABB Carry out the Installation as described below Follow the 5 1 5 5 Reassembly instructions REMOVAL Unsnap the corners of the Shield Can Lid ABB by using a pair of tweezers and pull upwards to remove it Scrap Not to be reused INSTALLATION Place a new Shield Can Lid ABB in the correct position Press to snap it Only the edge of the Shield Can is ...

Page 39: ...val as described below Prepare the Shield Can Lid BT GPS Carry out the Installation as described below Follow the 5 1 5 5 Reassembly instructions REMOVAL Unsnap the corners of the Shield Can Lid BT GPS by using a pair of tweezers and pull upwards to remove it Scrap Not to be reused INSTALLATION Place a new Shield Can Lid BT GPS in the correct position Press to snap it Only the edge of the Shield C...

Page 40: ...Disassembly instructions Carry out the Removal as described below Prepare the new Shield Can Lid DBB Carry out the Installation as described below Follow the 5 1 5 5 Reassembly instructions REMOVAL Lift up to remove the Shield Can Lid DBB INSTALLATION Place a new Shield Can Lid DBB in the correct position Press to snap it Only the edge of the Shield Can is allowed to press ...

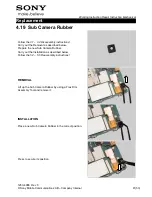
Page 41: ...4 Disassembly instructions Carry out the Removal as described below Prepare the new Sub Camera Rubber Carry out the Installation as described below Follow the 5 2 5 5 Reassembly instructions REMOVAL Lift up the Sub Camera Rubber by using a Flex Film Assembly Tool and remove it INSTALLATION Place a new Sub Camera Rubber in the correct position Press to secure its position ...

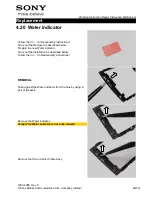
Page 42: ...ssembly instructions Carry out the Removal as described below Prepare the new Water indicator Carry out the Installation as described below Follow the 5 3 5 5 Reassembly instructions REMOVAL Push against the Water indicator from the hole by using a pair of tweezers Remove the Water indicator Scrap The Water indicator is not to be reused Remove the foil on Carrier Frame Assy ...

Page 43: ...ical 1263 4086 Rev 6 Sony Mobile Communications AB Company Internal 43 53 Replacement Water indicator INSTALLATION Place a new Water indicator in the correct position Make sure there is no foil on Carrier Frame Assy Press to secure its attachment ...

Page 44: ... 5 5 Reassembly instructions Touch panel calibration has to be performed for all replaced units kkk 1257 2706 Trouble Shooting Application mechanical NOTE Startup the unit to initialize settings before perform Customize Phone in Emma 4 22 Board Swap Change Label CHANGE LABEL Follow the instructions in the Generic Repair Manual Build swap for change of label 4 23 Board Swap Customize of Software CU...

Page 45: ... Antenna Cap 5 Battery Cover Assy a Battery b 5 1 Main PBA Transparent Belt Total Assy Insert Transparent Belt Total Assy into Main PBA from left side Lift its right side a little higher to ensure its hook and ZIF connector FPC above Main PBA Insert Transparent Belt Total Assy into Main PBA from right side Make sure its hook and ZIF connector FPC are well assembled in position Press the hook to ma...

Page 46: ... Internal 46 53 Reassembly Lock the ZIF connector by using a Front Opening Tool Apply 10 1 Ncm torque when tightening the Screw Torx Len 3 1 Diam 1 4 with Bits JCIS No 0 Take new screws 5 2 Carrier Window Front assy Place the Carrier Window Front assy onto the Main PBA Snap the BtB connector with fingers ...

Page 47: ...Mobile Communications AB Company Internal 47 53 Reassembly Turn over the phone Move the Main PBA into the Carrier Window Front assy Press to snap the hooks Listen to the click sound 5 3 Carrier Frame Assy Place the Carrier Frame Assy onto the Carrier Window Front assy unit ...

Page 48: ...cal 1263 4086 Rev 6 Sony Mobile Communications AB Company Internal 48 53 Reassembly Press the top side to secure the hooks Press to secure the hooks Listen to the click sound Press right side to secure the hooks Press left side to secure the hooks ...

Page 49: ...10 1 Ncm torque when tightening the Screw Torx Len 5 4 Diam 2 5 with T6 Take new screws Apply 13 1 Ncm torque when tightening the Screw Other Len 4 0 Diam 1 4 with T5 Take new screws Apply 10 1 Ncm torque when tightening the Screw Torx Len 3 4 Diam 3 0 with T5 Take new screws 5 4 Antenna Cap Place the Antenna Cap in the correct position ...

Page 50: ...ny Mobile Communications AB Company Internal 50 53 Reassembly Push to secure its position 5 5 Battery Cover Assy Battery Place the battery into the cavity Press the battery to secure its position Place the Cover Battery 3mm away from the Transparent Belt Total Assy 3mm ...

Page 51: ...Working Instruction Repair Instruction Mechanical 1263 4086 Rev 6 Sony Mobile Communications AB Company Internal 51 53 Reassembly Push downwards to secure its position ...

Page 52: ...ile Communications AB Company Internal 52 53 6 Country of Origin Barcodes for Brazil VIVO Labels Below is a link to a list of countries of origin If you are printing a Brazil or VIVO label scan the barcode corresponding to the correct country of origin for the Fabricado field ...

Page 53: ...ory Rev Date Changes Comments 1 2012 Apr 16 Initial release 2 2012 Apr 18 Update main camera Copper replacement on page 36 3 2012 Apr 20 Update main camera Copper replacement on page 36 4 2012 Apr 23 Add Main Camera Film replacement on page 36 5 2012 Apr 25 Add Board Swap and Barcode Label Chapter 6 2012 Jul 27 Update the chapter 4 21 ...

Reviews: