

Calendar and alarm clock
Calendar
Use the Calendar application to manage your time schedule. If you have signed into
and sychronised your device with one or several online accounts that include
calendars, for example, your Google™ account or Xperia™ with Facebook account,
then calendar events from these accounts will also appear in the Calendar
application. You can select which calendars you want to integrate into the combined
Calendar view.
When an appointment time approaches, your device plays a notification sound to
remind you. Also, appears in the status bar.
You can also synchronise your Outlook calendar with your device using PC Companion. If you
do so, all appointments from your Outlook calendar will appear in the calendar view of your
device.
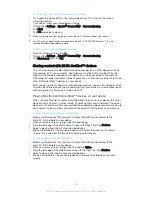
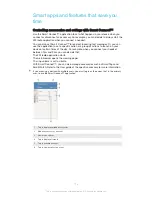
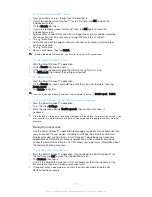
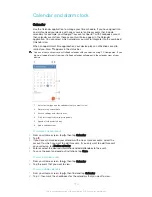
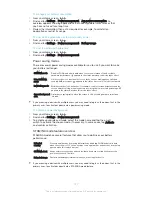
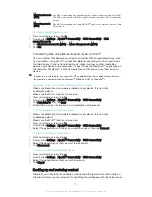
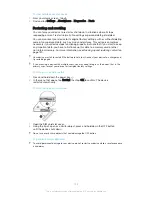
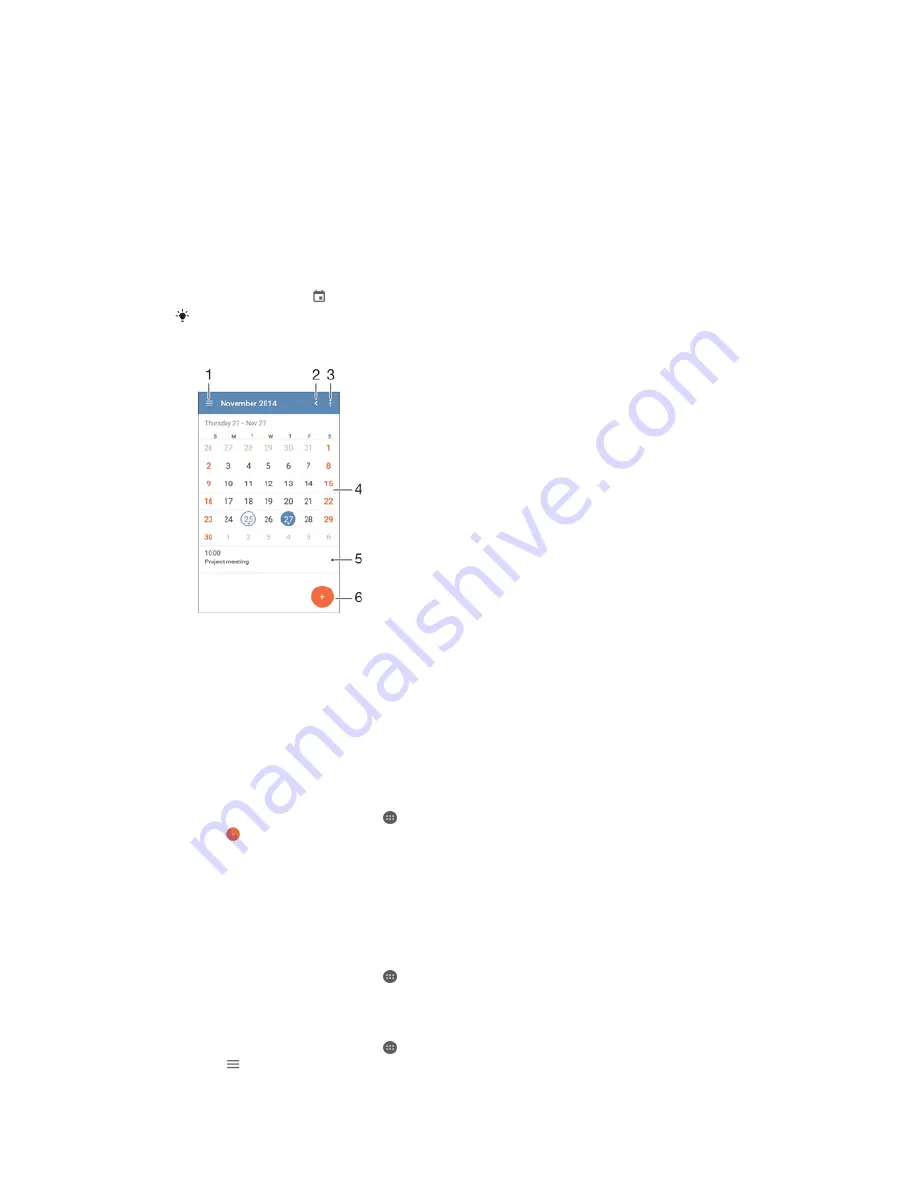
1
Select a view type and the calendars that you want to view
2
Return to the current date
3
Access settings and other options
4
Flick left or right to browse more quickly
5
Agenda for the selected day
6
Add a calendar event
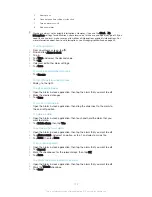
To create a calendar event
1
From your Home screen, tap , then tap
Calendar
.
2
Tap .
3
If you have synchronised your calendar with one or more accounts, select the
account to which you want to add this event. If you only want to add this event
on your device, tap
Device calendar
.
4
Enter or select the desired information and add attendees to the event.
5
To save the event and send out invitations, tap
Save
.
To view a calendar event
1
From your Home screen, tap , then tap
Calendar
.
2
Tap the event that you want to view.
To view multiple calendars
1
From your Home screen, tap , then find and tap
Calendar
.
2
Tap , then mark the checkboxes for the calendars that you want to view.
120
This is an Internet version of this publication. © Print only for private use.


