– 5 –
The set should be connected to a master unit for electrical
adjustments (See page 2).
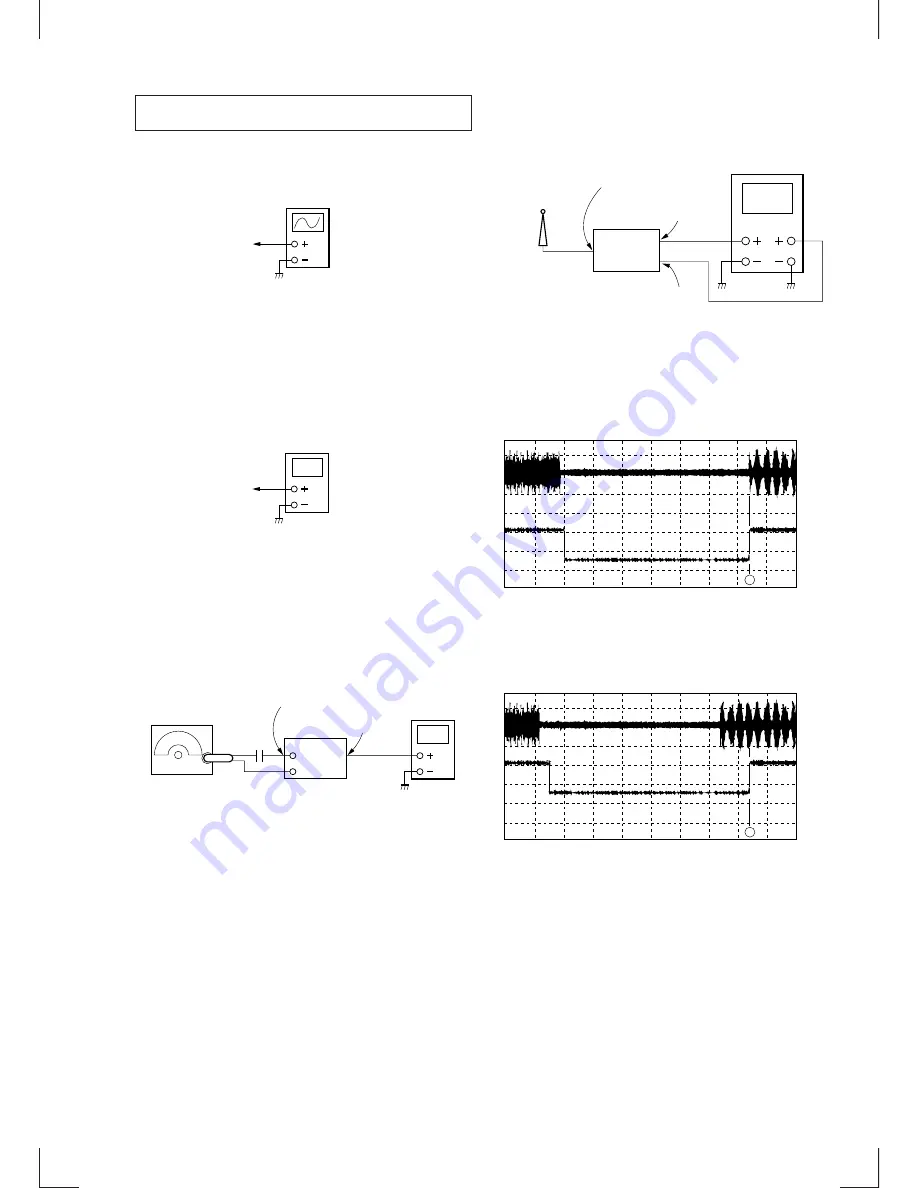
Local OSC Adjustment
Setting:
SECTION 3
ELECTRICAL ADJUSTMENTS
Procedure:
1. Adjust T102 so as to maximize the peak of waveform at 35.84
MHz.
Adjustment Location: See page 6.
IF2 Output Gain Adjustment
Setting:
oscilloscope
main board
TP LO
digital
voltmeter
main board
TP LEL
Procedure:
1. Adjust RV101 so that the reading on digital voltmeter is 2.25 V.
Adjustment Location: See page 6.
AGC Adjustment
Setting:
ANT +B switch : OFF
Procedure:
1. Set the carrier frequency of RF SSG to 225.648 MHz.
2. Receive the channel 12B (225.648 MHz).
3. Adjust RV102 so that the reading on digital voltmeter is 3.1
±
0.5 V.
4. Set the carrier frequency of RF SSG to 1471.792 MHz.
5. Receive the channel L12 (1471.792 MHz).
6. Adjust RV103 so that the reading on digital voltmeter is 3.2
±
0.5 V.
Adjustment Location: See page 6.
digital
voltmeter
main board
TP AGC
ANTENNA jack
0.01
µ
F
RF SSG
set
output level : 90 dBm (32 mV)
Non-modulation
Frame Sync Adjustment
Setting:
ANT +B switch : ON
Procedure:
1. Receive the DAB signal.
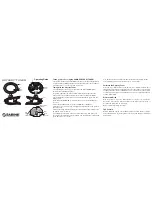
2. Adjust RV104 so that the rising edge of waveform of TP FSYNC
is positioned
A
.
(1) In case of Band
ΙΙΙ
(from channel 5A to 13F)
(2) In case of L Band (from channel L1 to L23)
CH-1
CH-2
oscilloscope
main board
TP IF2
main board
TP FSYNC
ANTENNA jack
ANTENNA
set
TP
IF2
TP
FSYNC
A
–1.68000 ms
–680.00 us
200 us / div
320.00 us
realtime
1
500 mV/
2
2.00 V /
–1.12500 V 5.00000 V
Adjustment Location: See page 6.
TP
IF2
TP
FSYNC
A
–370.00 us
–120.00 us
50.0 us / div
130.00 us
realtime
1
500 mV/
2
2.00 V /
125.000 mV 3.00000 V


