background image

25

XVM-H65

49

PONRST

LOGIC

SYNCSEPA

HHKILL

DAC

DAC

CLAMP

SYNC

CUT

ACC
DET

50

COMDC

IICBUS

VCO

LOGIC

LOGIC

LOGIC

PWM

REG

1

PLAN

2

R-Y OUT

3

B-Y OUT

4

R-Y IN

5

B-Y IN

6

VCC1

7

VREF

8

R-IN1

9

G-IN1

10

B-IN1

11

R-DET

12

G-DET

13

B-DET

14

R-IN2

15

G-IN2

16

B-IN2

48

SDATA

47

SCLK

46

CSYNC IN

45

NAVI SYNC IN

44

VCC1

43

VCO ADJ

42

AFC DET

41

GND2

40

+BCLKFLT

39

HSYNC LOCK

38

NRGB

37

VSS

36

POL

35

VDIN

34

CSYNC OUT

33

SCP

52

YIN

54

CTRAP IN

55

Y DET

56

ACC DET

ACC

AMP

57

C IN

58

VCC1

59

GND3

60

KILL DET

61

APC DET

62

SC OUT

63

VXO-NTSC

64

VXO-PAL

51

SECAM BLACK ADJ

53

CTRAP OUT

17 YS

18 BLAK

19 B-OUT

20 B-OUT DET

21 G-OUT

22 G-OUT DET

23 GND1

24 VREF DRIV

25 VCC2

26 R-OUT

27 R-OUT DET

28 VCOM OUT

29 VCC3

30 PWM OUT

31 VDOUT

32 HDOUT

R-Y,B-Y
DEMOD

VSYNC

DROP

PHASE

COMP

F

DET

VERT.

COUNT

I/N

SW

BPF

GCA

KILLER

APC

YUV

SW

LOGIC

VXO

GENE

G-Y

GEME

INT/EXT

SW

MATRIX

CLAMP

LIMIT

VXO

REG

DELAY

SHARPNESS

GCA

CONTRAST

GAMMA

INVERT

BRIGHT

OSD

SW

VCOM

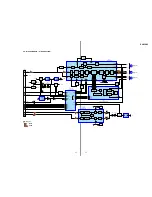
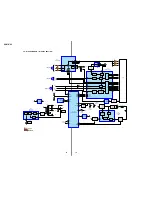
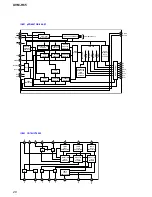
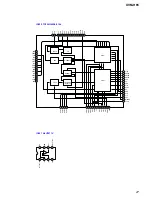
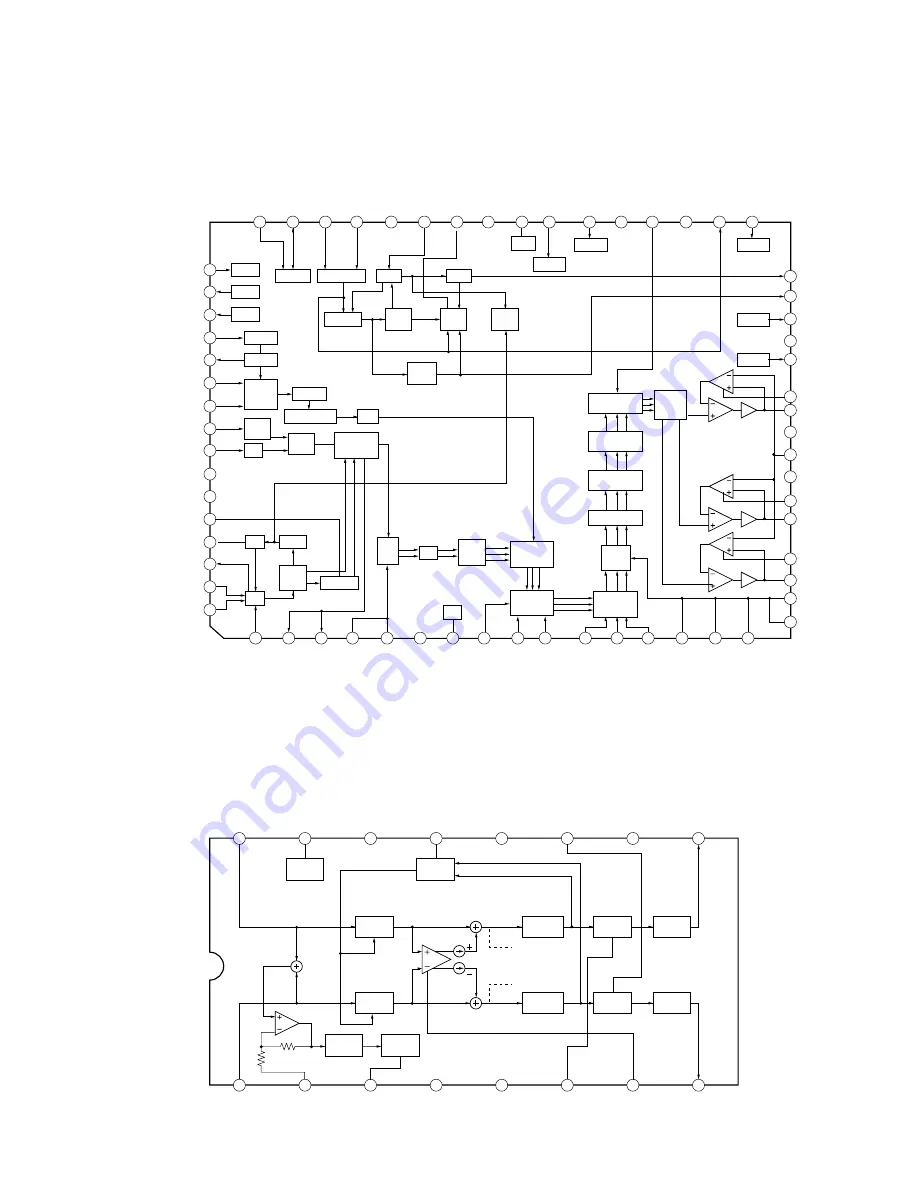
6-9. IC BLOCK DIAGRAMS

IC500  AN2546FH-AV

IC350  TA2061AF

VREF

16

15

14

13

12

11

10

9

1

2

3

4

5

6

7

8

LEVEL

DET

AGC

PRE

EMPHASIS

VCO

BUFFER

AGC

PRE

EMPHASIS

VCO

BUFFER

LIN

VREFC

AGC

AGC-T/C

VCC

FO-R

FO-SW

LOUT

RIN

MIX-NF

AUTO-OFF

GND

FO-L

SURND

ROUT

O.S.M

LEVEL

DET

LOUT=L+K•(L-R)

ROUT=R-K•(L-R)

Summary of Contents for XVM-H65 - Monitor

Page 1: ...han 100 pF Output Level 0 dBs 0 3 dB 0 775 V rms Vol Max Video 75 Ω 1Vp p A V Input 2 Input Impedance more than 10 KΩ less than 1000 pF Input Level 1 3 dBs 0 0 3 dB 0 775 V rms Video 75 Ω 1 Vp p DC output 7 5 V max 2 A Dimensions 150 42 80 mm 6 1 11 16 3 1 4 in w h d Mass 250 g 9 oz Card remote commander RM X122 Power requirements CR2025 lithium battery Operable range Approx 2 5 m 8 22 ft Dimensio...

Page 2: ...t 13 5 12 11 V POS Adjustment 13 5 12 12 H POS Adjustment 13 6 DIAGRAMS 6 1 IC Pin Description 15 6 2 Block Diagram Video Section 17 6 3 Block Diagram Display Section 18 6 4 Printed Wiring Board Display Section 1 2 20 6 5 Printed Wiring Board Display Section 2 2 21 6 6 Schematic Diagram Display Section 1 3 22 6 7 Schematic Diagram Display Section 2 3 23 6 8 Schematic Diagram Display Section 3 3 24...

Page 3: ...e the data into the EEP ROM Writing Method 1 Turn off power to the connection box XA 113 2 While holding the TEST switch S407 down for more than 5 seconds turn on power to the XA 113 Then release the TEST switch S407 3 Press the VOL key on the remote controller for more than 2 seconds 4 The EEP ROM data will be written and the normal test mode screen will appear After this perform V COM voltage po...

Page 4: ... off the transmitter for the cordless headphones Monitor 3 POWER button 4 Monitor cable connector 5 POWER SELECT switch For details refer to page 6 If interference occurs while using several cordless headphones If several monitors are installed and used simultaneously interference may occur In this case press IR on off on the unit to turn off the transmitter for the cordless headphones and use wir...

Page 5: ...source 4 POWER button 5 MENU button Press to adjust the various display settings 6 MODE button Press to change the screen mode 7 V v buttons Press to select the desired item For DVD operations When a Sony mobile DVD player is connected to this unit you can control the basic functions with the card remote commander 8 V v ALBUM buttons 9 TOP MENU button 0 MENU button qa O button qs buttons qd m M bu...

Page 6: ...r DVX 100 1 Not used in this unit US Canadian model 17 Monitor cable 5 m Connection box XA 113 DC DC cord 3 m PS one optional To 7 5 V DC Output To Audio L R Video Input Remote Commander Signal receiver cord 5m Stereo Mini jack RCA pin cord optional To Remote Signal IR Output RCA pin cord optional Sony mobile DVD player DVX 11A optional Precautions on PS one Be sure to fasten PS one in a safe plac...

Page 7: ...g to the following sequence Note Follow the disassembly procedure in the numerical order given 3 1 CASE REAR 3 1 CASE REAR Page 7 SET 3 2 DISPLAY BOARD Page 8 3 3 LIQUID CRYSTAL DISPLAY PANEL LCD1 Page 8 1 two screws P2 x 5 3 case rear main assy claw claw 2 two screws P2 x 5 ...

Page 8: ...SPLAY BOARD 3 3 LIQUID CRYSTAL DISPLAY PANEL LCD1 4 screw B3 x 2 3 screw B3 x 2 1 CN850 2 CN800 5 DISPLAY board 1 two screws K2 x 2 5 3 two tapping screws B1 7 x 6 2 bracket PWB 5 insulating sheet 6 LCD1 4 bracket PWB ...

Page 9: ...the selection using the INPUT key 2 The FOR FACTORY mode is now entered The following items are selected in turn by pressing the INPUT key repeatedly 3 For each item selected adjust so that the adjustment value is within the specified value range using the R and r keys on the remote controller 4 After adjustment press the MENU key on the remote controller to determine the adjustment value Press th...

Page 10: ...IPMENT Unless otherwise specified the equipment should be connected as shown below 5 3 SETUP FOR ADJUSTMENT The 10 step gray scale signal from the NTSC pattern generator is used as an adjustment signal for V COM voltage position adjustment as well as VIDEO adjustment 10 step gray scale signal with burst 1Vp p 75 Ω VIDEO OUT 75 Ω NTSC pattern generator main board TP507 TP500 monitor XVM H65 connect...

Page 11: ...witch OFF 5 6 1 Voltage Check Checking Method 1 Connect oscilloscope between TP853 and TP854 using high voltage proof probes 100 1 2 Verify that the reading on the oscilloscope is at 550 150 V rms Checking location Display board 5 6 2 Frequency Check Checking Method 1 Connect oscilloscope between TP853 and TP854 using high voltage proof probes 2 Verify that the reading on the oscilloscope is at 68...

Page 12: ...ent Adjustment Method 1 Select Black Limit from the FOR FACTORY MODE 2 Connect oscilloscope between TP811 and TP500 3 Adjust so that the signal level B stands at the specified value using the R and r keys on the remote controller Specified value 0 650 0 01 V Adjustment location Display board 5 12 3 White Limiter Level Adjustment Adjustment Method 1 Select White Limit from the FOR FACTORY MODE 2 Co...

Page 13: ...ct Gamma2 from the FOR FACTORY MODE 2 Connect oscilloscope between TP811 and TP500 3 Adjust so that the signal level I stands at the specified value us ing the R and r keys on the remote controller Specified value 3 1 0 1 V Adjustment location Display board 5 12 10 VCO Free Run Adjustment Adjustment Method 1 Select VCO Free from the FOR FACTOR MODE 2 Connect frequency counter between TP407 and TP4...

Page 14: ... TP801 TP508 TP507 CN411 CN410 TP353 TP352 TP350 TP405 TP404 TP500 TP951 S407 TP952 TP407 TP600 TP809 TP812 TP804 TP811 TP810 TP612 RV351 S950 TP854 TP805 TP806 RV802 RV800 TP807 T800 T850 IC350 IC601 CN800 DISPLAY BOARD SIDE A 6 pin TP354 Adjustment Location ...

Page 15: ...4 VDD2 Power supply pin 3 V 25 AVSS Ground 26 P17 Not used Open 27 KEY IN I A D key signal input 28 P15 Not used Open 29 P14 Not used Open 30 P13 Not used Open 31 P12 Not used Open 32 PW DET I Power voltage detection signal input 33 P10 Not used Open 34 AVREF Power supply pin 3 V 35 AVDD Power supply pin 3 V 36 RESET I System reset input 37 XT2 Power supply pin 3 V 38 XT1 Ground 39 IC I Ground 40 ...

Page 16: ... ON OFF control signal output 57 SIDE3 O Display size 3 control signal output 58 SIDE2 O Display size 2 control signal output 59 SIDE1 O Display size 1 control signal output 60 DIMMER O LCD backlight dimmer control signal output 61 P44 Not used Open 62 SW2 O A V input 2 select signal output 63 SW1 O A V input 1 select signal output 64 P47 Not used Open Pin No Pin Name I O Pin Description ...

Page 17: ... 19 SW SYNC OUT DELAY SHARP POWER CONTROL Q406 407 IR DRIVE Q352 353 POWER CONTROL Q957 958 1 3 3 2 1 3 1 POWER CONTROL Q952 954 TRAP CONTROL Q503 RV351 R CH VCO D903 D902 BATT S950 POWER SELECT IC350 AUDIO IR TRANSMITTER IC401 CHARACTER GENERATER D410 3 3V HD VD R G B POL VCOM PAL HD OUT VD OUT R G B POL H SYNC V SYNC VCOM ACC5V ACC ON PW ON ACC Y N DATA SCLK CSN L IN R IN Y IN C IN CSYNCIN REM I...

Page 18: ...5 2 50 44 6 FIELD DET INT EXT SEL VCOM DRIVE Q802 804 HD OUT POLC NBLK PAL POLS VD OUT MODE1 NODE2 MODE3 1 6 VCOM UPSD CX OEV3 OEV2 OEV1 STV2 STV1 STH2 STH1 HDIR CPH1 VB VG VR VR CI VCC CN AN BN AI S2 S0 S1 BI VG VB CPV PDOS OSCI IC601 VCO RV601 VCO IC600 DISPLAY CONTROL VCC VCC V COUNT V SEL OSC MASK PLL DET H COUNT H OUT LCD1 V OUT COM OSC IC801 POWER CONTROL Q855 856 859 RESET IC403 KEY IN DETE...

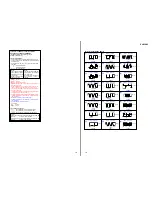
Page 19: ...re not indicated except for electrolytics and tantalums All resistors are in Ω and 1 4 W or less unless otherwise specified indicates tolerance f internal component C panel designation Caution Pattern face side Parts on the pattern face side seen from the Side B pattern face are indicated Parts face side Parts on the parts face side seen from the Side A parts face are indicated A B Line B B Line H...

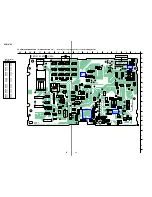
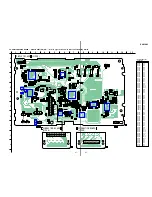
Page 20: ...800 C865 C402 C804 L801 L800 L402 F850 R851 R852 C860 C862 C851 C850 C412 C414 C500 C512 C807 C836 TP803 TP853 TP856 WHT BLU TP851 TP852 TP850 TP855 TP802 TP801 TP800 TP503 TP502 TP501 TP953 TP405 TP404 TP504 TP508 TP506 TP409 TP402 TP403 TP507 TP414 TP418 TP409 TP415 TP417 TP412 TP411 TP408 TP415 TP407 TP808 TP613 TP419 TP952 TP500 TP951 TP950 TP410 TP416 TP354 TP350 TP505 TP406 TP815 TP817 TP816...

Page 21: ...2 C520 C517 C516 R500 C539 R517 C535 R521 C411 R472 C356 C360 R974 R975 R456 C358 R956 R960 R959 R459 F950 C959 C958 R965 R453 C950 R955 R952 R954 R951 R969 R968 C365 R966 R970 R958 R473 L400 R515 R512 C547 R514 R446 R448 R450 R447 R449 R451 R859 R860 R861 R876 R877 R878 C858 R886 R864 R865 R866 R867 R868 R872 C835 C831 C833 L810 L804 L805 L806 C837 L807 L809 L808 R873 R874 C857 D853 D603 C821 C82...

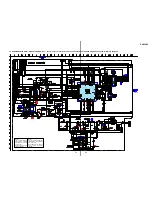
Page 22: ...2 C530 R515 R521 C547 R514 R519 R518 R535 C534 L503 C533 L502 L501 D501 L500 C548 C500 C501 Q957 R966 R967 R960 R959 R965 C960 R968 R969 R974 R975 L950 R973 R951 R956 R970 Q956 Q951 R962 C952 R958 R957 C950 R955 C951 TP505 TP954 L951 C957 C955 C953 IC953 IC952 TP952 TP978 TP977 TP980 TP979 D903 D902 TP953 TP950 TH950 TP951 R950 TP500 CN410 C532 Q952 Q954 Q958 Q504 Q505 Q500 R510 TP506 TP507 Q502 Q...

Page 23: ...5 R416 Q401 Q400 R482 R480 Q402 R417 R419 R421 D409 C409 R455 C424 Q404 Q405 R471 R472 R473 R436 R437 R432 C410 R474 C418 D400 Q406 R479 R478 R477 R476 R475 D408 D407 IC350 R350 C356 C355 C357 C359 C358 C354 R359 RV350 Q350 Q351 R361 R362 Q352 Q353 R368 R365 R366 R367 D351 D350 IC352 IC351 D356 C350 C351 C353 R354 C364 C362 C363C361 R352 C360 R351 R360 RV351 TP354 TP350 TP353 TP352 D410 TP406 TP40...

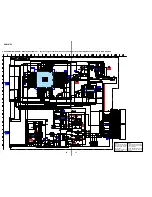
Page 24: ...C801 C810 R815 R812 R814 C809 R813 R811 R810 C806 C807 C808 L801 TP804 TP805 TP806 TP807 L808 L810 L809 L807 D804 D805 C833 C835 C831 C832 C836 C834 C830 R819 R820 R823 R824 R825 R822 R821 R818 C813 C816 Q802 Q803 C814 C812 C815 JC801 R816 R827 R826 L802 TP812 TP811 TP810 TP809 TP817 TP816 TP818 TP815 TP814 TP813 L600 C606 C605 D602 C817 LCD1 Q600 R634 Q601 TP616 TP612 R636 D604 Q506 TP801 TP800 T...

Page 25: ...C OUT 63 VXO NTSC 64 VXO PAL 51 SECAM BLACK ADJ 53 CTRAP OUT 17 YS 18 BLAK 19 B OUT 20 B OUT DET 21 G OUT 22 G OUT DET 23 GND1 24 VREF DRIV 25 VCC2 26 R OUT 27 R OUT DET 28 VCOM OUT 29 VCC3 30 PWM OUT 31 VDOUT 32 HDOUT R Y B Y DEMOD VSYNC DROP PHASE COMP F DET VERT COUNT I N SW BPF GCA KILLER APC YUV SW LOGIC VXO GENE G Y GEME INT EXT SW MATRIX CLAMP LIMIT VXO REG DELAY SHARPNESS GCA CONTRAST GAMM...

Page 26: ...T DATA H POSITION COUNTER H ADDRESS COUNTER H SIZE COUNTER V SIZE COUNTER V POSITION COUNTER V AD REGISTER V ADDRESS COUNTER OUTPUT CONTROL CHARACTER GENERATOR ROM 12X16BITX 512 WORD INSTRUCTION DECODER CONTROL SIGNALS 3 DATA 15 V BLK 14 VC2 13 BLK2 12 VC2 11 BLK1 18 VR 17 VG 20 H SYNC 19 V SYNC LOGIC LEVEL CONVERSION LOGIC LEVEL CONVERSION LOGIC LEVEL CONVERSION LOGIC LEVEL CONVERSION BINART TO 1...

Page 27: ...2 59 CPH1 61 CPH3 31 NGEO1 32 STV2 29 NGEO3 30 NGEO2 27 CX 28 CPV 25 STV1 20 VSS 24 HSRV 26 VDD 23 RV 21 NVD 22 NHD 19 PAL 17 UPSD 18 MIRROR 1 HPOS1 HPOS2 HPOS3 HPOS4 2 3 4 5 HODE1 HODE2 HODE3 6 7 8 NBLK 9 NDSH 11 NDSV 10 VSS 16 VDD 12 NCLP 13 POLS 14 POLC 15 COMPS V COUNTER MASK PD OSC H COUNTER V SEP FIELD DISCRI INT EXT SEL H OUT V OUT IC600 TC200G02AF 0104 IC601 NJU7071V 8 NC 7 VDD 6 OUT 5 OFF...

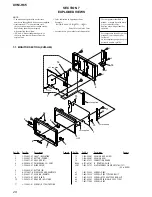
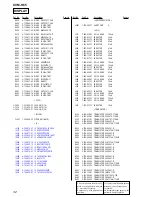
Page 28: ...L LIQUID CRYSTAL TFT 6 5 in WIDE 1 7 621 255 32 SCREW P 2X5 2 7 685 103 19 SCREW P 2X5 TYPE2 NON SLIT 3 7 685 233 19 SCREW KTP 2 6X6 TYPE2 NON SLIT 4 7 627 452 47 SCREW PRECISION K 2X2 5 TYPE1 5 7 621 772 08 SCREW B 3X2 NOTE The mechanical parts with no reference number in the exploded views are not supplied Items marked are not stocked since they are seldom required for routine service Some delay...

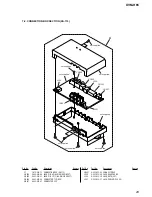
Page 29: ...N202 9 885 035 45 JACK PIN 3P Y AUDIO VIDEO OUT CN300 9 885 035 46 CONNECTOR 13P DVD CN301 9 885 035 47 CONNECTOR 22P CN901 9 885 035 48 CONNECTOR 4P J200 9 885 035 49 JACK HEADPHONE J300 9 885 035 50 JACK DATA OUT J901 9 885 035 51 JACK POWER PS USE 51 not supplied not supplied not supplied not supplied CN901 CN200 J200 J901 CN301 J300 CN300 CN202 not supplied not supplied not supplied not suppli...

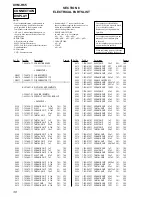
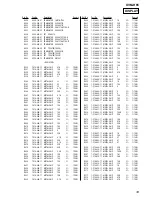
Page 30: ...IC CHIP 0 1uF 10 16V C503 1 107 826 11 CERAMIC CHIP 0 1uF 10 16V C504 1 107 826 11 CERAMIC CHIP 0 1uF 10 16V C505 1 107 826 11 CERAMIC CHIP 0 1uF 10 16V C506 1 104 915 11 TANTAL CHIP 2 2uF 20 16V C507 1 107 826 11 CERAMIC CHIP 0 1uF 10 16V C508 1 107 826 11 CERAMIC CHIP 0 1uF 10 16V C509 1 107 826 11 CERAMIC CHIP 0 1uF 10 16V C510 1 126 401 21 ELECT CHIP 1uF 20 50V C511 1 126 401 21 ELECT CHIP 1uF...

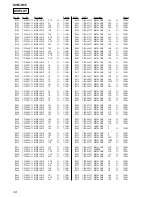
Page 31: ... 826 11 CERAMIC CHIP 0 1uF 10 16V C813 1 107 826 11 CERAMIC CHIP 0 1uF 10 16V C814 1 137 942 21 ELECT 47uF 20 25V C815 1 107 826 11 CERAMIC CHIP 0 1uF 10 16V C816 1 127 820 11 CERAMIC CHIP 4 7uF 16V C817 1 126 394 11 ELECT CHIP 10uF 20 16V C818 1 164 298 11 CERAMIC CHIP 0 15uF 10 25V C819 1 137 942 21 ELECT 47uF 20 25V C820 1 137 942 21 ELECT 47uF 20 25V C821 1 164 298 11 CERAMIC CHIP 0 15uF 10 25...

Page 32: ...H L400 1 412 951 11 INDUCTOR 10uH L402 1 412 955 11 INDUCTOR 22uH L500 1 469 527 11 INDUCTOR 47uH L501 1 412 959 11 INDUCTOR 47uH L502 1 412 959 11 INDUCTOR 47uH L503 1 412 959 11 INDUCTOR 47uH L600 1 412 951 11 INDUCTOR 10uH L602 1 408 775 21 INDUCTOR 6 8uH L603 1 412 951 11 INDUCTOR 10uH L800 1 456 439 21 COIL CHOKE 150uH L801 1 456 439 21 COIL CHOKE 150uH L802 1 412 951 11 INDUCTOR 10uH L803 1 ...

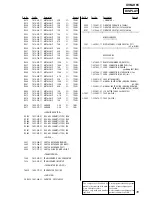
Page 33: ...5 1 10W R431 1 216 833 11 METAL CHIP 10K 5 1 10W R432 1 216 826 11 METAL CHIP 2 7K 5 1 10W R436 1 216 821 11 METAL CHIP 1K 5 1 10W R437 1 216 825 11 METAL CHIP 2 2K 5 1 10W R438 1 216 829 11 METAL CHIP 4 7K 5 1 10W R439 1 216 829 11 METAL CHIP 4 7K 5 1 10W R440 1 216 809 11 METAL CHIP 100 5 1 10W R441 1 216 809 11 METAL CHIP 100 5 1 10W R442 1 216 809 11 METAL CHIP 100 5 1 10W R443 1 216 833 11 ME...

Page 34: ...L CHIP 68K 5 1 10W R647 1 216 857 11 METAL CHIP 1M 5 1 10W R648 1 216 829 11 METAL CHIP 4 7K 5 1 10W R654 1 216 818 11 METAL CHIP 560 5 1 10W R655 1 216 818 11 METAL CHIP 560 5 1 10W R656 1 216 837 11 METAL CHIP 22K 5 1 10W R657 1 216 837 11 METAL CHIP 22K 5 1 10W R658 1 216 825 11 METAL CHIP 2 2K 5 1 10W R659 1 216 821 11 METAL CHIP 1K 5 1 10W R660 1 216 818 11 METAL CHIP 560 5 1 10W R661 1 216 8...

Page 35: ...ES ADJ CERMET 3 TYPE 100K RV600 1 225 901 21 RES ADJ CERMET 3 TYPE 10K RV601 1 225 907 21 RES ADJ CERMET 3 TYPE 100K RV800 1 225 901 21 RES ADJ CERMET 3 TYPE 10K RV801 1 225 905 21 RES ADJ CERMET 3 TYPE 47K RV802 1 225 901 21 RES ADJ CERMET 3 TYPE 10K SWITCH S401 1 572 596 21 SWITCH KEYBOARD POWER S402 1 572 596 21 SWITCH KEYBOARD IR ON OFF S407 1 572 596 21 SWITCH KEYBOARD TEST S950 1 571 277 51 ...

Page 36: ... HISTORY Clicking the version allows you to jump to the revised page Also clicking the version at the upper on the revised page allows you to jump to the next revised page Ver Date Description of Revision 1 0 2003 07 New ...

Reviews: