Astaro Security Gateway 625
Operating Instructions
Important Note:
Make sure you use the screws supplied with the rack-mount
brackets. Using the wrong screws could damage the hardware appliance and
would invalidate your warranty.
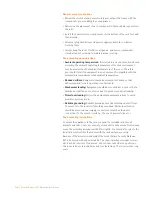
1. Attach the rack-mount brackets to the appliance
1.1 Place the appliance on a hard flat surface with the front panel facing you.
1.2 Attach the rack-mount brackets to the left and right side of the appliance
with the supplied screws.
1.3 Make sure the brackets are properly attached to the appliance.
Important note:
The rails for Astaro Security Gateway 625 will fit a rack of
600 mm/23.6” deep.
2. Choose the rack location
Leave enough clearance in front of the rack to enable you to open the front
door completely (~60 cm/25 inches).
Leave approximately 80 cm/30 inches of clearance in the back of the rack to
allow for sufficient airflow and ease in servicing.
This product is for installation only in a restricted access location (dedicated
equipment rooms, service closets and the like).
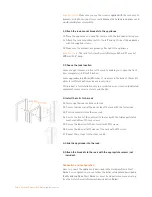
3. Install the rails to the rack
3.1 Telescope the inner and the outer rail.
3.2 Secure the inner rail at the back side of the rack with the fastenings.
3.3 Pull the outer rail from the inner rail.
3.4 Secure the front of the outer rail to the rack with the triplex perforated
washer and three M5 rack screws.
3.5 Secure the inner rail to the outer rail with M5 screws.
3.6 Secure the inner rail at the back of the rack with a M5 screw.
3.7 Repeat these steps for the other rail kit.
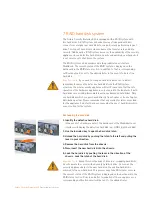
4. Slide the appliance into the rack.
5.
Attach the brackets to the rack with the appropriate screws (not
included).
Connection and configuration
How to connect the appliance is described in the Hardware Quick Start
Guide. For configuration you can follow the initial setup wizard described in
the WebAdmin Quick Start Guide or cancel it and perform a manual setup
(see the Astaro Security Gateway Administration Guide).


