background image

L/ R

USB
DVD

CD+ G

PRO GRA M

1

2

3

4

5

6

7

8

9

0

Musicarrier

PO WE R

MU SI C VO L

MIC 1

MIC 2

MIC 1 V OL

MIC 2 V OL

ECH O

TAPE

AUX

DVD

BBE ON

VID EO

L

R

AUX I NPU T

AUX

DVD

TAPE

BBE

iPo d

On

Off

BAL ANC E

iPo d

L

R

AL L- in -O NE M us ic S ys te m

DOLB Y

D I G I T A L

DIGITAL  AUDIO

G R A P HIC S

INP UT

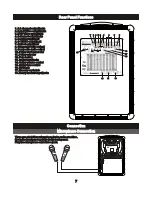
Rear Panel Functions

Rear Panel Functions

Microphone Connection

Microphone Connection

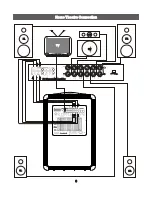
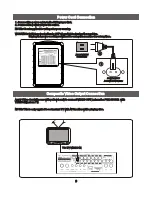
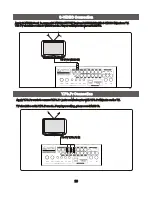
Connection

Connection

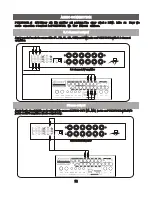
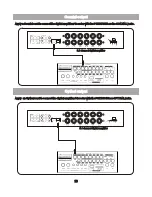
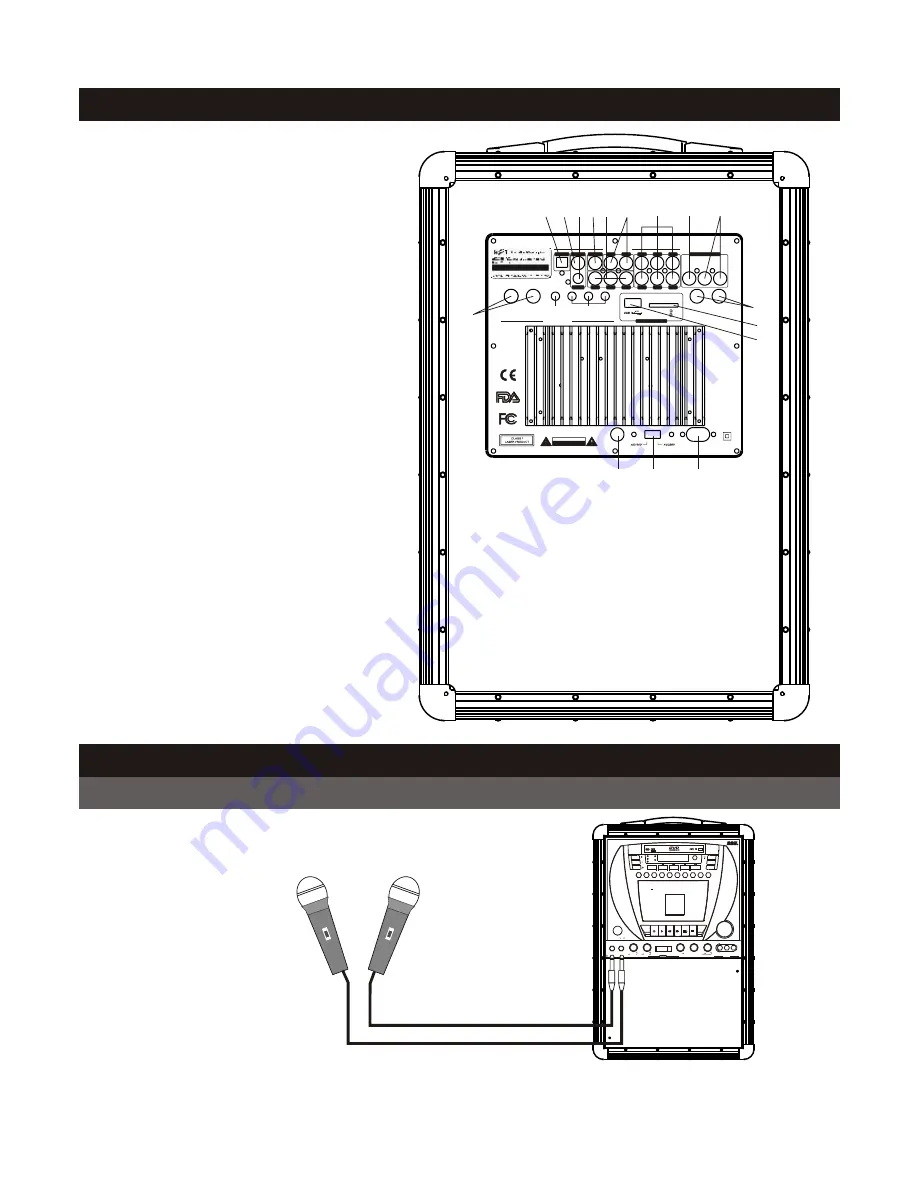
1. 5.1 channel output jacks
2. R.G.B Video output jacks
3. DVD Video output jack
4. 2 channel output jacks
5. Coaxial output jack
6. S-VIDEO output jack
7. Optical output jack
8. Composite video output
9. Composite audio output
10. Power cord connector
11. Power selector
12. Fuse holder
13. Guitar input jacks
14. Guitar volume control
15. Guitar tone control
16. USB jack
17. Memory card slots
18. Rear panel mic input jacks

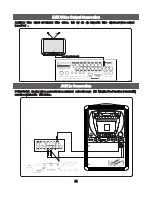
There are a total four microphone jacks on the machine, 
two in the front panel and two in the back panel.  
Plug the microphone cable into a jack.

There are a total four microphone jacks on the machine, 
two in the front panel and two in the back panel.  
Plug the microphone cable into a jack.

7

7

Y/ R

PB /G

PR /B

VI DE O

SW

FL

FR

SL

SR

CE N

COA XI AL

ML

MR

S- VI DE O

OPT IC AL

VI DE O

OUT PU T

R

L

GUI TAR 1

GUI TAR 2

GUI TAR VOL

BAS S

MI D

TR EB LE

MI C 1

MI C 2

SD/MMC

MINI SD

FU SE 2. 5A /2 50 V

POW ER SEL EC T

POW ER IN PU T

AC 110V/ AC 23 0V 5 0/ 60 Hz

RISK OF ELECTRIC SHOCK

DO NOT OPEN

CAUTION

DV D FUNC TI ON

OUT PU T

AUD IO OUT PU T

GUI TAR FU NCT IO N

DV D FUNC TI ON

6

6

3

3

12

12

2

2

4

4

1

1

8

8

9

9

18

18

17

17

16

16

15

15

14

14

13

13

11

11

10

10

5

5

Summary of Contents for PCK-350 DR

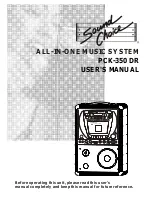
Page 1: ...VIDEO L R AUX INPUT AUX DVD TAPE P B CK A iPod n On O O f f O f f BALANCE iPod L R O B D L Y D I G I T L A IGIT A D D AL U IO P C GRA HI S N U I P T PCK 350 DR USER S MANUAL ALL IN ONE MUSIC SYSTEM N...

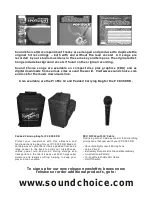
Page 2: ...0 DR Padded Carrying Bag for PCK 350 DR Protect your investment with this attractive and functional carrying bag for your PCK 350 DR Made of durable woven nylon fabric it has a padded front and a larg...

Page 3: ...Setup Specifications Specifications Troubleshooting Troubleshooting 17 17 18 18 23 23 26 26 27 27 5 5 Brief Introduction 14 Brief Introduction 14 USB Memory Card Operation 15 USB Memory Card Operatio...

Page 4: ...se harmful interference to radio or television reception which can be determined by turning the equipment off and on the user is encouraged to try to correct the interference by one or more of the fol...

Page 5: ...our home consult your product dealer or local power company 13 Power Sources product should be operated only from the type of power source indicated on the marking label If you are not sure of the typ...

Page 6: ...een dropped or damaged in any way F When the product exhibits a distinct change in performance this indicates a need for service 21 Damage Requiring Service Unplug this product from the wall outlet an...

Page 7: ...Customer Service 800 788 4487 or 704 583 1616 Ext 1182 or email us customercare soundchoice com Australia Sound Choice Distr Aust Pty Ltd Attn Service Dept 311 North East Road Hampstead Gardens SA 50...

Page 8: ...L R Audio Multiplex Pause Fast Forward Adjust Player Volume Output Next Chapter track Stop Please Note It is necessary to switch the PBC control to OFF in order to operate the remote control on DVD pl...

Page 9: ...HT channel 12 Numeric keys 0 9 15 CDG disc program 28 29 Play Pause 30 Stop 34 Previous 35 Next 43 Key control 45 Tray door 46 LED display window 47 Microphone jacks 48 Microphone volume control 50 Fu...

Page 10: ...deo output jack 4 2 channel output jacks 5 Coaxial output jack 6 S VIDEO output jack 7 Optical output jack 8 Composite video output 9 Composite audio output 10 Power cord connector 11 Power selector 1...

Page 11: ...fier Y R PB G PR B VIDEO SW FL FR SL SR CEN COA XIAL ML MR S VIDEO OPT ICAL VIDEO OUT PUT R L GUI TAR 1 GUI TAR 2 GUI TAR VOL BAS S MID TRE BLE MIC 1 MIC 2 SD MMC MINI SD FUS E 2 5 A 250V POW ER SEL E...

Page 12: ...n to OFF when finished using the machine Unplug the power cord if you will not be using the machine for a long time WARNING Switch power button to OFF when finished using the machine Unplug the power...

Page 13: ...ng please see PAGE 18 TV should be set in Y Pb Pr mode For player setting please see PAGE 18 Y R PB G PR B VIDEO SW FL FR SL SR CEN COAXIAL ML MR S VIDEO OPTICAL VIDEO OUTPUT R L GUITAR 1 GUITAR 2 GUI...

Page 14: ...s Th F S must be switched to status 50 50 Y R PB G PR B VIDEO SW FL FR SL SR CEN COAXIAL ML MR S VIDEO OPTICAL VIDEO OUTPUT R L GUITAR 1 GUITAR 2 GUITAR VOL BASS MID TREBLE MIC 1 MIC 2 SD MMC MINI SD...

Page 15: ...PB G PR B VIDEO SW FL FR SL SR CEN COAXIAL ML MR S VIDEO OPTICAL VIDEO OUTPUT R L GUITAR 1 GUITAR 2 GUITAR VOL BASS MID TREBLE MIC 1 MIC 2 SD MMC MINI SD DVD FUNCTION OUTPUT AUDIO OUTPUT GUITAR FU NC...

Page 16: ...r with the PCK 350 DR on OPTICAL jacks 5 1 channel digital amplifier 5 1 channel digital amplifier L L R R L L R R 5 1 channel digital amplifier 5 1 channel digital amplifier L L R R L L R R Y R PB G...

Page 17: ...onnecting audio with Then y PCK 350 DR iPod and PCK 350 DR PCK 350 DR power cord PCK 350 DR with power PCK 350 DR DV will up n power cord PCK 350 DR with power PCK 350 DR DV will up n DVD Disc Playbac...

Page 18: ...SB button in red on the remote Screen displays three options DVD DRIVE USB DRIVE SD CARD see picture 3 Depress up down arrow to select one of them DVD DRIVE is for disc auto play If no disc in the tra...

Page 19: ...e cover of the MP3 player iPod cradle If you wish to mount an iPod model four types of docks are provided to fit different iPod models Mini Nano Video30 Video60 Select a suitable dock and install it o...

Page 20: ...twice to exit programming In the program mode you can press the CLEAR button to cancel the prior programmed track Note The CD G VCD CD disc must be stopped to enter Program mode And make sure to press...

Page 21: ...480P 576P and 720P should be selected in the SETUP menu If your TV is not HDTV the image will not be displayed well when video type is set on 720P Note To recover the system if it fails Stop playing a...

Page 22: ...and the end of section to intercept The third press is to cancel Note The A and B points must be set in the same track It is inapplicable for CD G disc Press this button to set all tracks repeat one...

Page 23: ...ct scene of VCD disc While playing press RETURN button to go back to menu Press this button to enter into VCD disc menu And input numbers to select scene of VCD disc While playing press RETURN button...

Page 24: ...tch between different video angles on a DVD disc that has multi angle video The current angle will display on the screen This function will not work if the DVD discs don t have a multi angle video PLA...

Page 25: ...k press P BACK ON The P BACK light on the front will turn red and the green light on the recorder will also turn on Amplifier Volume Control Amplifier Volume Control 53 53 the PCK 350 DR the PCK 350 D...

Page 26: ...ayable disc class to avoid those discs not suitable to kids Password is required when changing the setup This function requires classification marks on the discs 2 Screen Protection Setup Set up if sc...

Page 27: ...not 3 enter Rear Front elay the rear and front 3 enter Rear Front elay the rear and front Audio Out put Setup Set up the audio output mode LT RT or STEREO mode only validates whe n main soundtrack ha...

Page 28: ...btitle Language Setup Select a suitable sub title language 3 Subtitle Language Setup Select a suitable sub title language 2 Audio Language Setup Select a suitable audio language 2 Audio Language Setup...

Page 29: ...DVD MPEG 4 AVI XVID VCD1 0 3 0 MP3 CD G CD JPEG WMA CD R RW DVD R R RW 120mm 80mm 120mm 80mm NTSC PAL AUTO NTSC PAL AUTO VIDEO S VIDE0 VGA SCART YUV RGB VIDEO S VIDE0 VGA SCART YUV RGB 20 20KHZ 20 20K...

Page 30: ...EO No VGA No VGA No SCART o No SCART o on RAW or PCM Please refer to page 24 on RAW or PCM Please refer to page 24 is is is ed 6 is ed 6 disc is scratched and deformed disc is scratched and deformed a...

Page 31: ...VD RW DVD R DVD RW CD G VCD SVCD CD CD DA CD R CD RW MP3 JPEG Kodak Picture CD PLAYER Karaoke Functions 2 Microphone Inputs Individual Microphone Volume Control Digital Echo Digital Key Control Direct...

Reviews: