7
Spectralizer
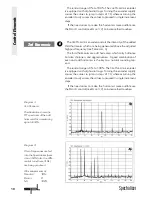
Flow Chart
Quick-Start
Generator
2nd Harmonic
Encoder
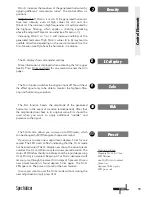
Density-
Encoder
Generator
3rd Harmonic
Encoder
Effect
Original
Solo-
Taste
Kick-
Encoder
Frequency-
Encoder
Highpass-
Filter
Mix-
Encoder
Input
Encoder
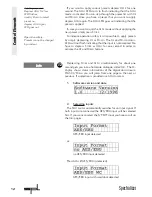
Set all controls to the starting positions:
I
NPUT
G
AIN
0; F
REQUENCY
1k; D
ENSITY
0; 2
ND
H
ARMONIC
0%;
3
RD
H
ARMONIC
0%; M
IX
0%.
1. Depress
A
CTIVE
. The status-LED illuminates.
2. Set
M
IX
to 50%. You will notice an increase in high
frequencies above 1 kHz (starting position F
REQUENCY
).
3. Set
D
ENSITY
to 1, to increase the audibility of the
harmonics in the next step.
4. Set
2
ND
H
ARMONIC
to 50% and 3
RD
H
ARMONIC
to 30%.
5.
If you are using full scale material for this initial test
drive the C
LIP
LEDs may illuminate. Reduce the I
NPUT
G
AIN
to give additional headroom for the new harmonics.
6.
To compare original and processed signal press A
CTIVE
.
The status LED goes out.
Use the S
OLO
button to monitor the added harmonics precisely.
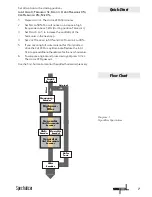
Diagram 1:
Signalflow Spectralizer


