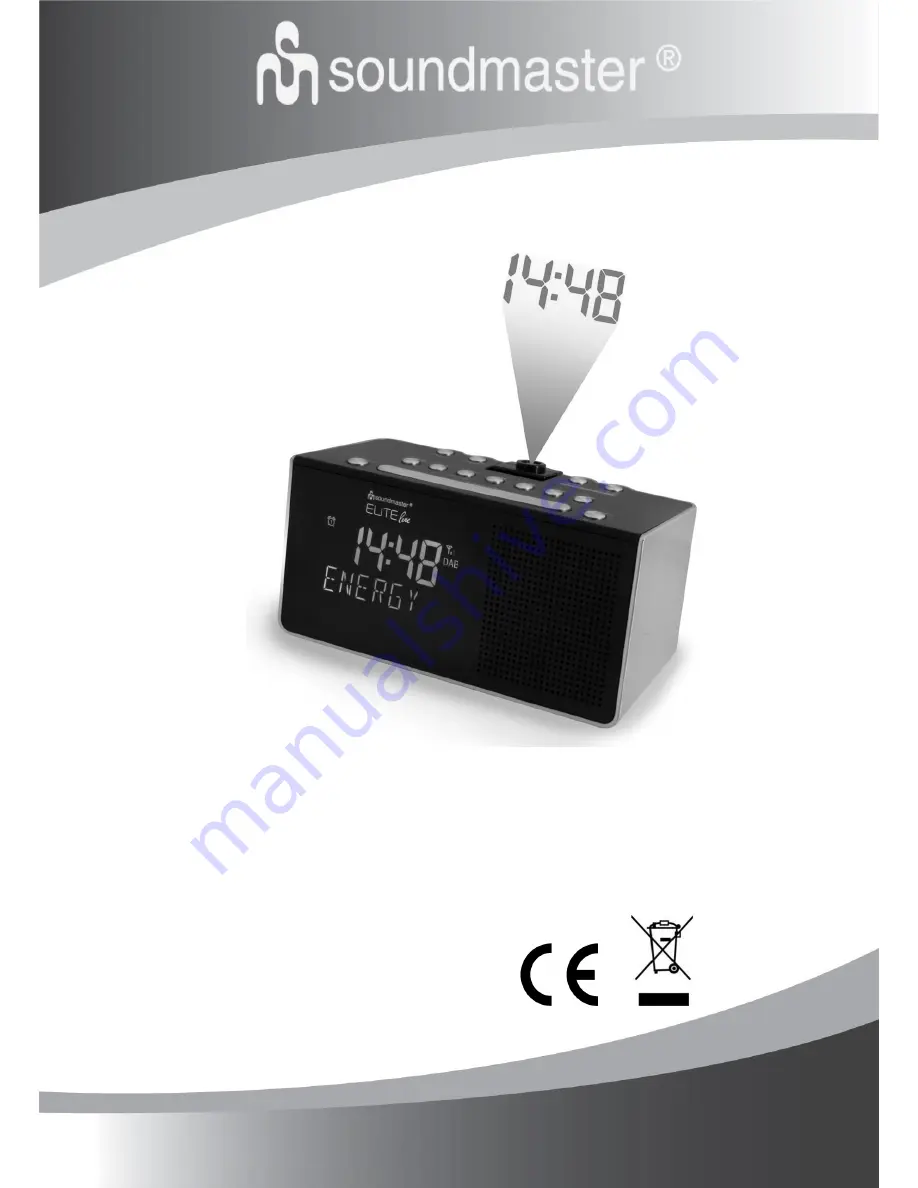
background image


DEUTSCH 

ITALANIO 

ENGLISH 

NORSK 

FRANÇAIS 

DANSK 

NEDERLANDS 


UR8200 

Hersteller 

Wörlein GmbH 


Tel.:  +49 9103/71670 

Gewerbestrasse 12   

Fax.: +49 9103/716712 

D 90556 Cadolzburg   

Email. info@woerlein.com 

GERMANY   


Web:   www.woerlein.com 

Summary of Contents for ELiTEline UR8200

Page 1: ...H ITALANIO ENGLISH NORSK FRANÇAIS DANSK NEDERLANDS UR8200 Hersteller Wörlein GmbH Tel 49 9103 71670 Gewerbestrasse 12 Fax 49 9103 716712 D 90556 Cadolzburg Email info woerlein com GERMANY Web www woerlein com ...

Page 2: ... and microwave units otherwise radio reception may be disturbed Do not open or repair the enclosure It is not safe to do so and will void your warranty Repairs only by authorized service customer center Only use mercury and cadmium free batteries Used batteries are hazardous waste and NOT to be disposed of with the household waste Return the batteries to your dealer or to collection points in your...

Page 3: ...NU button INFO button BACK button 10 BACKWARD button 11 FORWARD button 12 SNOOZE button SLEEP button 13 POWER button 14 VOLUME DOWN button 15 VOLUME UP button 16 Display 17 Speaker 18 Antenna 19 DC IN jack 20 USB jack for charging external devices 21 FOCUS dial Display 1 Alarm 1 or Alarm 2 icon 2 Snooze mode 3 AM PM time 12 hour clock 4 Signal strength 5 DAB mode 6 Time 7 FM mode 8 Display message...

Page 4: ... 2 Press the or button 10 or 11 until you see SYSTEM on the display and then 3 press the SELECT button 6 Press the or button 10 or 11 until you see TIME on the display and then 4 press the SELECT button 6 Press the or button 10 or 11 until you see SET TIME on the display and 5 then press the SELECT button 6 Press the or button 10 or 11 to set hour time and then press the 6 SELECT button 6 to confi...

Page 5: ...tion 1 Press and hold the PRESET button 2 until EMPTY 1 or the next available preset 2 number shows on the display Press the or button 10 or 11 to select a preset number 3 Press the SELECT button 6 to confirm 4 The DAB station is stored with the selected preset number 5 Repeat steps 1 4 to store more preset stations 6 To tune to a preset station press the PRESET button 2 once then press the or 7 b...

Page 6: ... 2 DRC Dynamic Range Control DRC adds or removes a degree of compensation for the differences in the dynamic range between radio stations 1 Press the SELECT button 6 to confirm the selection DRC 2 Press the or button 10 or 11 to cycle through the below options DRC OFF No compensation applied DRC LOW Medium compensation applied DRC HIGH Maximum compensation applied 3 Press the SELECT button 6 to co...

Page 7: ...station 2 Press and hold the PRESET button 2 until EMPTY 1 or the next available preset number shows on the display 3 Press the or button 10 or 11 to select a preset number 4 Press the SELECT button 6 to confirm The FM station is stored with the selected preset number Repeat steps 1 4 to store more preset stations 5 To tune to a preset station press the PRESET button 2 once then press the or butto...

Page 8: ...the SELECT button 6 to confirm the selection The duration defines the time before the radio returns to standby mode if the alarm is not deactivated Duration options 15 30 45 60 90 and 120 minutes 5 Press the or button 10 or 11 to cycle through the source options and then press the SELECT button 6 to confirm the selection The source defines the sound source of the alarm Source options DAB FM and Bu...

Page 9: ...esponding alarm icon flashes during the snooze period The radio will return to standby mode during the snooze period The alarm will sound again when the snooze period is over To cancel the snooze period and the alarm press the POWER button 13 Sleep This sleep function defines the duration of time before the radio switches itself off automatically 1 When the radio is switched on press the SLEEP but...

Page 10: ... the time and date information 1 Press the SELECT button 6 to confirm the selection UPDATE 2 Press the or button 10 or 11 to cycle through the below options ANY Update the time and date from any available signals DAB Update the time and date from DAB signals FM Update the time and date from FM signals NONE Do not update the time and date 3 Press the SELECT button 6 to confirm the selected option 1...

Page 11: ...backlight is switched on 1 Press the SELECT button 6 to confirm the selection ON LEVEL 2 Press the or button 10 or 11 to cycle through the below brightness levels LOW MEDIUM HIGH 3 Press the SELECT button 6 to confirm the selected option Dim level This setting defines the brightness level when the backlight is dimmed 1 Press the SELECT button 6 to confirm the selection Dim level 2 Press the or but...

Page 12: ...d to the wall outlet The device is now reset and you will need to set up the unit time and alarm again Care and maintenance Clean the radio with a soft damp cloth and let all parts dry completely after cleaning Do not use any aggressive cleaners brushes with nylon bristles sharp or metallic cleaning utensils knives hard scrapers and the like They could damage the surfaces of the radio Do not immer...

Reviews: