background image

VOICE LIST

No.

Display

Description

No.

Display

Description

No.

Display

Description

136

Sn-Sid 15

FXS Snare Rim 2

181

Tom-Mi 20

Latin Mid Tom 3

226

Hat-Cl 12

Rock Close 4

137

Tom-Hi 1

Q High Tom 1

182

Tom-Mi 21

Wood Mid Tom 2

227

Hat-Cl 13

R&B Close 1

138

Tom-Hi 2

Q High Tom 2

183

Tom-Mi 22

Mute Mid Tom

228

Hat-Cl 14

Standard Close 3  

139

Tom-Hi 3

Q High Tom 3

184

Tom-Mi 23

Power Mid Tom 2

229

Hat-Cl 15

FXS Close 1

140

Tom-Hi 4

Q High Tom 4

185

Tom-Mi 24

Fusion Mid Tom

230

Hat-Cl 16

Standard Close 4 

141

Tom-Hi 5

Standard High Tom 

186

Tom-Mi 25

Q Mid Tom 3

231

Hat-Cl 17

Jazz Close 2

142

Tom-Hi 6

Rock High Tom 1

187

Tom-Lo 1

Q Low Tom 1

232

Hat-Cl 18

FXS Close 2

143

Tom-Hi 7

Jazz High Tom 1

188

Tom-Lo 2

Q Low Tom 2

233

Hat-Cl 19

Electronic Close 3

144

Tom-Hi 8

Rock High Tom 2

189

Tom-Lo 3

Q Low Tom 3

234

Hat-Cl 20

Voc Close

145

Tom-Hi 9

Funk High Tom 

190

Tom-Lo 4

Standard Low Tom 1

235

Hat-Cl 21

Rock Close 5

146 Tom-Hi 10 Electronic High Tom 1 191

Tom-Lo 5

Rock Low Tom 1

236

Hat-Cl 22

Noise Close

147 Tom-Hi 11

Latin High Tom 1

192

Tom-Lo 6

FXS Low Tom

237

Hat-Cl 23

Standard Close 5 

148 Tom-Hi 12

R&B High Tom

193

Tom-Lo 7

Jazz Low Tom 1

238

Hat-Cl 24

Standard Close 6

149 Tom-Hi 13

FXS High Tom 1

194

Tom-Lo 8

Rock Low Tom 2

239

Hat-Cl 25

Rock Close 6

150 Tom-Hi 14

Rock High Tom 3

195

Tom-Lo 9

Funk Low Tom

240

Hat-Op 1

Standard Open 1

151 Tom-Hi 15

Jazz High Tom 2

196

Tom-Lo 10

Jazz Low Tom 2

241

Hat-Op 2

Jazz Open 1

152 Tom-Hi 16

Old High Tom

197

Tom-Lo 11

Latin Low Tom 2

242

Hat-Op 3

Voc Open

153 Tom-Hi 17

Rock High Tom 4

198

Tom-Lo 12

Jazz Low Tom 3

243

Hat-Op 4

Rock Open 1

154 Tom-Hi 18

Wood High Tom 1

199

Tom-Lo 13

Power Low Tom 1

244

Hat-Op 5

Electronic Open 1

155 Tom-Hi 19 Electronic High Tom 2 200

Tom-Lo 14

Standard Low Tom 2

245

Hat-Op 6

Electronic Open 2

156 Tom-Hi 20

Wood High Tom 2

201

Tom-Lo 15

Room Low Tom

246

Hat-Op 7

Funk Open 1

157 Tom-Hi 21

FXS High Tom 2

202

Tom-Lo 16

Wood Low Tom 1

247

Hat-Op 8

FXS Open 1

158 Tom-Hi 22

Power High Tom

203

Tom-Lo 17 Electronic Low Tom 1 248

Hat-Op 9

Rock Open 2

159 Tom-Hi 23

Step High Tom

204

Tom-Lo 18

Noise Low Tom 1

249 Hat-Op 10

Funk Open 2

160 Tom-Hi 24

Room High Tom

205

Tom-Lo 19 Electronic Low Tom 2 250 Hat-Op 11

Electronic Open 3

161 Tom-Hi 25

Bk High Tom

206

Tom-Lo 20

R&B Low Tom 1

251 Hat-Op 12

FXS Open 2

162

Tom-Mi 1

Q Mid Tom 1

207

Tom-Lo 21

Noise Low Tom 2

252 Hat-Op 13

Standard Open 2

163

Tom-Mi 2

Q Mid Tom 2

208

Tom-Lo 22

Power Low Tom 2

253 Hat-Op 14

FXS Open 3

164

Tom-Mi 3

Standard Mid Tom 1

209

Tom-Lo 23

Hard Low Tom 1

254 Hat-Op 15

Electronic Open 4

165

Tom-Mi 4

Funk Mid Tom

210

Tom-Lo 24

Wood Low Tom 2

255 Hat-Op 16

Wood Open

166

Tom-Mi 5

Electronic Mid Tom 1

211

Tom-Lo 25

Mute Low Tom 

256 Hat-Op 17

Half Open

167

Tom-Mi 6

Wood Mid Tom 1

212

Tom-Lo 26

Rock Low Tom 3

257 Hat-Op 18

R&B Open

168

Tom-Mi 7

Rock Mid Tom 1

213

Tom-Lo 27

Power Low Tom 3

258 Hat-Op 19

Jazz Open 2

169

Tom-Mi 8

Power Mid Tom 1

214

Tom-Lo 28

R&B Low Tom 2

259

Hat-Ped 1

Standard Pedal 1

170

Tom-Mi 9

Latin Mid Tom 1

215

Hat-Cl 1

Rock Close 1

260

Hat-Ped 2

Power Pedal

171 Tom-Mi 10

Rock Mid Tom 2

216

Hat-Cl 2

Jazz Close 1

261

Hat-Ped 3

Rock Pedal 1

172 Tom-Mi 11

Latin Mid Tom 2

217

Hat-Cl 3

Standard Close 1  

262

Hat-Ped 4

Electronic Pedal

173 Tom-Mi 12

Standard Mid Tom 2

218

Hat-Cl 4

Funk Close 1

263

Hat-Ped 5

Rock Pedal 2

174 Tom-Mi 13

Rock Mid Tom 3

219

Hat-Cl 5

Rock Close 2

264

Hat-Ped 6

Funk Pedal 1

175 Tom-Mi 14

Room Mid Tom

220

Hat-Cl 6

Funk Close 2

265

Hat-Ped 7

Jazz Pedal 1

176 Tom-Mi 15

R&B Mid Tom

221

Hat-Cl 7

Rock Close 3

266

Crash 1

Standard Crash 1

177 Tom-Mi 16

Electronic Mid Tom 2

222

Hat-Cl 8

Electronic Close 1

267

Crash 2

Standard Crash 2

178 Tom-Mi 17

Jazz Mid Tom 1

223

Hat-Cl 9

Electronic Close 2

268

Crash 3

FXS Crash 1

179 Tom-Mi 18

HipHop Mid Tom 1

224

Hat-Cl 10

Standard Close 2  

269

Crash 4

HipHop Crash

180 Tom-Mi 19

HipHop Mid Tom 2

225

Hat-Cl 11

Funk Close 3

270

Crash 5

DJ Crash

30

Summary of Contents for Realkit-Pro

Page 1: ...WWW SOUNDSATIONMUSIC COM user manual Professional Electronic Drumkit ...

Page 2: ...gned to provide reasonable protection against harmful interference in a resi dential installation This equipment generates uses and can radiate radio frequency energy and if not installed and used in accordance with the instructions may cause harmful interference to radio communications However there is no guarantee that interference will not occur in a particular installation If this equipment do...

Page 3: ... AC adaptor into the same AC outlet as appliances with high power consumption such as electric heaters or ovens SERVICE AND MODIFICATION This product should be serviced by qualified service personnel when w the power supply cord or the plug of the adaptor has been damaged w liquid has been spattered into the unit or it has been exposed to rain w the instrument does not appear to operate normally o...

Page 4: ... E d i t t h e p a r a m e t e r 1 5 Edit another parameter o r p a r t 15 Co m p le t e t h e e d it 1 6 S T R I K I N G C O U N T 1 7 SETUP 18 Accompaniment Volume for Demo 18 Percussion Volume for Demo 18 M a s t e r T u n e 1 9 C o u n t S e s i t i v i t y 1 9 E q u a l i z e r 1 9 Advanced Parameter Edit 20 Sesitivity 20 Dynamic Range 21 Trigger Corve 21 Cross Talk 21 Hi Ha t Pe d al s et ti...

Page 5: ...e in installation The part number is printed in part packing box Power adaptor and connection cables are not shown in the drawing SOUND MODULE CRASH KICK SNARE TOM 2 TOM 1 HI HAT TOM 3 RIDE KICK PEDAL HI HAT CONTROLLER B 8 Snare HD 008 A 12 Cymbal edg B 8 Kick B HH Ctrl P 6C Kick pedal A 8 Tom A 8 Tom A 8 Tom A 8 Hi Hat A 12 Cymbal KICK PEDAL IS OPTIONA L ACCESORY RACK SYSTEM RACKA 1 ...

Page 6: ...ng nuts Pad clamp Crash and Ride rod Leg Hi Hat rod Rack System RACKA RACK SYSTEM You can find all of these components in RACK SYSTEM RACKA package Note Please note that the Hi Hat control pedal is also packaged in this box Folded rack in package 2 ...

Page 7: ...the pad installation L Rod to proper position and then tighten the wing nuts 5 Loosen the wing nuts in the clamp Insert the cymbal installation rod to proper location and then tighten the wing nuts 1 Open the arm adjust the position then tighten the wing nuts 2 Install the left and right leg adjust the height to touch floor firmly then tighten the wing nuts 4 Rotate the pad installation L Rod to p...

Page 8: ...ut Hi Hat Installation Crash and Ride Installation Snare Installation 1 Insert the tom into the tom installation L Rod then tighten the wing nut Note All toms use the same pad 2 Adjust the angle of the L Rod then tighten the wing nut Tom Installation 1 Align holes in support and stand then insert bolts and fasten with attached key 2 Insert tongue of the kick stand into slot of the pedal Tighten th...

Page 9: ...d in both Song and Record operations Please refer to relevant chap ters for detailed information 8 COUNT Button Enter the Count mode to exam how fast you could strike the pad 9 DATA Knob Rotate the knob to change data for all operations 10 ENTER Button Confirm your choice or operating 11 EXIT Button Exit to the previous LCD window or return to the Kit Selection screen 12 SETUP Button Enter the Set...

Page 10: ...e room by plugging a set of headphones into the sockets 5 Headphone Volume Knob Rotate it to adjust the headphone volume 6 Line In Jack Line In stereo audio input jacks will mix the supplied signal with the internal drum sound It can be used to hook up items such as CD players MP3 player etc 7 Line Out Jack There is no built in speaker in the drum Line Out stereo audio output supplies the drum out...

Page 11: ...ads have striking force sensitivity feature Strike the pad harder to make higher volume and strike the pad softer to make lower volume Playing Tom Drum Strike the central position head of the pad to make head sound Playing Hi Hat 1 Strike the Hi Hat pad without pressing the Hi Hat control pedal to make open Hi Hat sound 2 Strike the Hi Hat pad with fully pressing the Hi Hat control pedal to make c...

Page 12: ... The factory setting for all User Kits is Uni versal Kit You could call them even if you don t create your own user kit Of course you could replace it by editing Please see EDIT Chapter in this manual for details Press the KIT button again to back to the pre set kit DRUM KIT There are 50 preset drum kits and 30 User Kits The kit is combination of different instrument voice assigned to each pad whi...

Page 13: ...nce to engage the demo song mode with the indicator lighting The dis play will show All Demo Press the button immediately all demo songs will play one by one If you don t select song after 3 second the first demo song number and name will appear on the display The tempo and time signature of the demo song will appear on the second row of the display also The title of the song number section in the...

Page 14: ... stop the playing the indicator turns off Note If the interval between the first and sec ond pressing of the SONG button is longer than 2 seconds it ll turn to Kit mode instead of Song mode Note If you didn t record any song the display will show No u song After 3 second the mode will change to Kit select automatically SONG User Song Number Song Name Tempo Time Signature All U Song User Song No U ...

Page 15: ...ol and current volume is blinking Rotate the DATA knob to change the volume ranged 0 127 The default setting is 96 Press the ENTER button to confirm you setting and turn to the next parameter of the metronome 3 Metronome Sound Setting After press the ENTER button to finish the volume setting the next parameter to setup is metronome sound The display will show MetroSound and blinking current sound ...

Page 16: ...o value will blink in the second row of the display Rotate the DATA knob to change the tempo ranged 40 240 Press the ENTER button to confirm you setting After about 10 seconds this operation will exit automatically Or press the EXIT button to exit the tempo setting immediately Tempo 12 ...

Page 17: ... it possible to change the currently selected drum kit setting In this way you may create your own drum kit and save it as UserKit DRUM KIT EDIT The edit procedure is the same for every parameter Assigning voice to the part is one of the most important function After you are familiar with the operation of voice assignment it ll be easy to edit other parameters The following section is the edit pro...

Page 18: ...for alternative parts will appear Please refer to table below When a part is selected the icon of this part blink EDIT icon will stop blink In this example the part selected is Rim1 of Snare When select part the part name will blink You must press the ENTER button to confirm your part selection Voice PART DESCRIPTION ICON HH Pedal Hi Hat Pedal HiHat Open Hi Hat Open HiHatClose Hi Hat Close Crash C...

Page 19: ...ER button to finish cur rent editing it ll turn back to the parameter se lection stage with the next parameter blinking Press the ENTER button to edit this parameter or select other parameter by rotating the DATA knob Then edit parameters in the same way explained in the Step 4 Step 5 above Param eters can be edited are listed in the table in page 11 DRUM KIT EDIT SnareRim01 Volume 4 Select parame...

Page 20: ...lways asks Replace it Press the ENTER button to replace existing one with your new editing Press the EXIT button then change another number If you really don t want to cover any existing User Kit press the EXIT button in number selection stage and it will cover the current kit edited referring to the next sec tion in this page then turn to the Kit Select mode The User Kit setting is nonvolatile ev...

Page 21: ...on as you strike any pad Remaining time in sencond will be dis played in the right side and the current counting in the left side of the scren When the time is over You ll hear alarm sound for about one second The counting will stop Then you can check the results Press the ENTER button to start another examination Or press the EXIT button to exit this function Tip Sensitivity of the sriking for th...

Page 22: ... Accomp Vol Rotate the DATE knob to change the volume ranged 0 24 The default setting is 11 Press the ENTER button to confirm your set ting and turn to the next parameter for editing Press the EXIT button to exit current edit and turn back to the parameter selection 2 Percussion Volume for Demo When play demo song you may adjust per cussion volume Adjust this volume with pa rameter D Drum Vol Rota...

Page 23: ...al performance Press the ENTER button to confirm your set ting and turn to the next parameter for editing Press the EXIT button to exit current edit and turn back to the parameter selection Count Sens 3 Master Tune This parameter affects sound pitch globally Rotate the DATE knob to change the mas ter tuning ranged 0 to 50 The default Set ting is 0 which refers to 440 Hz at A1 note Press the ENTER ...

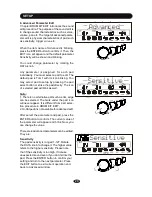
Page 24: ...r strike the pad directly The icon of selected pad will blink as well Note 1 There is no alternative part such as rim edge can be selected The mark under the pad icon will never appear It is different from part selec tion procedure in DRUM KIT EDIT 2 Hi Hat pedal is not available for advanced edit After select the parameter and pad press the ENTER button to confirm The current value of the paramet...

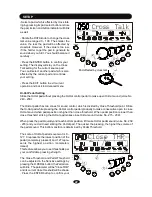
Page 25: ...e corves you may select are Linear Exp1 Exp2 Log1 Log2 and Spline Press the ENTER button to confirm your setting Press the EXIT button to exit current operation and back to Advanced menu The default curve is Linear Dynamic Trigger Cross Talk When strike one pad other pad s will sound occasionally It is called cross talk It is a result of pads detecting the vibrations in the rack as you hit other p...

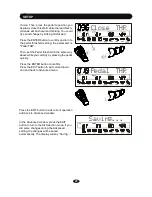
Page 26: ...nd control which is divided by Close Threshold point Strike the Hi Hat pad while pressing the Hi Hat control pedal gradually to make consecutive open to close Hi Hat sound when pedal position is higher than close threshold When pedal position is lower than close threshold striking the Hi Hat pad makes close Hi Hat sound voice No 215 239 When press the pedal quickly and reach bottom position it ll ...

Page 27: ...Then press the pedal to position you desire as close threshold while the real thresh old value will be shown and blinking You could try sound change by striking Hi Hat pad Press the ENTER button to confirm and turn to the pedal threshold setting the parameter is Pedal THR Then set the Pedal threshold in the same way above while you could try by pressing the pedal quickly Press the ENTER button to ...

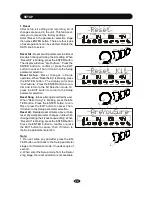
Page 28: ...s the ENTER button to con firm and return to the Kit Selection mode Or press the EXIT button to return to the Setup parameter selection Reset Song Erase all songs recorded by user When Reset Song is blinking press the EN TER button Press the ENTER button to con firm or press the EXIT button to cancel Then it ll return to the Setup parameter selection Reset All Besides reset all items above it also...

Page 29: ...ount will appear on the display Record Recording Press the button again to stop the recording The display will go to the save stage 2 Play back your recording After stop the recording press the button to playback your recording Press button again to stop the playback After you save the recording as User Song In the Song mode you can also select user song to playback Please refer to the SONG chap t...

Page 30: ...splay Press the ENTER button to erase this song or press the EXIT button to give up erasing Then it ll return to the User Song mode If the song name was already used for the previous recording it ll ask you do you want to replace it with the new recording Press the ENTER button to replace it or press the EXIT button to select another song number Replace it User Song Erase it 2 1 3 26 ...

Page 31: ...ce This is a world wide standard communication interface that enables electronic musical instruments and computers to communicate with each other so that instructions and other data can pass between them This exchange of information makes it possible to create a system of MIDI instruments and devices that offers far greater versa tility and control than is available with isolated instruments Wheth...

Page 32: ...18 15 Chinese 42 PowerJazz U19 UserKit19 16 Latin 43 POW U20 UserKit20 17 TexBlues 44 Brushes U21 UserKit21 18 JoJo 45 Asian U22 UserKit22 19 Jammer 46 Orchestra U23 UserKit23 20 BigKit 47 MillionBux U24 UserKit24 21 PixLily 48 BigAmb U25 UserKit25 22 LayItDown 49 Roller U26 UserKit26 23 Huge 50 MadDrum U27 UserKit27 24 Match U01 UserKit01 U28 UserKit28 25 ElecDrum U02 UserKit02 U29 UserKit29 26 N...

Page 33: ... 22 Hiphop Kick 1 67 Snare 7 Q Snare 3 112 Snare 52 Electronic Snare 5 23 Kick 23 Hiphop Kick 2 68 Snare 8 Rock Snare 1 113 Snare 53 Funk Snare 3 24 Kick 24 Hiphop Kick 3 69 Snare 9 Electronic Snare 1 114 Snare 54 Rock Snare 7 25 Kick 25 Hiphop Kick 4 70 Snare 10 Rock Snare 2 115 Snare 55 Step Snare 26 Kick 26 Hiphop Kick 5 71 Snare 11 Jazz Snare 1 116 Snare 56 Rock Snare 8 27 Kick 27 Noise Kick 7...

Page 34: ...Op 7 Funk Open 1 157 Tom Hi 21 FXS High Tom 2 202 Tom Lo 16 Wood Low Tom 1 247 Hat Op 8 FXS Open 1 158 Tom Hi 22 Power High Tom 203 Tom Lo 17 Electronic Low Tom 1 248 Hat Op 9 Rock Open 2 159 Tom Hi 23 Step High Tom 204 Tom Lo 18 Noise Low Tom 1 249 Hat Op 10 Funk Open 2 160 Tom Hi 24 Room High Tom 205 Tom Lo 19 Electronic Low Tom 2 250 Hat Op 11 Electronic Open 3 161 Tom Hi 25 Bk High Tom 206 Tom...

Page 35: ...go Hi 381 Fxs 11 Voice Effect 11 292 Ride 5 Crash Ride 337 Perc 18 Bongo Lo 382 Fxs 12 Voice Effect 12 293 Ride 6 Rock Ride 2 338 Perc 19 Conga Mu 383 Fxs 13 Voice Effect 13 294 Ride 7 Electronic Ride 1 339 Perc 20 Conga Op 384 Fxs 14 Voice Effect 14 295 Ride 8 FXS Ride 1 340 Perc 21 Conga Lo 385 Fxs 15 Voice Effect 15 296 Ride 9 Electronic Ride 2 341 Perc 22 Timbale Hi 386 Fxs 16 Voice Effect 16 ...

Page 36: ...ion sound 371 418 Effect sound VOICE LIST No Display Description No Display Description No Display Description 406 Fxs 36 Voice Effect 36 411 Fxs 41 Voice Effect 41 416 Fxs 46 Voice Effect 46 407 Fxs 37 Voice Effect 37 412 Fxs 42 Voice Effect 42 417 Fxs 47 Voice Effect 47 408 Fxs 38 Voice Effect 38 413 Fxs 43 Voice Effect 43 418 Fxs 48 Voice Effect 48 409 Fxs 39 Voice Effect 39 414 Fxs 44 Voice Ef...

Page 37: ...d Mute mode Sound Effects Reverb effect with professional DSP processor Equalizer 8 preset types Metronome Tempo Time signature Sound Count Exercise 1 3 minutes Setup Menu Accomp Drum volume for Demo Master tuning count sensitivity Equalizer Advanced Sensitivity Dynamic range Velocity Curve Cross talk Hi Hat Pedal Reset Pad Edit Voice Volume Pan Pitch Reverb level Record 10 Songs Display Custom ba...

Page 38: ...tionmusic com WARNING 1 Read these instructions Keep these instructions Heed all warnings Follow all instructions 2 Payattentionto inserttheconnectorintothedevicecompletelytoavoidcontactNG nosoundorstaccato 3 notexceedadequatelisteningtime Foradults headphonelisteningtimeshouldbelessthan2 3hoursper day continuouslisteningtime shouldbe less than halfan hourand the volumeshouldbe within40 60dB small...

Page 39: ...e WEEE Directive 2202 96 EC and your national law Thisproductshouldbehandedoverto adesignatedcollectionpoint e g onanauthorizedone for onebasis when you buya new similar productor to an authorized collectionsite for recyclingwaste electricaland elec tronic equipment WEEE Improperhandlingofthistypeofwastecouldhaveapossiblenegativeimpactontheenvironmentandhuman healthduetopotentiallyhazardoussubstan...

Page 40: ...Rev 2 04 A Professional Electronic Drumkit This product is imported in EU by PRENEXPORT SPA Via Enzo Ferrari 10 62017 Porto Recanati Italy www soundsationmusic com ...

Reviews: