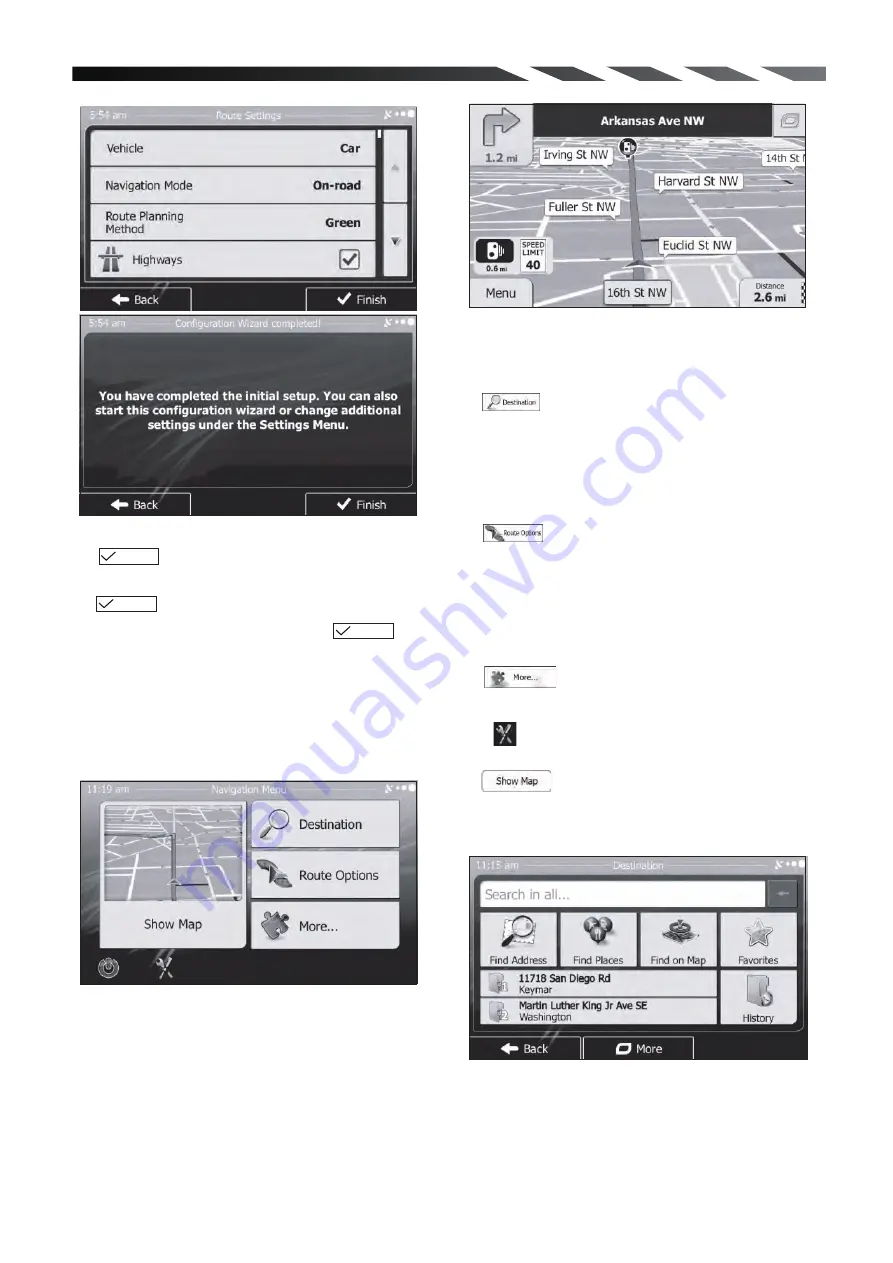
2. Navigation menu
Set your preferred time format and units.
Tap to confirm your preferences.
Next
Set your preferred route planning options.
Tap to confirm your preferences.
Next
The initial setup is now complete. Tap The
application starts.
Finish
Startup screen: the Navigation menu
After the initial setup, and whenever the software
is started, the Navigation menu appears. You have
the following options:
Tap to select your destination by entering
an address or selecting a place of interest, a
location on the map or one of your Favorite
destinations. You can also look up your recent
destinations from the Smart History or by entering
its coordinate.
Tap to display the route parameters. You
can view the route in its full length on the map.
You can also perform route-related actions such
as editing or canceling your route, setting a start
point for the route, picking route alternatives,
avoiding parts of the route, simulating navigation
or adding the destination to your Favorites.
Tap to simulate demo routes or to run
some additional applications.
Tap to customize the way the navigation
software works.
Tap to start navigating on the map.
3. Destination menu
22


