ST2826 Operation manual
Ver1.0
◇
31
6)
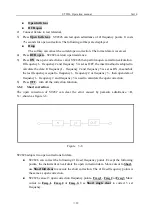
Press
Open single clear
to open correct the set frequency.
7)
Move cursor to
Open
.
8)
Press
ON
.
9)
Move cursor to
Freq 1
,
Freq 2
or
Freq 3.
10)
Use fixture to short.
11)
Press
Short single clear
to short correct the set frequency.
12)
Move cursor to
Short
.
13)
Press
ON
.
14)
Prepare standard component.
15)
Move cursor to
Func.
16)
Set the parameter of standard component.
17)
Move cursor to
Ref A
.
18)
Use numeric key and unit key to input reference value of primary parameter of standard
component.
19)
Move cursor to
(
Ref
)
B
.
20)
Use numeric key and unit key to input reference value of secondary parameter of
standard component.
21)
Move cursor to
Freq 1
,
Freq 2
or
Freq 3
.
22)
Connect standard component to fixture.
23)
Press
Load correction
,
the instrument executes a correction. The actual test result of
component is displayed on
Meas A
and
(
Meas
)
B.
24)
Move cursor to
Load.
25)
Press
ON
.
3.5.4
Load correction test function
Operational step of load correction test
Refer to 3.1.1
3.5.5
Cable selection
The selectable cable is 0 m.
3.5.6
Single/multi correction selection
Refer tp the operation of scanning interface.
3.5.7
File management
Refer to 4.2 <File management>.
3.5.8
Auxdiary tool
No.
3.6
<Limit list setting> page
Press
[LCRZ]
,then
More 1/3
,
and
Limit setting
,
to enter
<Limit list setting>
page.
Summary of Contents for ST2826
Page 2: ......
Page 10: ......
Page 51: ...ST2826 Operation manual Ver1 0 41 Figure 3 15 ...
Page 61: ...ST2826 Operation manual Ver1 0 51 ...
Page 144: ...ST2826 Operation manual Ver1 0 134 Figure 9 8 the input circuit for control signal ...


