South Bend Tools
For Machines Mfd. Since 11/20
Model SB1099
-15-
P R E P A R A T I O N
Assembly
The machine must be fully assembled before it
can be operated. Before beginning the assembly
process, refer to Needed for Setup and gather
all listed items. To ensure the assembly process
goes smoothly, first clean any parts that are
covered or coated in heavy-duty rust preventative
(if applicable).
To assemble dust collector:
1.
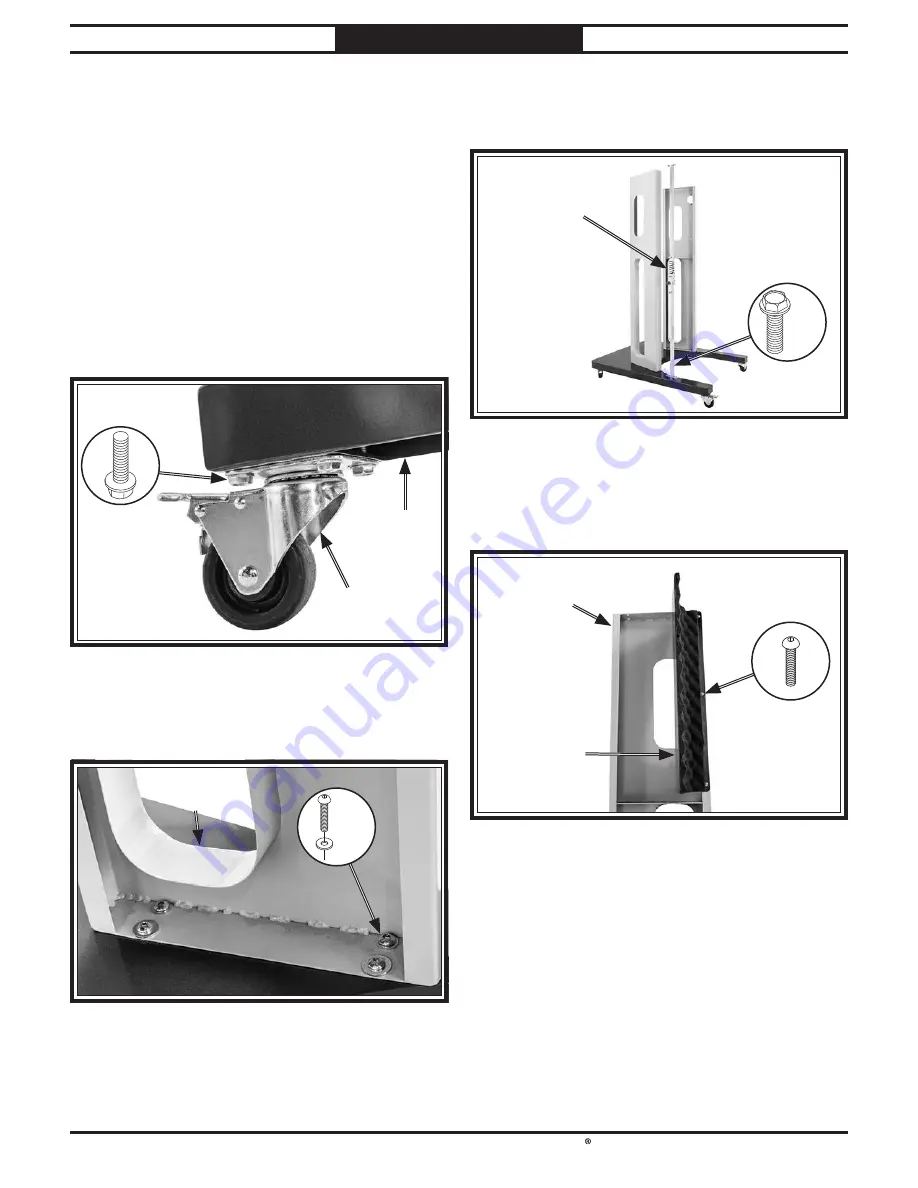
Attach (4) 2
1
⁄
2
" locking swivel casters to
base with (16)
5
⁄
16
"-18 x
1
⁄
2
" flange bolts (see
Figure 6). Lock casters for assembly.
2.
Attach (2) side panels to base with (8)
5
⁄
16
"-
18 x
1
⁄
2
"
button head cap screws and
5
⁄
16
" flat
washers (see Figure 7).
Figure
Figure 6. Locking swivel caster attached to base.
. Locking swivel caster attached to base.
x16
x16
Figure
Figure 7. Side panels attached to base.
. Side panels attached to base.
x8
x8
Locking
Locking
Swivel Caster
Swivel Caster
Base
Base
Side Panel
Side Panel
(1 of 2)
(1 of 2)
3.
Attach
(2) lock handle guides to base and
finger-tighten with (4)
5
⁄
16
"-18 x
1
⁄
2
" flange
bolts (see Figure 8).
4.
Attach (2) sound dampening panels to side
panels with (6)
1
⁄
4
"-20 x
1
⁄
2
" button head cap
screws (see Figure 9).
Figure 8. Lock handle guide with stop plate attached
Lock handle guide with stop plate attached
to base.
to base.
Figure 9. Sound dampening panel attached to side
Sound dampening panel attached to side
panel.
panel.
x4
x4
x6
x6
Lock Handle
Lock Handle
Guide w/Stop
Guide w/Stop
Plate (1 of 2)
Plate (1 of 2)
Side Panel
Side Panel
(1 of 2)
(1 of 2)
Sound
Sound
Dampening
Dampening
Panel
Panel
(1 of 2)
(1 of 2)


