South Bend Tools
For Machines Mfd. Since 12/21
Model SB1102
-15-
P R E P A R A T I O N
4.
Apply
1
⁄
16
" double sided tape to bottom
perimeter of each dust port, then attach to
dust hood as shown in Figure 10.
5.
Secure dust ports to dust hood with
(8) #8 x
1
⁄
2
" tap screws and (8) #8 flat
washers.
3.
Attach handwheel to spindle and tighten
pre-installed set screw, then attach
handwheel handle (see Figure 9).
Dust Collection
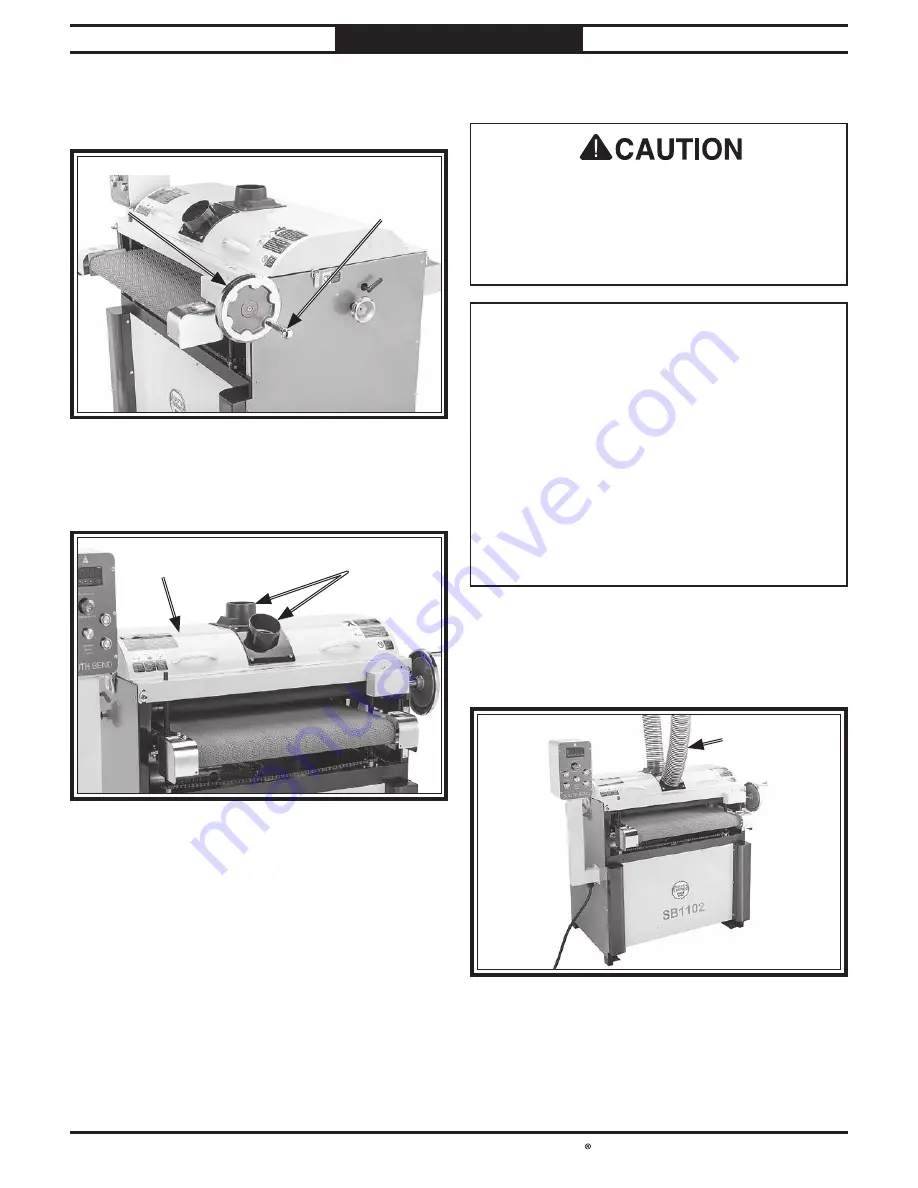
1.
Fit (2) 4" dust hoses over dust ports as
shown in Figure 11 and secure in place with
(2) hose clamps.
Minimum CFM at each Dust Port: 400 CFM
Do not confuse this CFM recommendation
with the rating of the dust collector. To
determine the CFM at the dust port, you
must consider these variables: (1) CFM
rating of the dust collector, (2) hose type
and length between the dust collector and
the machine, (3) number of branches or
wyes, and (4) amount of other open lines
throughout the system. Explaining how
to calculate these variables is beyond the
scope of this manual. Consult an expert or
purchase a good dust collection "how-to"
book.
This machine creates a lot of wood chips/
dust during operation. Breathing airborne dust
on a regular basis can result in permanent
respiratory illness. Reduce your risk by
wearing a respirator and capturing the dust
with a dust-collection system.
2.
Tug hoses to make sure they do not come
off. A tight fit is necessary for proper
performance.
To connect machine to dust collect system:
Figure
Figure 10. Dust ports attached to dust hood.
. Dust ports attached to dust hood.
4" Dust Ports
4" Dust Ports
Dust hood
Dust hood
Figure
Figure 11. Dust hoses attached.
. Dust hoses attached.
4" Dust Hose
4" Dust Hose
Figure 9. Handwheel and handle attached.
Figure 9. Handwheel and handle attached.
Handwheel
Handwheel
Handle
Handle
Handwheel
Handwheel

