7
interior of the karman with large sandpaper so that the resin clings, scotcher the outside of the
karman right to prevent that the resin does not run out, choucrouter and to let dry the fuselage
laid down on the right blank. To make in the same way with the karman left
.
5.6 Fixing of the canopy
Each one with its practices for fixing of canopy, if not a good method and joining with epoxy of 2
small piano wires of 2mm X 80mm to front and the back. To sand the canopy for joining well and
to fold the part to be stuck of the CAPE as a guy zag for a better joining. The exceeding CAPE of
2-3mm are wedged then under the edge of the fuselage while making slide the canopy.
6. Installation radio
The fuselage receives the 4 servos of standard size of the stab, the rudder, of the ailerons, the
receiver and an accumulator 4 or 5 elements 1400mAh. While placing l?accu well in the nose one
should arrive at the centering recommended with a minimum lead addition (< 50g)
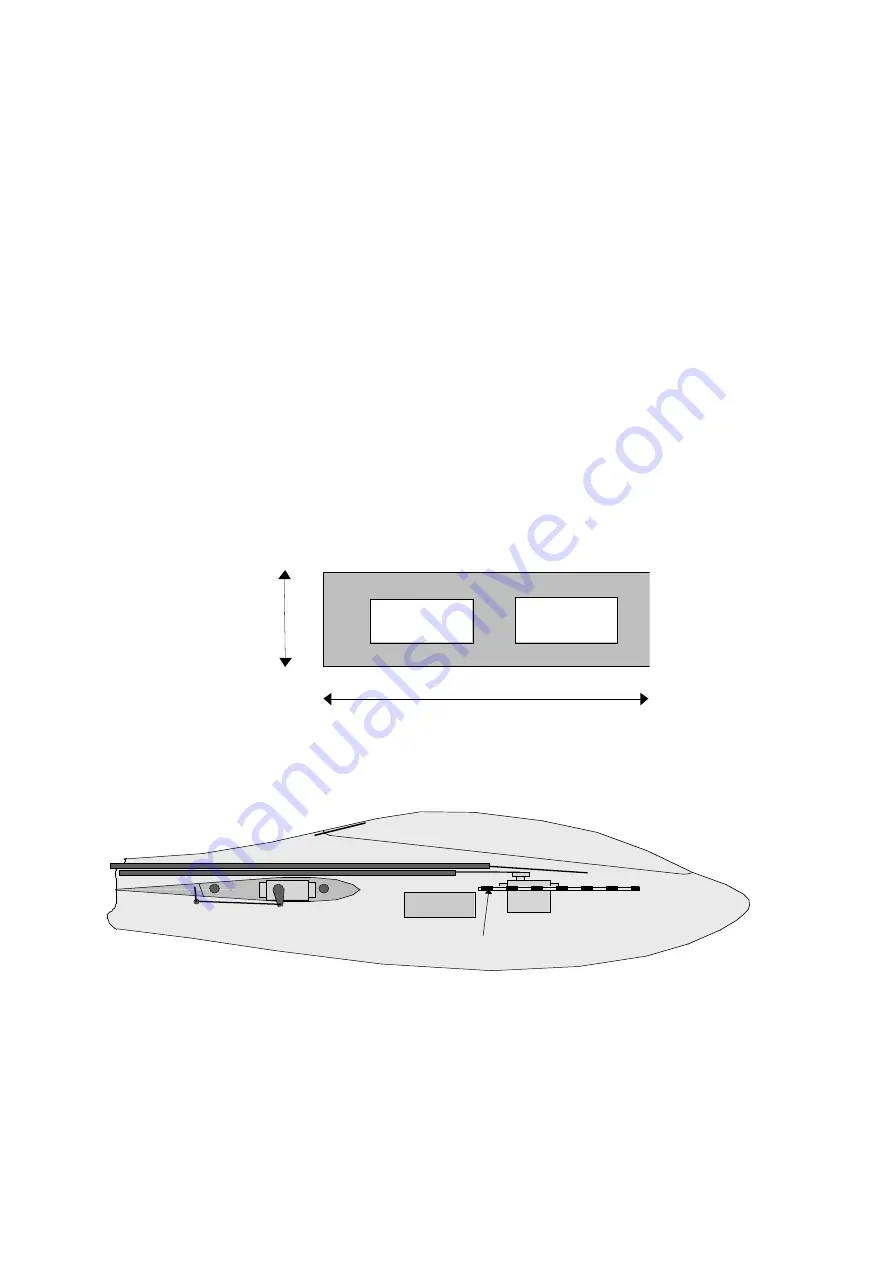
6.1 Installation of the servo tray.
To make a servo turntable in ctp of 20/10 with following dimensions:
Taille Servo
standard
150 mm
42 mm
To sand the interior of the fuselage so that the adhesive hangs and to stick platinize it at the
place indicated on the diagram with epoxy resin. It is preferable to install platinizes it radio with the
same height as the wing for a better dynamic balance of the sailplane.
CAP 20/10
de fixation
de verrière
Platine servo CTP 2mm
Récepteur
Accu
5x1400mA
6.2 Installation of the servos will ailerons
Both servos will ailerons s?installent on the section of each karman. There the fibre is sufficiently
thick between the 2 keys ailes to be able to screw servo of standard size directly. It is enough for
that to découper/fraiser the karman and to bore 4 small holes in fibre for the screws. The head


