International Badminton Posts
Revision 2.0 – 10.5.16
Assembly:
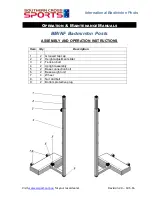
1. Insert the g rooved n et cable cap (1) into the slider s ection (2) .
2. Insert the slider sect ion (2) int o the uprig ht assembly (4) an d insert the tension bo lt
(3) and tig hten as re q uired.
3. Insert bottom protect ive ca p (9) int o the e nd of the uprig ht ass embly (4)
4. Slid e the uprig ht ass embly (4) onto the en d of the stem attached to the we ig hted bas e
(6).
5. Insert base c onne ctio n bo lt (5) and tig ht en up as f irmly as po ssib le.
6. Pos itio n wh ee ls (7) on back of base, and secure with n ut and bolt (8)
Additional Operation Instructions
Position posts on court in required positions.
Secure net to back of one post, and run net cable across the grooved cap to the opposite post.
Run net cable over grooved cap, and tie off on back of post
Adjust net so it is centered between posts, and tie off net cables into place
Note fine adjustment of the net height is possible be adjusting the slider section (2). Release
tension on the tension bolt (3) and adjust as required.
GENERAL MAINTENANCE
Inspect this equipment for wear, loose bolts, damage and proper stability before each use.
Replace defective or worn parts immediately.
WARRANTY
This product is warranted to be free from all manufacturing defects for a period of 24 months from date of
original invoice. All moving and mechanical components, are warranted to be free of manufacturing
defects for a period of 12 months from date of original invoice. All nets, pads and other accessories are
warranted to be free of manufacturing defects for a period of 12 months from date of original purchase.
Normal wear or equipment failure due to misuse or lack of proper maintenance will void all warranties.


