background image

Questions? Call Toll Free at 1-800-737-2112


Copyright © 2014 MAT Engine Technologies, LLC

ENG - 11

Operation

• Save all instructions 

Read, understand, and follow all instructions on 
the machine and in the manual(s) supplied before 
starting. Be thoroughly familiar with the controls 
and the proper use of the machine before starting.

The operation of any mower can result in 
foreign objects being thrown into the eyes, 
which can result in severe eye damage. 
Always wear safety glasses or eye shields 
while operating your mower or performing 
any adjustments or repairs. We recom-
mend standard safety glasses or wide vi-
sion safety mask be worn over spectacles.

ENGINE SPEED

Engine speed was set at the factory for optimum 
performance. It is not adjustable.

ENGINE CONTROL

WARNING

Federal regulations require an engine control to 
be installed on this mower in order to minimize 
the risk of blade contact injury. Do not under any 
circumstances attempt to defeat the function of 
the blade control lever. The blade turns when the 
engine is running.

• Your mower is equipped with a blade control  


lever which requires the operator to be  


positioned behind the mower handle to start  


and operate the mower.

BEFORE STARTING ENGINE

ADJUST CUTTING HEIGHT (FIG. 5)
MODELS WITH SPRING LOADED HEIGHT 
ADJUSTERS

NOTE:

 No tools required for models with spring 

loaded height adjusters.

IMPORTANT:

 Before adjusting the cutting height 

consider what is best for the lawn being cut. For 
best results never cut off more than one-third of 
the total length of the grass.

D

Y

Fig. 5

Z

The cutting height can be adjusted by engag-
ing one of seven height adjustment tabs on the 
index plate (Y). Press the spring lever (Z) toward 
the wheel and rotate the spring lever to raise or 
lower the wheel (D). Line up the square hole in the 
spring lever with the tab on the index plate for the 
desired cutting height and release the spring lever. 

NOTE: 

All four wheels MUST be adjusted in the 

same height position.

Summary of Contents for SM2243

Page 1: ...o ___________________ Mfg Date Code __________________________________________ Date of Purchase Attach a copy of your sales receipt Consumer Toll Free Number 1 800 737 2112 KEEP THIS MANUAL FOR FUTURE...

Page 2: ...is not recom mended Refer to Engine Owner s Manual for engine specifications MEETS CPSC SAFETY REQUIREMENTS This walk behind mower conforms to the safety standards of the American National Standards...

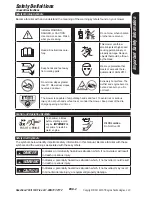
Page 3: ...urn you Do not touch DANGER KEEP HANDS and FEET AWAY DANGER The mower is capable of amputating hands and feet To avoid risk or serious injury do not put hands or feet near or under the mower Keep clea...

Page 4: ...hich could be picked up and thrown by blade Be sure the area is clear of other people particularly small children before mowing Stop machine if anyone enters the area Do not operate the mower when bar...

Page 5: ...se extreme care in handling gasoline Gaso line is extremely flammable and the vapors are explosive Extinguish all cigarettes cigars pipes and other sources of ignition Use only an approved container N...

Page 6: ...ear gloves and use extra caution when servicing them Do not change the engine governor setting or over speed the engine Maintain or replace safety and instruction labels as necessary WARNING This mowe...

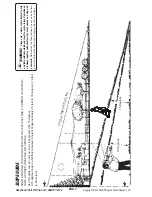
Page 7: ...not mow it Mow across the face of slopes never up and down Exercise extreme caution when changing direction on slopes 15 Degrees 10 Degrees SLOPE GUIDE SIGHT AND HOLD THIS GUIDE LEVEL WITH A VERTICAL...

Page 8: ...ion Read understand and follow all instructions on the machine and in the manual s before starting To be able to operate your mower safely and get the best performance become familiar with the control...

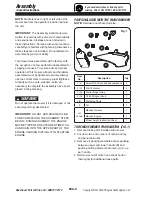
Page 9: ...Do not operate the mower if it is damaged or not securely and fully assembled IMPORTANT DO NOT ADD ENGINE OIL BE FORE COMPLETING THE ASSEMBLY STEPS BELOW DURING ASSEMBLY THE ENGINE MAY BE TIPPED FOR E...

Page 10: ...andle brackets were installed at the factory so the handle will pivot 4 Tighten all screws to secure handle Torque to 10 ft lbs 5 Tighten both handle knobs E 6 Attach starter rope guide F found in par...

Page 11: ...of blade contact injury Do not under any circumstances attempt to defeat the function of the blade control lever The blade turns when the engine is running Your mower is equipped with a blade control...

Page 12: ...mower to side discharge Lift the mulching cover F and slide the hooks S on the side discharge chute E under the hinge pin T on the mulching cover as shown NOTE DO NOT remove the mulching cover at any...

Page 13: ...pyright 2014 MAT Engine Technologies LLC ENG 13 Operation Continued Save all instructions Snap plastic bag extrusions over the bag frame with the open side toward the inside of the bag Insert the bag...

Page 14: ...ll instructions Bag Pivot Stop Side Discharge Chute E removed with Spring Loaded Mulch Cover F in place REAR BAGGER MODELS Raise the Spring Loaded Rear Door AA Bag CC installs from the rear Slide the...

Page 15: ...e at 1 800 737 2112 Copyright 2014 MAT Engine Technologies LLC ENG 15 Operation Continued Save all instructions REAR BAGGER MODELS Lift bag CC by the Handle BB Lower the spring loaded door to seal aga...

Page 16: ...treme care when handling gasoline Gasoline is extremely flammable and the vapors are explosive Do not smoke or allow smoking near fuel or the mower Extinguish all cigarettes cigars pipes and other sou...

Page 17: ...haust fumes can kill Do not put hands or feet near or under the mower Keep clear of the discharge opening at all times Keep children and by standers away when starting the engine and out of the mowing...

Page 18: ...restarting and operating the mower Vibration is generally a warning of trouble For best results Do not cut wet grass Never cut off more than one third of the total length of the grass Plan ahead and...

Page 19: ...l attract dust and dirt that will shorten the life of the self lubricat ing bearings If you feel they must be lubricated use only a dry powdered graphite type lubricant sparingly Refer to the separate...

Page 20: ...CAUTION Never run the engine without an air filter installed Running the engine without the filter can cause excessive engine wear and damage 3 Clean engine regularly with a cloth or brush Keep the t...

Page 21: ...de bolt U with the disc spring washer X into blade adapter and crankshaft 4 Use block of wood between blade and mower housing and tighten the blade bolt turning clockwise Torque to 25 30 ft lbs IMPORT...

Page 22: ...wer See Cleaning in the Maintenance section of this manual 2 Follow Lubrication instructions in the Maintenance section of this manual 3 Be sure that all nuts bolts screws and pins are securely fasten...

Page 23: ...anual 4 Service air filter See Engine Owner s Manual 5 Clear vent in fuel cap 6 Remove fuel filter Inspect Replace if necessary See Engine Owner s Manual 7 Clear or replace fuel line See Engine Owner...

Page 24: ...ail or become damaged as a result of misuse accident lack of proper maintenance tampering or alteration Travel handling transportation and incidental costs associated with warranty repairs are not rei...

Page 25: ...995 and sold in the State of California and U S EPA certi fied small spark ignited nonroad engines manufactured in model year 1997 or later and sold in all of the United States are covered by this Emi...

Page 26: ...r main tenance misuse mis fueling improper storage accident and or collision the incorporation of or any use of any unapproved add on modified graymarket or counterfeit parts unsuitable attachments or...

Page 27: ...Questions Call Toll Free at 1 800 737 2112 Copyright 2014 MAT Engine Technologies LLC ENG 27 Repair Parts MODEL NUMBER SM2243...

Page 28: ...ead 2 EA 17 A202418 Wheel 10 x 1 5 Diamond Tread 2 EA 18 A202416 Nut 3 8 16 Hex Nylock 4 EA 19 A202417 Washer 7 8 x 1 2 x 1 8 Thk 2 EA 20 A202149 Engine Rato RV170 173CC 1 EA 21 A202192 Screw 3 18 16...

Page 29: ...2 3 4 5 Repair Parts Decal Group Item Part No Description Qty 1 A202285 Label Decorative SOUTHLAND 1 2 A202448 Label Danger Cut Finger 1 3 A202275 Label Decorative Made in USA 1 4 A202267 Label Decor...

Page 30: ...PARTS CYLINDER HEAD REF NO DESCRIPTION PART NO QTY EPA2 EPA3 1 Cover Cylinder Head A201566 A201566 1 2 Gasket Cylinder Head Cover A201567 A201567 1 3 Gasket Cylinder Head A203182 A203182 1 4 Bolt M6...

Page 31: ...A201570 A201570 2 3 Bolt M6 X M12 A201570 A201570 1 4 Bracket Fuel Tank Right A 201580 A201580 1 5 Seal Oil A201599 A201599 1 6 Bolt M6 X M12 A201570 A201570 2 7 Plate Breath Groove Cover A201584 A20...

Page 32: ...IR PARTS CRANKCASE COVER REF NO DESCRIPTION PART NO QTY EPA2 EPA3 1 Gasket Crankcase A203183 A203183 1 2 Pin A201593 A201593 2 3 Block Returning Oil A201595 A201595 1 4 Bolt M6 x 12 A201570 A201570 1...

Page 33: ...EPA3 1 Ring The First Reference Only Reference Only 1 2 Ring The Second Reference Only Reference Only 1 3 Ring Set Oil Reference Only Reference Only 1 4 Piston Reference Only Reference Only 1 5 Clip P...

Page 34: ...2 Copyright 2014 MAT Engine Technologies LLC ENG 34 REPAIR PARTS RV170 ENGINE REPAIR PARTS CAMSHAFT REF NO DESCRIPTION PART NO QTY EPA2 EPA3 1 Valve Intake A203186 A203186 1 2 Tappet Valve A201630 A20...

Page 35: ...Technologies LLC ENG 35 REPAIR PARTS RV170 ENGINE REPAIR PARTS ENGINE SHROUD REF NO DESCRIPTION PART NO QTY EPA2 EPA3 1 Housing Engine Cover A201761 A201761 1 2 Shroud Engine A201636 A201636 1 3 Screw...

Page 36: ...800 737 2112 Copyright 2014 MAT Engine Technologies LLC ENG 36 REPAIR PARTS RV170 ENGINE REPAIR PARTS RECOIL STARTER REF NO DESCRIPTION PART NO QTY EPA2 EPA3 1 Nut Hex Flange A201324 A201324 3 2 Star...

Page 37: ...ght 2014 MAT Engine Technologies LLC ENG 37 REPAIR PARTS RV170 ENGINE REPAIR PARTS CARBURETOR REF NO DESCRIPTION PART NO QTY EPA2 EPA3 1 Carburetor Gasket Kit A203189 A203189 1 2 Carburetor Assy A2031...

Page 38: ...PARTS RV170 ENGINE REPAIR PARTS AIR FILTER REF NO DESCRIPTION PART NO QTY EPA2 EPA3 1 Gasket Air Cleaner A201696 A201696 1 2 Tube Breather A201697 A201697 1 3 Nut A201324 A201324 2 4 Kit Air Filter Ho...

Page 39: ...39 REPAIR PARTS RV170 ENGINE REPAIR PARTS FLYWHEEL IGNITION REF NO DESCRIPTION PART NO QTY EPA2 EPA3 1 Nut Flywheel A201685 A201685 1 2 Flywheel Subassembly A201687 A201687 1 3 Bolt A201688 A201688 1...

Page 40: ...AIR PARTS RV170 ENGINE REPAIR PARTS FUEL TANK REF NO DESCRIPTION PART NO QTY EPA2 EPA3 1 Cap Fuel Tank A202482 A202482 1 2 Strainer Fuel A201722 A201722 1 3 Clamp A201723 A201723 1 4 Tube Fuel A201724...

Page 41: ...AIR PARTS ENGINE LABELS REF NO DESCRIPTION PART NO QTY 1 Decal Air Filter Maintenance Reference Only 1 2 Decal Hot Surface Warning Reference Only 1 3 Decal Fuel Usage Reference Only 1 4 Decal Outdoor...

Page 42: ......

Page 43: ......

Page 44: ...If you have a question or problem CALL TOLL FREE 1 800 737 2112 Copyright 2014 MAT Engine Technologies LLC...

Reviews: