(
2
)
Set-up of the paper
Place the paper to be cut into the paper feeding tray, aligned and with
the printed face upwards.
a. Paper width adjustment: with the side of the paper lightly touching with
the paper guide side plates. Note- too tight and feeding may not occur,
too loose and registration issues may occur.
b. Do not overfill the paper feeding tray or doubles and missfeeding may
occur.
c. Paper feeding may be affected with the frontal end of the paper is
curled upwards, only load flat stock without curl into the machine.
d. Do not place papers of different kinds (coated and non-coated etc.) at
the same time, or paper feeding may be affected.
e. Do not use plastic sealed paper, film coated paper, PVC paper and other
stocks which may be too thick or too hard to avoid damaging the
machine.
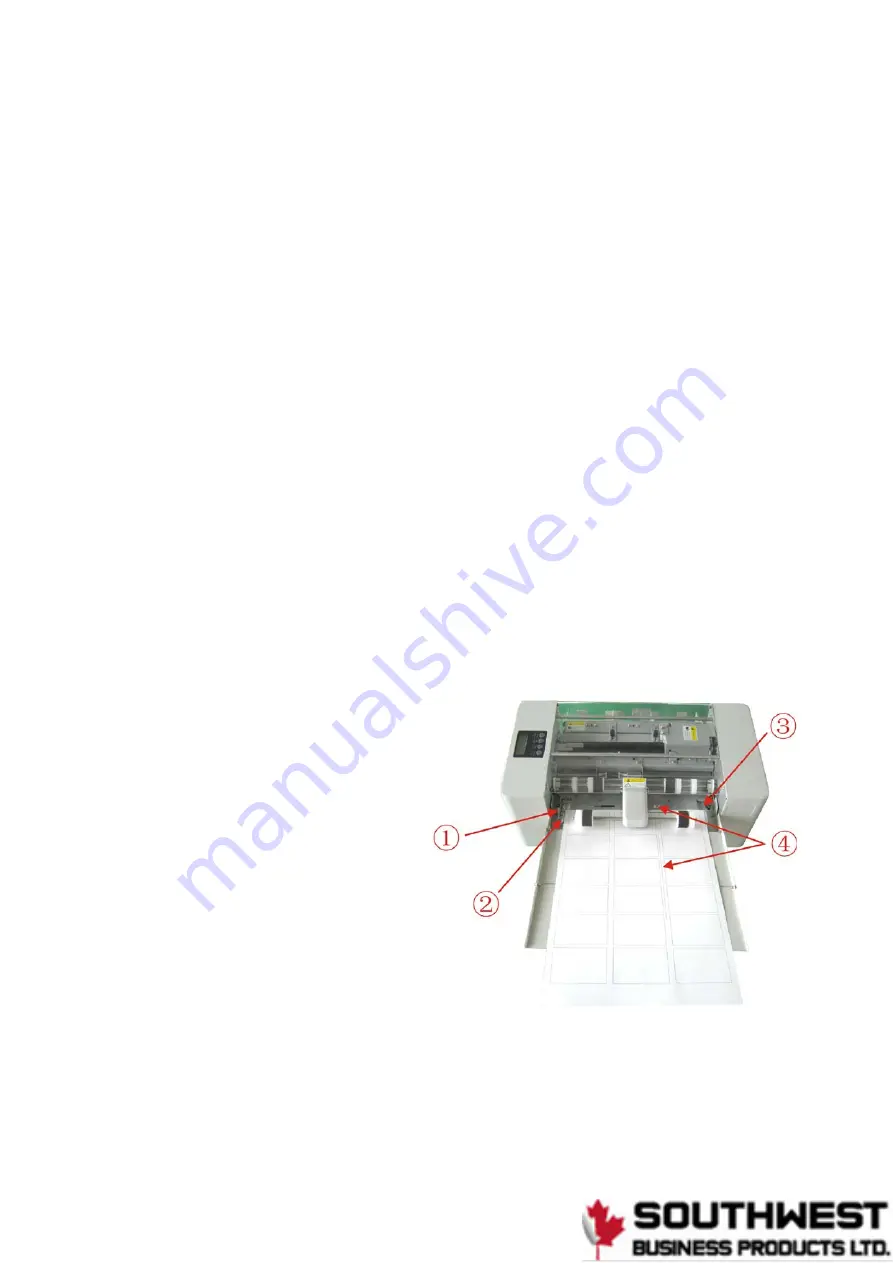
①
Micro-adjusting nut of paper
guide plate
②
Left paper guide plate
③
Right paper guide plate
④
Aligned cut marks
(
3
)
Move both left and right paper guide
plates to suit the paper size and the 2
triangle marks on the paper feeding tray
aligned with the center of the card gutters
using a sheet for reference. Use the micro-adjusting nut on the paper guide plate to
adjust the paper tightness.
35
Summary of Contents for Graphic Whizard PT320 CC
Page 25: ...17...
Page 26: ...A3 420 297 88 9mm 45mm 18...
Page 27: ...A3 420 297 88 9mm 50mm 19...
Page 28: ...A3 420 297 88 9mm 54mm 20...
Page 29: ...A3 420 297 88 9mm 50 8mm 21...
Page 30: ...A3 420 297 88 9mm 95mm 22...
Page 31: ...A3 420 297 88 9mm 127mm 23...
Page 32: ...24...
Page 33: ...25...
Page 34: ...26...
Page 35: ...27...
Page 36: ...28...
Page 37: ...88 9mm 40 250 mm customize 29...


