8
C. CHIMNEY ASSEMBLY
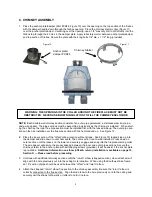
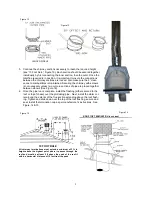
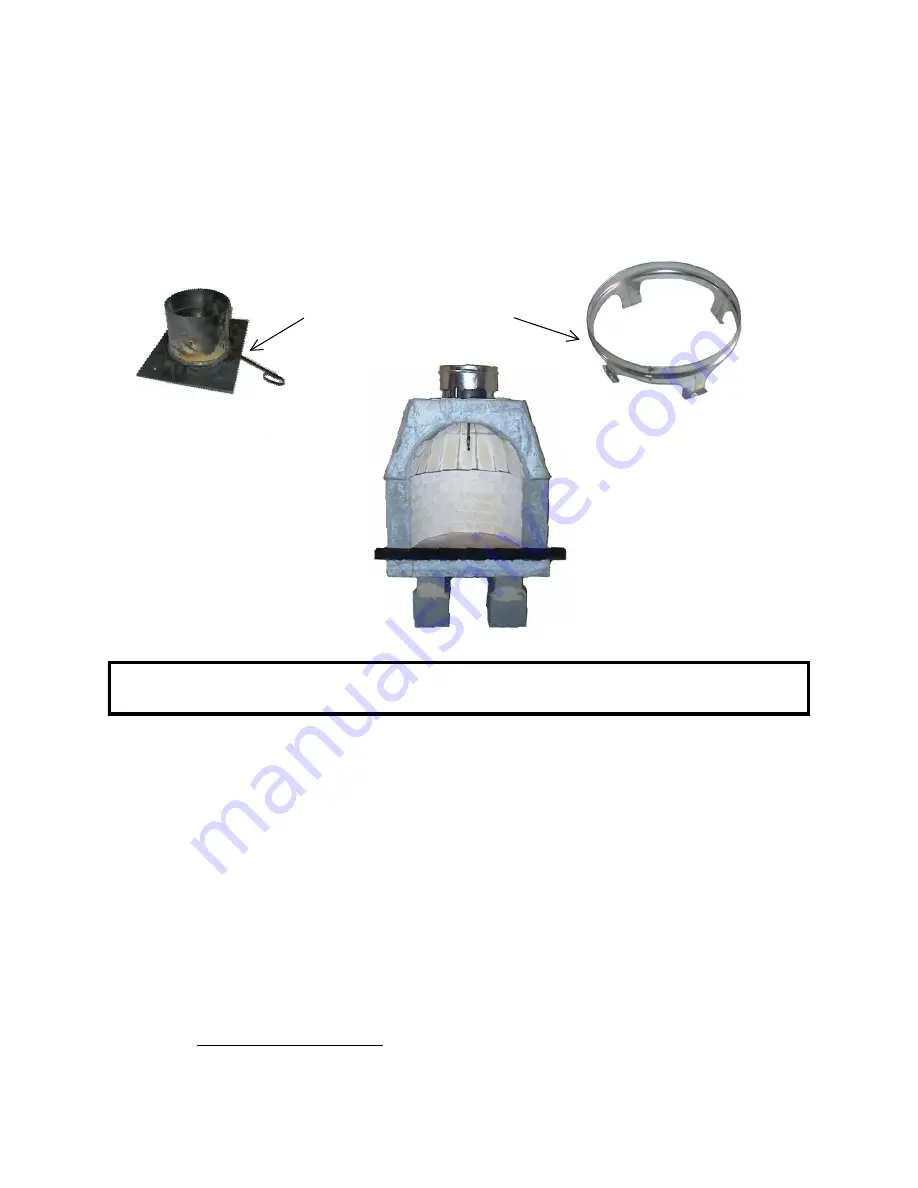
1. Place the anchor plate/damper (Part #CD24; Figure 10) over the opening on the top section of the firebox
with the damper handle down through the firebox opening. Place the chimney starter collar (Figure 11)
over the anchor plate/damper. Centering over the opening, use a 1/4" masonry drill to drill directly into the
firebox top through the 4 holes in the damper plate. Apply refractory mortar between anchor plate/damper
and top section of firebox. Secure the plate with the 4 lag bolts 1/4" dia. x 1 1/2" long (provided).
NOTE:
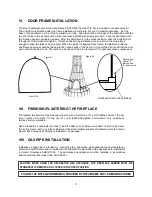
Each double wall chimney section consists of an outer pipe galvanized, a stainless steel inner pipe,
and a wire spacer. The pipe sections must be assembled individually as the chimney is installed. When start-
ing the chimney, the inner flue pipe section must be installed first, with the lanced side up. The outer pipe sec-
tion can then be installed over the flue pipe section with the hemmed end up. See Figure 12.
2.
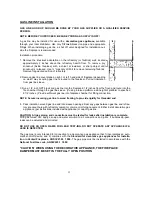
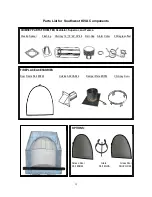
Place the inner section of the “offset” elbow (section without straps - See Figure 13) lanced side up into
the damper and slide down in until hem seats. The outer section can now be installed. Press down on
outer section until the lances on the lower end securely engage and snap into the fireplace-starting collar.
The wire spacer will assure the proper spacing between the inner and outer pipe sections. Secure the
chimney starter to the anchor plate with self-tapping screws (provided). It will be easier if the anchor plate
is pre-drilled.
Additional information on elbow (offset & return) installation is available on page 10,
Section D — Please read before proceeding.
3. Continue with additional chimney sections until the “return” elbow (strapped section), when attached, will
align with the hole previously cut into the ceiling for termination. When using the Southwest Kiva frame,
an 18” section of pipe should be used between the “offset” and “return” elbow.
4. Attach the strapped “return” elbow flue section to the chimney assembly. Be sure the “return” elbow is
correctly connected to the flue section. Align the top elbow to the hole previously cut into the ceiling and
securely nail the straps to the walls or rafters to hold it in place.
Figure 10
Figure 11
Chimney Starter
Anchor plate/
damper #CD24
WARNING: THE OPENINGS IN THE COLLAR AROUND THE FIREPLACE MUST NOT BE
OBSTRUCTED. NEVER USE BLOWN INSULATION TO FILL THE CHIMNEY ENCLOSURE.
8

