30
31
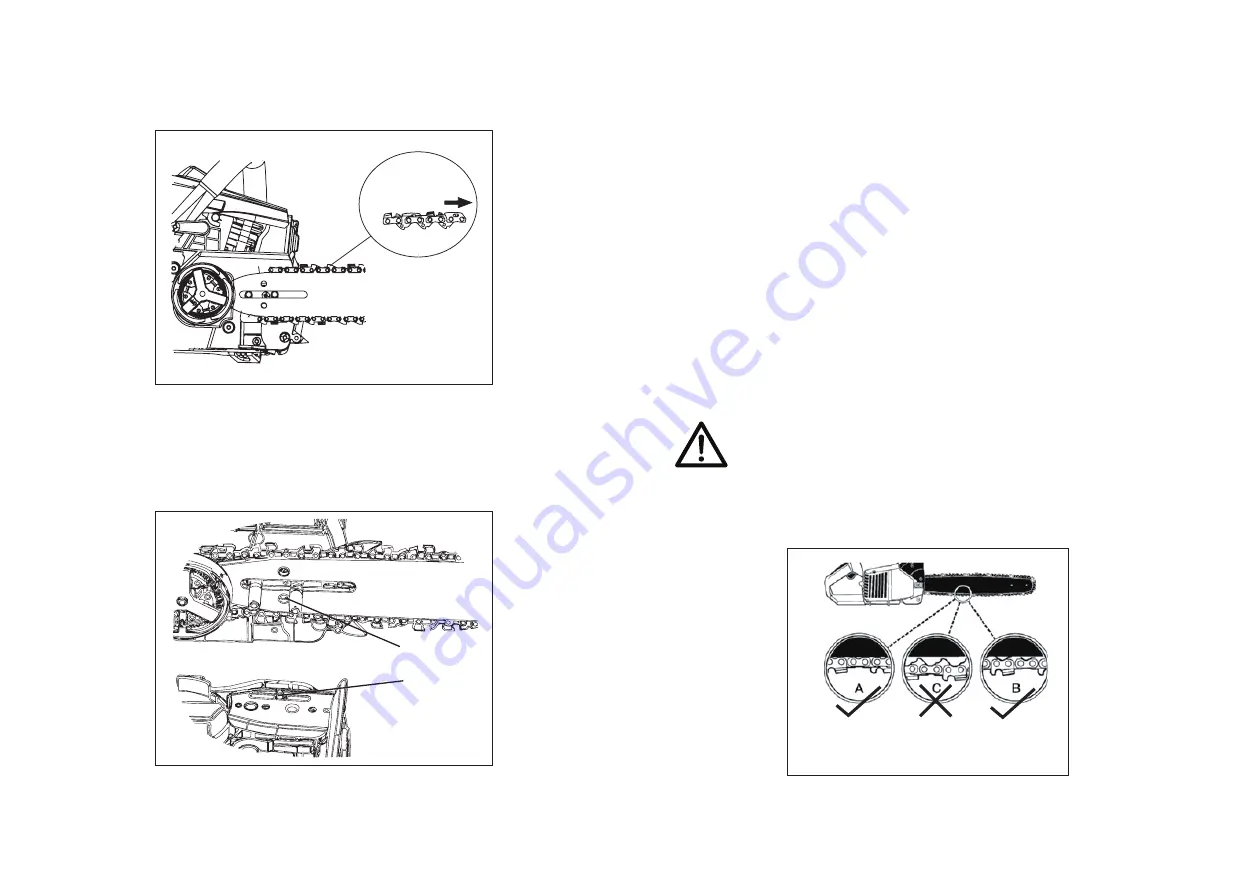
3. Fit the chain around the bar ensuring that the direction of the
chain is as depicted in the picture on the bar. Fit the chain on
the sprocket. Adjust the position of chain tensioner so the
tensioner pin locates in the hole (A) on the bar.
Direction of chain
4. Adjust the tension to ensure that there is not too much slack
in the chain. Make sure the tensioner pin (B) is located in the
assembly hole (A) on the bar. Pay attention to the correct
direction of the saw chain. Compare with the picture near the
chain sprocket and the picture on the bar.
A
B
5. Fit the chain cover to the power unit and fasten the nuts to
the chainsaw, ensure these are fastened as tight as possible
using your fingers only.
6. While holding up the tip of the bar, adjust the chain tension
by turning the adjustment wheel until the chain engages
in the bar channel. When tensioned correctly, it should be
possible to pull one full chain link free of the bar channel with
ease.
7. Tighten the wheel as secure as you can using your fingers.
Then check the chain for smooth rotation and proper tension
while moving it by hand. If necessary, loosen the chain cover.
8. Tighten the tensioner wheel.
NOTE
: A new chain will expand its length during the first period
of use. Check and re-adjust the tension frequently, as a loose
chain can easily derail or cause rapid wear of itself and the chain
bar.
CAUTION!
If the saw chain is TOO LOOSE or TOO TIGHT
the V-drive wheel, chain bar, chain and crank shaft bear-
ing will suffer premature wear. Below Fig. shows the cor-
rect tension A (when cold) and tension B (when warm).
Fig. C shows a chain that is too loose.


