Motherboard Description
SY-P4I875P DRAGON 2
8
A
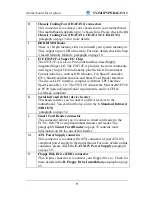
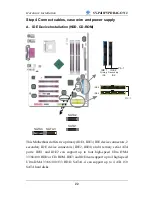
Microphone and LAN Status LED Connector (J30)
This connector allows you to extend your microphone connector and
LAN Status LED to your front panel. Check the
MIC & LED
Connector (J30)
paragraph on page 36 for a lay-out of this header.
B
+12V Power Connector
This is where the Power Supply's +12V ATX connector goes. For a
lay-out of this connector please check the
F. ATX12V Power
Supply
paragraph on page 39.
C
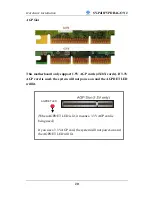
AGP Slot
This is the AGP expansion slot for your video card. Note that it can
only work with 1.5v AGP cards. For more information, check the
Step 3 Installation of Expansion Cards paragraph on page 19.
D
Socket 478 Connector
This is the Zif (Zero Insertion Force) socket for your Pentium 4 or
Celeron CPU. For more information, check the Step 1 Install the
CPU paragraph on page 15.
E
Intel 875P North Bridge Chip
The Intel® 875P chipset features support for an 800 MHz Front Side
Bus (FSB) and implements Intel® Performance Acceleration
Technology (PAT) with dual-channel
DDR
400 memory
configurations to get incredible performance from the memory
interface. Optimized to support the Intel® Pentium® 4 Processor
with
Hyper-Threading Technology
†
, the 875P chipset adds
intelligence to help manage and prioritize multiple threads received
from the microprocessor.
F
3V Lithium Battery
This battery supplies power to the CMOS RAM. As long as the
battery supplies enough power, the contents of your CMOS RAM
will be valid. CMOS RAM contents are configured by CMOS setup,
and can be cleared by JP5. For more details on this check the
H.
CMOS Clear (JP5)
paragraph on page 42.
G
CPU Cooling Fan (CPUFAN1, 2) connectors
With these connectors you can attach the CPU fan or fans to your
motherboard. They supply power and (in the case of CPUFAN1)
allow you to monitor the speed of the FAN via the SOYO Hardware
Monitor software or via CMOS setup. For more details on the
lay-out of these connectors, check the
2. Cooling Fan Installation
paragraph on page 33.
Summary of Contents for SY-P4I875P DRAGON 2 V1.0
Page 12: ...Motherboard Description SY P4I875P DRAGON 2 7 1 7 SY P4I875P DRAGON 2 MOTHERBOARD COMPONENTS ...
Page 120: ...115 APPENDIX A HighPoint HPT 372 ...
Page 127: ...122 APPENDIX B Silicon Image 3112 ...
Page 130: ...125 APPENDIX C Flashing BIOS ROM ...
Page 132: ...127 5 Press ALT F2 to start up AWDFLASH You should see the following screen ...
Page 133: ...128 6 AWARD flash will now automatically flash your BIOS and reset when it is done ...
Page 134: ...129 APPENDIX D Troubleshooting ...


