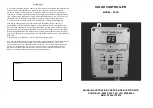
SOLAR CONTROLLER
MODEL: SC3D
The SC3D
is a micro processor based solar controller used to heat your pool/spa from your solar
collector. The controller does this by sensing the temperature on the roof and the temperature of
the pool. If the roof temperature rises 7
o
above the pool temperature and the pool temperature is
below the set point then the controller will switch power to the solar pump which in turn will cycle
the pool water through the collector to heat the water and then return it to the pool. If the pool
temperature rises to the set point or the roof temperature falls to within 2
o
of the pool water the
controller will switch power off to the solar pump.
Features:
•
Sample and Hold Temperature Display
•
Simple one touch control buttons
•
Pool, set point and roof temperature display
•
Winter mode
•
Manual mode
•
Heating and Heating/Cooling Mode
•
Temperature sensor error indication
Operation:
For normal operation
the controller should in AUTO mode (indicated by green light).
To test pump
press the MODE button once (manual is indicated by light).
To change desired pool temperature
press the SELECT button once. The set (yellow) light
should be on and the display will indicate the set point, The UP/DOWN buttons may now be
pressed to change the set point. The display will revert back to the pool temperature about 8
seconds after the last button was pressed.
To display roof temperature
press the SELECT button twice. The roof (red) light should be on
and the display will indicate the roof temperature. The display will revert back to the pool
temperature about 8 seconds after the last button was pressed.
To activate winter mode
press the MODE button twice if in AUTO or once if in MANUAL
(indicated by red light). In this mode the pump will turn on for approx. 10 minutes every day at the
time the winter mode was activated. If there is a power failure this will reset the 24 hour timer so
the pump will come on at the time the power is restored.
Minimum Roof setting (sampling):
To prevent the unit from sampling at night an
adjustable setting has been provided. The
roof
temperature needs to be above this value for the
unit to sample. To adjust this value:
1.
Press the
SELECT
button until the roof temperature is displayed
2.
Press the
UP/DOWN
once to see the value
3.
Press or hold
UP/DOWN
to change value
4.
Press
SELECT
again or wait 3 seconds to exit this setting
NOTE:
If during the summer period you find the unit running late or early, increasing this value
will prevent the unit from sampling at these times. The default value is 20º C.
Heating and Cooling:
To provide cooling ability for those living in tropical areas, a cooling mode
has been provided. To change the controller from heating only to heating and cooling:
1.
Press the
SELECT
button until the roof temperature is displayed
2.
Hold the
SELECT
button for 5 seconds until a flashing “H “ or “HC” is displayed
3.
“H “ = Heating only. “HC” = heating and cooling.
4.
Use the
UP/DOWN
to change value
5.
Press
SELECT
to exit
NOTE:
With cooling mode activated, the unit will operate at night and the minimum roof setting is no
longer available.
Calibration:
To adjust the displayed temperature:
1.
While displaying the pool temperature hold the SELECT for 5 seconds
2.
The display will flash the current temperature.
3.
Use the
UP/DOWN
to adjust the value
4.
Press the
SELECT
t button to exit the setting
NOTE: The adjustment will not /- 3 degrees
Temperature sensor error indication:
If one of the sensor leads is damaged or the sensor is faulty, the appropriate light will flash to indicate
there is a fault.
POOL sensor fault
Pool
light (green) will flash.
ROOF sensor fault
Roof
light (red) will flash.
The display will flash (If selected):
“OC” = Open circuit (Broken wire)
“SC” = Short Circuit
Mounting Instructions
The control unit should be mounted on a wall or other vertical surface taking care to protect it from rain
and direct sunlight.
Specifications:
INPUT: 230/240V 10A 50Hz
MAX TOTAL LOAD: 10A
IP23


