Seaich Corporation, LLC. All rights reserved. www.seaich.com | Spacerails, LLC. www.spacerails.com
Page 19
CONNECT TWO R-D RAILS AND JOIN WITH TWO R-C RAILS
D
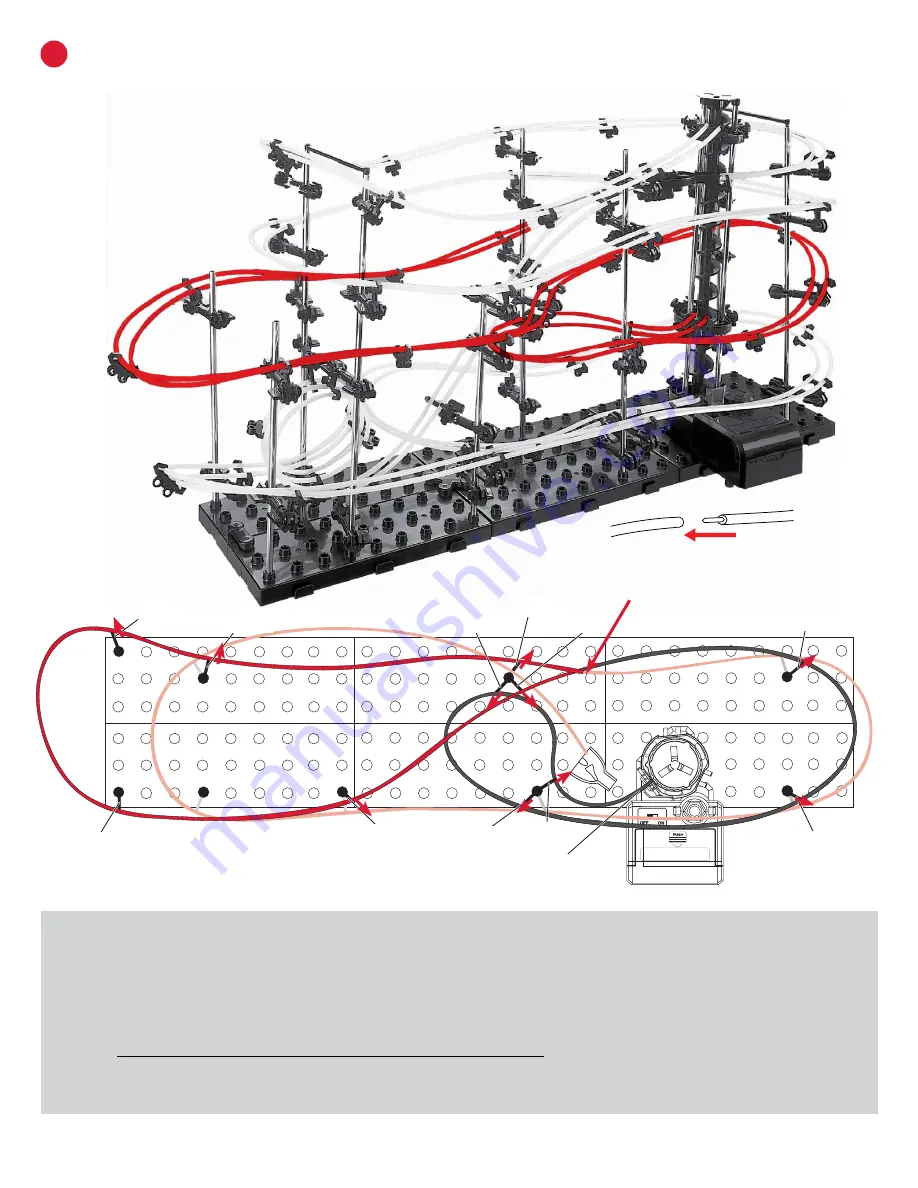
Use the following illustrations and pictures as
for attaching the rails to the structure:
Step 10:
Rotate one rail arm on A-2, C-3, F-2, F-4, F-3, H-2, I-2, G-3, G-4, and E-4 to match the red arrows shown above. The
arm number is shown above and is counted from the bottom up.
D-3 is the 3rd arm from the bottom on the D shaft.
Step 11:
Connect two R-D rails starting at the middle elevator ring and going to G-3, F-3, F-2, G-4, I-2, H-2, E-4, B-2, A-2,
C-3, F-4, and leave hanging at joint until end of Step 12. There will be extra rail at the end. Leave extra at this point.
Step 12:
Starting at middle elevator ring, straighten rails and place a Rail Clip in between each shaft to keep rails evenly
spaced (red triangles are not shown to help with visual clarity of the rails.) Go from section to section until you reach where
the two sets of rails are hanging. Start by cutting one set of the rails even with each other. Then overlap the other set and
cut so they will join evenly. Insert the rail connectors into the ends of one set, then join them with the other set.
A-
2
C-
3
F-
2
F-
3
F-
4
H-
2
I-
2
G-
4
G-
3
E-
4
B-
2
TWO R-D rails are used. (150 cm each)
Rails R-C and R-D
will be joined here.
Middle
Elevator Ring


