background image

Product Manual

Booster 


Pack 


is 


charging. 


The 


charging 


indicator


will 


turn 


off 


when 


charging 


is 


complete. 


It 


takes


approximately 15 hours to completely charge the

COUNTcam2 Booster Pack.

Connecting the Booster Pack

Using 


the 


Booster 


Pack 


Cable, 


connect 


the 


male


end of the cable to the OUTPUT port of the booster


pack. Then, connect the female end of the cable to


the charging port of the COUNTcam2.
The 


green 


charging 


indicator 


will 


be 


illuminated


on 


the 


COUNTcam2 


to 


indicate 


Booster 


Pack 


is


sending charge to the COUNTcam2.

Installing the Booster Pack on an  

Adjustable Pole

1. The Booster Pack 

has a hose clamp 

mounting bracket 

on the back of the 

housing. Thread a 

small hose clamp 

through the mounting 

bracket of the Booster 

Pack. 

Due to the acute 

angle of the mounting 

bracket, bending 

the edge of the 

hose clamp may be 

necessary to get the 

hose clamp through 

the bracket. 

2. Once the hose clamp 

is inserted, you can 

attach the Booster Pack to the adjustable pole. 

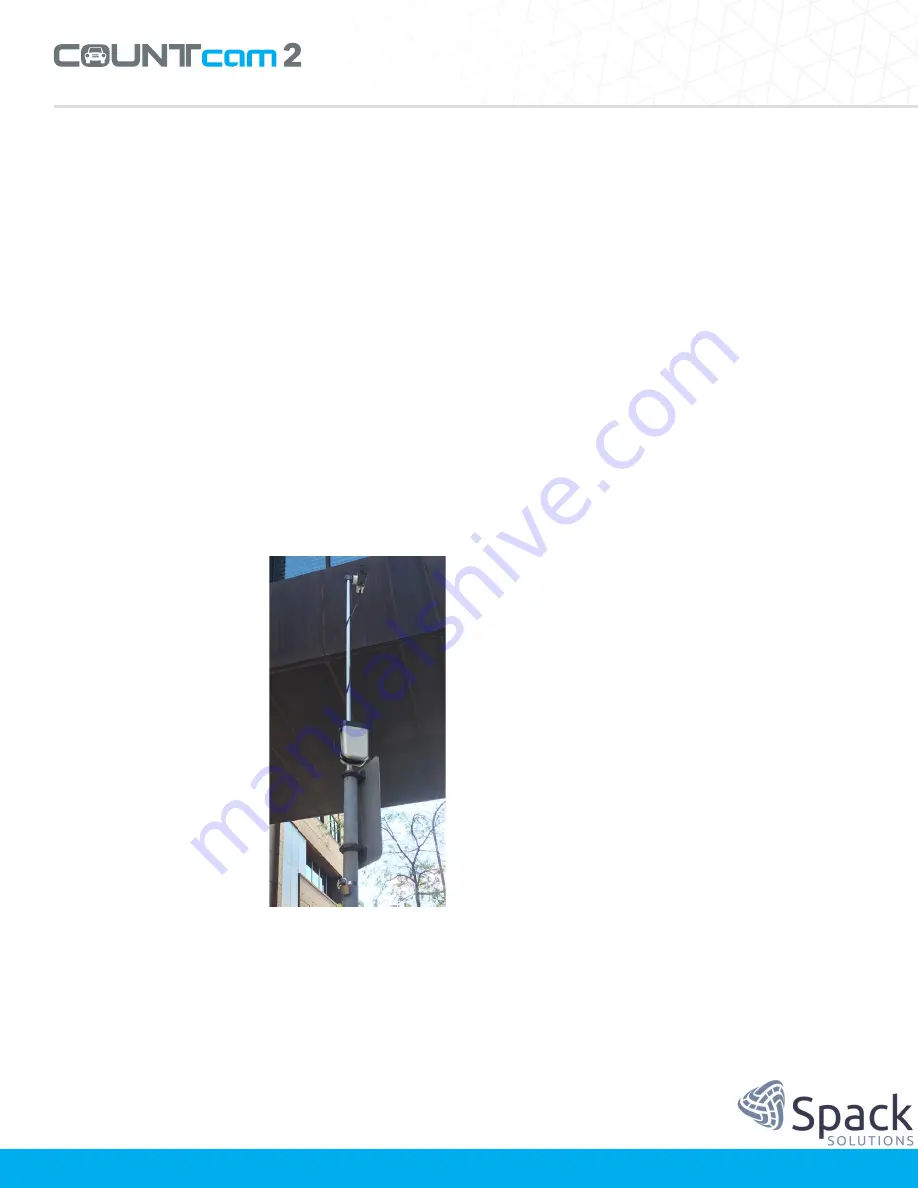
Attach the Booster Pack on the adjustable 

pole so that when secured to a street sign, 

the Booster Pack is 8 - 10 feet (2.5 - 3 Meters) 

off the ground. The booster pack should be 

as close to the ground as possible, but high 

enough to avoid tampering or vandalism. 

Note: Do not install the Booster Pack at the top


of the Adjustable Pole near the camera. The


weight of the Booster Pack + COUNTcam2 can


create a pendulum effect in windy conditions.


Video being recorded may not be usable.

3. After attaching the Booster Pack at an ideal

spot on the adjustable pole, connect to the


COUNTcam2 using the booster pack cable.


Once connected, wrap excess cable around the


housing of the Booster Pack.

4. Carefully raise the adjustable pole and secure

it to the street sign using medium hose clamps


and secure it with the hose clamp lock bracket.

(See section 3 for more detail on installation)

Installing the Booster Pack on a Large Post

1. The Booster Pack has a hose clamp mounting

bracket on the back of the housing. Insert a


large hose through the hose clamp bracket on


the Booster Pack, then, insert the end of the


hose clamp through the lock bracket. Due to the


acute angle of the mounting bracket, bending


the edge of the hose clamp may be necessary

to get the hose clamp through the bracket.

2. Using a ladder (not provided; use at your own

risk), secure the large hose clamp to the post.


The Booster Pack should be installed at least 10

- 15 feet (3 - 4.5 Meters) off the ground to avoid


vandalism or tampering.

3. Make sure the drive of the hose clamp is fully

covered by the lock bracket and tighten the


hose clamp. Hose clamps should not be over-


tightened, this may cause the clamp to break.


After tightening the hose clamp, insert the


padlock through the holes of the lock bracket.

4. After attaching the Booster Pack at an ideal

spot on the post, install and connect to the


COUNTcam2 using the booster pack cable.

(See section 3 for more detail on installation)

Once connected, wrap excess cable around the


housing of the Booster Pack.

7

Summary of Contents for Countcam2

Page 1: ...Video Recording System Product Manual Version 3 0 2018 ...

Page 2: ...ndexer 5 Using the Hose Clamp Lock Bracket 5 4 Retrieval 5 6 Picking up the COUNTcam2 5 Downloading Video Files 5 Using the COUNTcam2 Video Uploader 6 5 Using the Booster Pack 6 7 Charging the Booster Pack 6 Connecting the Booster Pack 7 Installing the Booster Pack on an Adjustable Pole 7 Installing the Booster Pack on a Large Post 6 6 Troubleshooting 8 9 Unable to Connect to the COUNTcam2 Wi FiNe...

Page 3: ...Product Manual ...

Page 4: ...charging indicator will turn off when charging is complete It takes approximately 15 hours to completely charge the COUNTcam2 Download the App Download the COUNTCAM App from the Google Play Store or from the Apple App Store to a mobile device i e phone or tablet This is a proprietary app designed to control the COUNTcam2 You will need the COUNTCAM app to initiate recordingon the COUNTcam2 Once the...

Page 5: ...nter right of the app figure 1 3 You will know the COUNTcam2 is recording when the red recording indicator starts blinking in the app figure 1 1 and the blue LED on the front of COUNTcam2 is also blinking App Functionality The COUNTCAM app has several icons on the sides of the screen that serve different functions This section will explain those icons in more detail 1 Recording Indicator When the ...

Page 6: ...ity will be displayed on the format bar Note formatting the internal storage will permanently delete all video files stored on the internal storage 3 Installation Proper COUNTcam2 installation in the field is crucial to capturing usable video data This section reviews the best practices for installing your COUNTcam2 in the field Always use caution and best judgment when working in the field Equipp...

Page 7: ...nto the mount secured to the top of the pole Alternatively a small hose clamp can also be used with the COUNTcam2 mounting bracket to secure the COUNTcam2 to the pole 2 Connect to the COUNTCAM wireless network on a mobile device with the COUNTCAM app installed 3 Open the COUNTCAM app and allow up to 20 seconds for the live stream to appear Once viewing the live stream tap the record icon to initia...

Page 8: ... power lines when using a ladder or when lowering the extension pole Lower the extension pole slowly to avoid dropping or damaging the COUNTcam2 Consider placing the COUNTcam2 in a backpack or other container when removing from a large post to avoid the chance of accidental damage caused by dropping the COUNTcam2 If the COUNTcam2 is still recording simply hold the power button down for three secon...

Page 9: ...harger connector After alignment use the locking screw to secure the connection The green charging indicator next to the INPUT connection will be illuminated when the name of the drive can be changed To access the recorded video files Open Untitled DV Movie 4 The COUNTcam2 creates video in 30 minute segments Drag the desired video files to the folder of your choice on your computer to begin the vi...

Page 10: ...indy conditions Video being recorded may not be usable 3 After attaching the Booster Pack at an ideal spot on the adjustable pole connect to the COUNTcam2 using the booster pack cable Once connected wrap excess cable around the housing of the Booster Pack 4 Carefully raise the adjustable pole and secure it to the street sign using medium hose clamps and secure it with the hose clamp lock bracket S...

Page 11: ...re is a link to a document on how to re install the camera firmware Unable to Connect to the COUNTcam2 through the App If you are able to connect to the COUNTCAM Wi Fi network but are having connectivity through the COUNTCAM app here are some suggestions tohelp remedy the connectivity issues Restart the COUNTCAM app If you are unable to connect to the COUNTcam2 through the COUNTcam2 try restarting...

Page 12: ...d cable you are using may have worn out or is faulty If possible try connecting the COUNTcam2 to your computer using a different download cable Make sure the camera is powered off The camera may not connect to the computer if it is powered on To power down the COUNTcam2 disconnect if from your computer then hold the power button down for three seconds Note if the blue light on the front of the COU...

Page 13: ...AM wireless network in order to view camera feed and initiate recording Remote camera viewing or control is not possible at this time Can I use three Booster Packs to record over 150 hours No because of the video quality settings the COUNTcam2 s internal storage will hold up to 150 hours of video If you have a special project that requires more than 150 hours of video to be recorded at a single ti...

Reviews: