Page 12
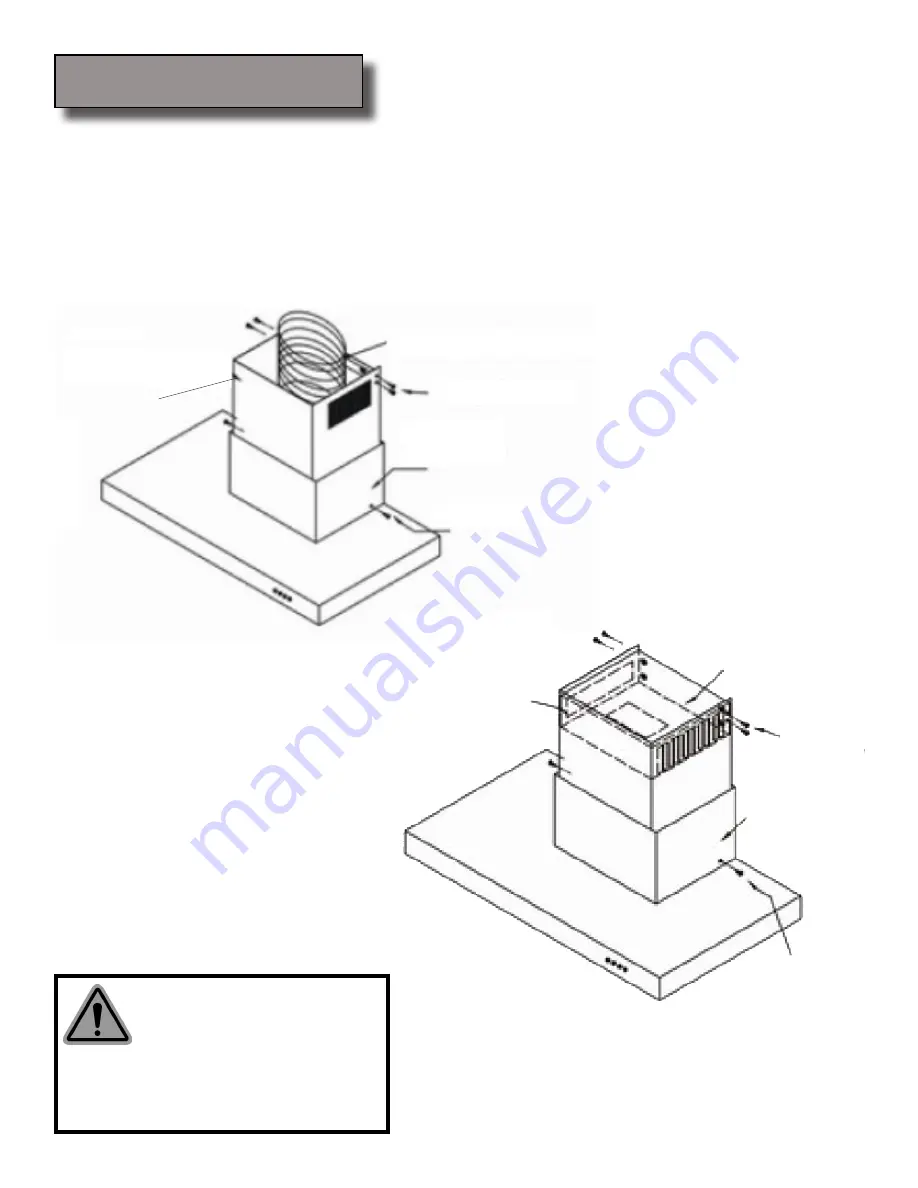
Connect the duct tube to the exterior exhaust system or the optional air diverter. Make sure all joints are secure
6.
and air tight. Use of duct tape is recommended.
Place Upper Chimney and Lower Chimney over the body of the hood as shown in Figure 7A (or Figure 7B of
7.
air diverter is present). Slide up the upper duct cover towards the chimney mounting bracket or the optional
air diverter. Use four 4mm x 10mm Tapping Screws to secure the upper chimney onto the chimney mounting
bracket or the optional air diverter. Finally secure the lower chimney to the hood body by using two 4mm x
10mm Tapping Screws.
Page 12
Figure 7A
Figure 7B
Air Divertor
Upper
Chimney
(has vent
-
ing holes)
Lower
Chimney
Chimney Mounting Bracket
Upper
Chimney
(has vent
-
ing holes)
Lower
Chimney
4 x 10 Screw
4 x 10 Screw
4 x 10 Screw
4 x 10 Screw
Installation
(Continued)
WARNING
Excessive Weight
Require three or more person to move and
install this range hood. Spinal or other bodi-
ly injuries could occur if it is not followed.
Summary of Contents for 168 Series
Page 2: ......
Page 28: ...Page 26 Your Notes ...
Page 29: ...Page 27 Your Notes ...
Page 30: ...Page 28 Your Notes ...
Page 31: ...Page 29 Your Notes ...


